2.1
A Quick Tour of MICA
Before you start to set up MICA, take a moment to become familiar with the locations and
purposes of the controls, drives, connections and ports, which are illustrated in the figures
below.
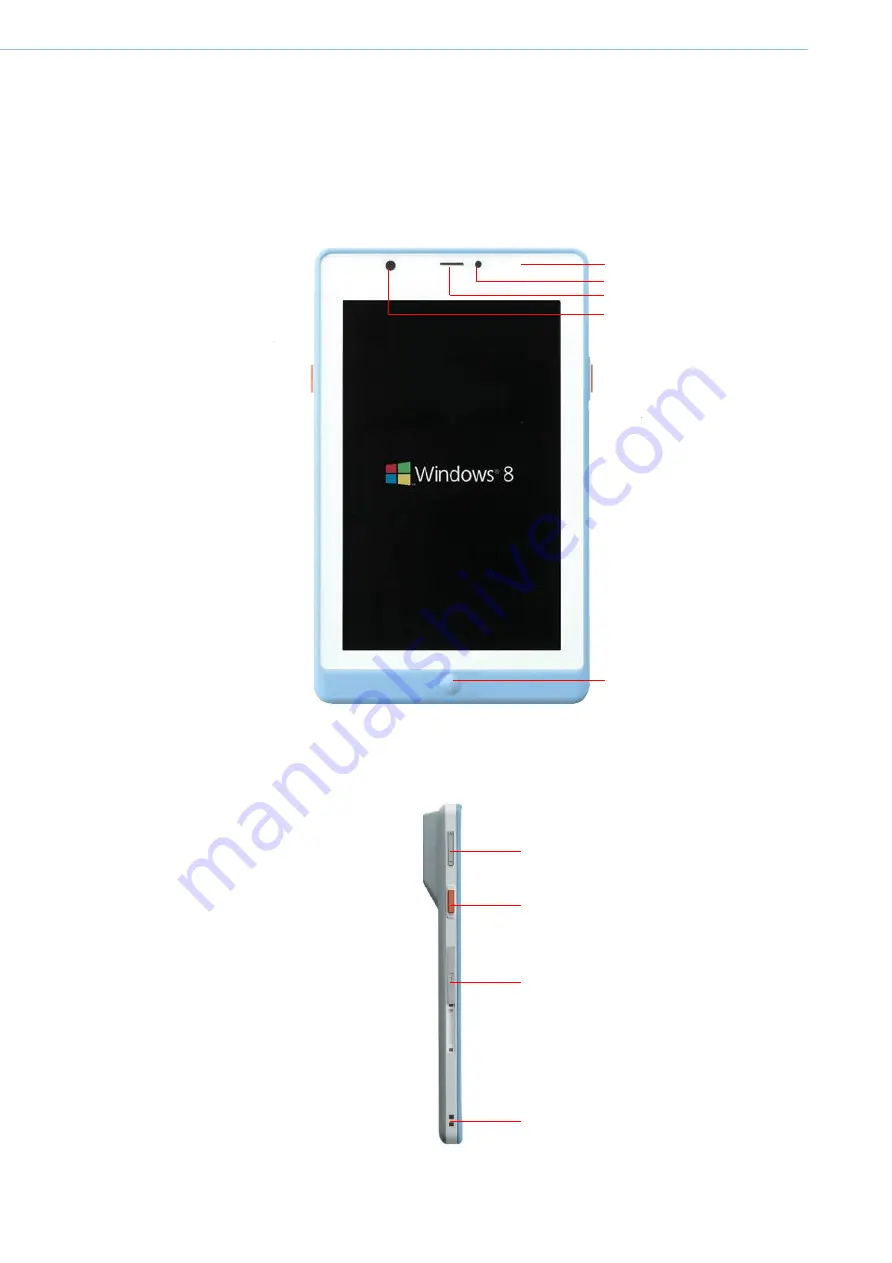
When placed upright on the desktop, the MICA front panel appears as shown in Figure 2.1.
LED indicator
Ambient sensor
Camera
Figure 2.1 Front View
The volume control button, barcode scanner button and docking connector are on the left side
of the tablet PC.
Figure 2.2 Left Side View
MICA Tablet PC User Manual
7
Receiver
Home Key
Barcode scanner button
Volume control button
Docking connector
Hang hole
Содержание MICA-071
Страница 1: ...User Manual MICA 071 7 Intel Atom based Pocketable pads...
Страница 9: ...Chapter 1 1 General Information...
Страница 13: ...1 4 Dimensions Figure 1 1 MICA Dimensions 5 MICA Tablet PC User Manual 121mm 200mm...
Страница 14: ...Chapter 2 2 Getting Started...
Страница 25: ...Chapter 3 3 Using MICA 071...
Страница 34: ...Chapter 4 4 Chipset Setup...
Страница 36: ...Step 2 Click Next button for license agreement 28 MICA Tablet PC User Manual...
Страница 40: ...Chapter 5 5 Audio Setup...
Страница 46: ...Chapter 6 6 Bluetooth Setup...
Страница 50: ...Chapter 7 7 GPS Driver Installation...
Страница 55: ...Chapter 8 8Speaker and Receiver Setup...
Страница 58: ...Chapter 9 9 WIFI Driver Installation...


