DSA-2130SAE User Manual
8
2.1 Connect the Power
1.
Connect the power adapter cord with the AC power cord.
2.
Connect the power adapter cable to the player’s DC 12 V power port.
3.
Plug the AC power cord into a power outlet and the Power LED (green) will light
up.
2.2 Connecting to a Display
Connect your display to the Digital Signage Player’s VGA port with the VGA cable
that came with your display. Consult your display’s user manual for cabling specifica-
tions.
2.3 Accessing the menu system
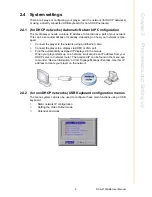
If your network does not support DHCP, requires a static IP setting, or if you are
using USB drives to update contents instead of a network, you can perform these
settings directly via the player’s menu system:
1.
Attach a USB keyboard to the player’s USB port.
2.
Connect the player to your display or monitor using a VGA or HDMI cable.
3.
Connect the player power adapter, and switch the display on.
4.
Set your display monitor to the corresponding video input.
When you see the on screen menu system on the display, you can begin configuring
the menu items.
Warning!
Only use the power adapter packaged with the DSA-2130SAE. Using a
different power adapter could damage the device.
Note!
If you would like to use the HDMI, Composite or S-Video video output,
you need to change the player’s configuration setting with the DSA Con-
figurator.
Содержание DSA-2130SAE
Страница 1: ...User Manual DSA 2130SAE ...
Страница 4: ...DSA 2130SAE User Manual iv ...
Страница 6: ...DSA 2130SAE User Manual vi ...
Страница 7: ...Chapter 1 1 Introduction ...
Страница 13: ...Chapter 2 2 Preparations and Setting Up ...
Страница 18: ...DSA 2130SAE User Manual 12 ...
Страница 20: ...DSA 2130SAE User Manual 14 ...
Страница 21: ...Chapter 3 3 Software Operation ...
Страница 27: ...Chapter 4 4 Working with SMIL ...
Страница 30: ...DSA 2130SAE User Manual 24 ...
Страница 31: ...Appendix A A FAQ ...
Страница 35: ...29 DSA 2130SAE User Manual Appendix A FAQ ...


