background image

ADJ Products, LLC  -  www.adj.com  - 3 Sixty 2R Instruction Manual Page 23

ADJ Products, LLC  -  www.adj.com  - 3 Sixty 2R Instruction Manual Page 22

  3 Sixty 2R   


                     System Menu

  3 Sixty 2R   


                     System Menu

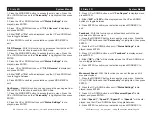
3. Press  UP or DOWN buttons, until “Lamp Time Password” is dis-

played, and press ENTER.
4. The “Lamp Time Password” is 038.
5. Press ENTER or press MODE/ESC to exit.

Clean Lamp Time - This will allow you to clear the lamp time run-

ning time. Please clear the lamp running time every time you replace 

the lamp. You need to put in the Lamp Time Password before doing 

this. Please see the section before this.

1. Press the MODE/ESC button to access the main menu. Press 

the UP or DOWN buttons so that “Information” is highlighted, then 

press ENTER. 
2. Press the UP or DOWN buttons until “Time Information” is dis-

played, press ENTER.
3. Press  UP or DOWN buttons, until “Clear Lamp Time” is dis-

played, and press ENTER. 
4. Either “Off” or “On” will be displayed, use the UP and DOWN but-

tons to toggle between.
5. Press ENTER to confirm your selection or press MODE/ESC to 

exit.

Temperature Info - This will allow you to check the moving head 

temperature.

1. Press the MODE/ESC button to access the main menu. Press 

the UP or DOWN buttons so that “Information” is highlighted, then 

press ENTER. 
2. Press the UP or DOWN buttons until “Temperature Info” is dis-

played, press ENTER.
3. “Head Temperature” will now be displayed, press ENTER.
4. “XXX” will now be displayed. “XXX” represents the current tem-

perature of the moving head.

5. Press ENTER or press MODE/ESC to exit.

Software Version - This will allow you to see the software version 

you are currently running.

1. Press the MODE/ESC button to access the main menu. Press 

the UP or DOWN buttons so that “Information” is highlighted, then 

press ENTER. 
2. Press the UP or DOWN buttons until “Software Version” is dis-

played, press ENTER.
3.  “VX.X” will now be displayed. “X.X” represents the software ver-

sion.
4. Press ENTER or press MODE/ESC to exit.

LAMP CONTROL -

Lamp On/Off - With this function you can switch the lamp on or off 

via the control board.

1. Press the MODE/ESC button to access the main menu. Press the 

UP or DOWN buttons so that “Lamp Control” is highlighted, then 

press ENTER. 
2. Press the UP or DOWN buttons until “Lamp On/Off” is displayed, 

press ENTER.
3. Either “Off” or “On” will be displayed, use the UP and DOWN but-

tons to toggle between.
4. Press ENTER to confirm your selection or press MODE/ESC to 

exit.

Automatic On - With this function you can have the lamp automati-

cally turn On when when switching on the power.

1. Press the MODE/ESC button to access the main menu. Press the 

UP or DOWN buttons so that “Lamp Control” is highlighted, then 

press ENTER. 
2. Press the UP or DOWN buttons until “Automatic On” is displayed, 

press ENTER.
3. Either “Off” or “On” will be displayed, use the UP and DOWN but-

Содержание 3 SIXTY 2R

Страница 1: ...bilities for property equipment building and electrical damages injuries to any persons and direct or indirect economic loss associated with the use or reliance of any information contained within this document and or as a result of the improper unsafe unsufficient and negligent as sembly installation rigging and operation of this product Europe Energy Saving Notice Energy Saving Matters EuP 2009 ...

Страница 2: ...rom the unit This is a normal process and is cause by the heat associated with the lamp Customer Support ADJ Products LLC provides a toll free cus tomer support line to provide help and to answer any question should you encounter problems during your set up or initial operation You may also visit us on the web at www adj com for any comments or suggestions Service Hours are Monday through Friday 8...

Страница 3: ...ed by items placed upon or against them paying particular attention to cords at plugs convenience recep tacles and the point where they exit from the appliance Cleaning The fixture should be cleaned only as recommended by the manufacturer See page 66 for cleaning details Heat This fixture should be situated away from heat sources such as radiators heat registers stoves or other appliances includin...

Страница 4: ...allowing the fixture to be used tempo rarily until a replacement lamp can be installed The fixture will continue to operate for an additional 300 hours however the Replace the Lamp warning will continue to flash in the display Keep in mind that the flicker protection circuitry will only work for about 300 hours lamp clock life of 6000 6300 hours After 6300 hours the fixture will no longer respond ...

Страница 5: ...ing requires extensive experience including calculat ing working load limits installation material being used and perodic safety inspection of all installation material and unit If you lack these qualifications do not attempt the installation yourself These installaiton should be checked by a skilled person once a year Screw one clamp each via a M12 screw and nut onto the Omega holders Insert the ...

Страница 6: ...ter Button This button is used to select and confirm a function in the system menu and enter the submenus 8 Right Button This button is used to move to the right when navi gating through the system menu 9 Mode Esc Button This button is used to enter the main menu and exit the submenus 10 Up Button This button is used to scroll forwards when navigating through the system menu 11 Carrying Handles Th...

Страница 7: ...a 21 24 or 32 channel DMX unit The DMX address is set electronically using the controls on the front panel of the unit Your unit and your DMX controller require a approved DMX 512 110 Ohm Data cable for data input and data output Figure 1 We recommend Accu Cable DMX cables If you are making your own cables be sure to use standard 110 120 Ohm shielded cable This cable may be purchased at almost all...

Страница 8: ...UT OUTPUT SOUND REMOTE CONTROL INPUT POWER INPUT OUTPUT SOUND REMOTE CONTROL INPUT POWER INPUT OUTPUT DMX512 DMX DMX COMMON 1 2 3 Termination reduces signal errors and avoids signal transmission problems and interference It is always advisable to connect a DMX terminal Resistance 120 Ohm 1 4 W between PIN 2 DMX and PIN 3 DMX of the last fixture 1 2 3 1 2 3 DMX DMX COMMON DMX512 OUT 3 PIN XLR Figur...

Страница 9: ...X ON OFF Password XXX ON OFF Power on running time Fixture running time Fixture Last times clear Lamp running time Lamp off time Timer Password 038 Clear Fixture Last time Lamp Password 038 Clear lamp time Temperature Info Head Temperature XXX Temperature in the head Software Version V1 0 0 Software version Lamp Control Lamp On Off Automatic On Lamp On via DMX Lamp Off via DMX Max On at Temp Lamp ...

Страница 10: ...and press the UP or DOWN buttons so that Function is highlighted then press ENTER 2 Press the UP or DOWN buttons until Slave Mode is displayed and press ENTER 3 Either Slave 1 Slave 2 or Slave 3 will be displayed Press ENTER to select either of the three or press MODE ESC button to exit Auto Program This function allows the internal programs to run in either stand alone or master slave mode In Mas...

Страница 11: ...displayed XXXX represents the running time of the lamp the last time that the lamp was On 5 Press ENTER or press MODE ESC to exit Last Run Password This will display the timer password 1 Press the MODE ESC button to access the main menu Press the UP or DOWN buttons so that Information is highlighted then press ENTER 2 Press the UP or DOWN buttons until Time Information is dis played press ENTER 3 ...

Страница 12: ...ture Info is dis played press ENTER 3 Head Temperature will now be displayed press ENTER 4 XXX will now be displayed XXX represents the current tem perature of the moving head 5 Press ENTER or press MODE ESC to exit Software Version This will allow you to see the software version you are currently running 1 Press the MODE ESC button to access the main menu Press the UP or DOWN buttons so that Info...

Страница 13: ...and DOWN but tons to toggle between Select On if you wish to activate this func tion or Off to deactivate 4 Press ENTER to confirm your selection or press MODE ESC to exit Max on at temp With this function you can set the inside tempera ture from which the lamp will restrike after automatic shut off 1 Press the MODE ESC button to access the main menu Press the UP or DOWN buttons so that Lamp Contr...

Страница 14: ...et Channel 1 s value to 7 Channel 2 s value to 7 and Chan nel 3 s value to 57 Wait 20 seconds and the address should change on the unit to 57 2ND EXAMPLE If you want the address to be 420 you must first set the address that is currently assingned to the unit If you want the set the address to 420 set Channel 1 s value to 7 Channel 2 s value to 8 and Channel 3 s to 164 256 164 420 No DMX status Wit...

Страница 15: ...Press the MODE ESC button to access the main menu Press the UP or DOWN buttons so that Personality is highlighted then press ENTER 2 Press the UP or DOWN buttons until Status Settings is dis played press ENTER 3 Press UP or DOWN buttons until Pan Degree is displayed and press ENTER 4 Either 540 or 630 will be displayed use the UP and DOWN buttons to toggle between 5 Press ENTER to confirm your sel...

Страница 16: ...M or Off 5 Press ENTER to confirm your selection or press MODE ESC to exit Service Setting Password With this function you can enter the RDM password so that you can access and change the RDM ID number 1 Press the MODE ESC button to access the main menu Press the UP or DOWN buttons so that Personality is highlighted then press ENTER 2 Press the UP or DOWN buttons until Service Setting is dis playe...

Страница 17: ...ress ENTER 2 Press the UP or DOWN buttons until Display Setting is dis played press ENTER 3 Press UP or DOWN buttons until Key Lock is displayed and press ENTER 4 Either Off or On will be displayed use the UP and DOWN but tons to toggle between 5 Press ENTER to confirm your selection or press MODE ESC to exit Temperature C F With this function you can change the tempera ture display to show either...

Страница 18: ...press MODE ESC to exit Reset Gobos With this function you can reset the gobo wheel motor 1 Press the MODE ESC button to access the main menu Press the UP or DOWN buttons so that Reset Function is highlighted then press ENTER 2 Press the UP or DOWN buttons until Reset Gobos is displayed 3 Press ENTER to reset or press MODE ESC to exit Reset Shutter With this function you can reset the shutter motor...

Страница 19: ...uttons until User Mode is displayed press ENTER 3 Use the UP or DOWN buttons to scroll through the 3 DMX Channel Modes Standard Mode This is 24 Channel Mode Basic Mode This is 21 Channel Mode Extended Mode This is 32 Channel Mode User Mode A B C These are customizable DMX modes Select either of these modes and set the amount of DMX Channels and what each channel does 4 Press the MODE ESC button on...

Страница 20: ...llowing determinations 1 3 or more errors The fixture cannot function properly with three or more errors therefore the fixture will place itself in a stand by mode until subsequent repairs can be made 2 Less than 3 errors If the fixture has less than 3 errors there fore most other functions will work properly The fixture will attempt to operate normally until the errors can be corrected by a techn...

Страница 21: ...de and 32 Channel mode See pages 43 64 for detailed description of the DMX traits 2 To control your fixture in DMX mode follow the set up procedures on pages 13 15 as well as the set up specifications that are included with your DMX controller 3 Use the controller s faders to control the various DMX fixture traits 4 This will allow you to create your own programs 5 Follow the directions on pages 3...

Страница 22: ... units pro grams Any unit can act as a Master or as a Slave 1 Using standard XLR microphone cables daisy chain your units together via the XLR connector on the rear of the units Remem ber the Male XLR connector is the input and the Female XLR connector is the output The first unit in the chain master will use the female XLR connector only The last unit in the chain will use the male XLR connector ...

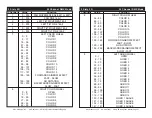
Страница 23: ...2 119 GOBO 14 120 126 GOBO 1 SHAKE 127 133 GOBO 2 SHAKE 134 140 GOBO 3 SHAKE 141 147 GOBO 4 SHAKE 148 154 GOBO 5 SHAKE 155 161 GOBO 6 SHAKE 162 168 GOBO 7 SHAKE 169 175 GOBO 8 SHAKE 3 Sixty 2R 21 Channel DMX Mode Channel Value Function 5 RIGHT COLOR WHEEL 81 89 COLOR 9 90 98 COLOR 10 99 107 COLOR 11 108 116 COLOR 12 117 127 COLOR 13 128 189 FORWARD RAINBOW EFFECT FAST SLOW 190 193 NO ROTATION 194 ...

Страница 24: ...RISM ROTATION FAST SLOW 190 193 NO ROTATION 194 255 BACKWARD PRISM ROTATION SLOW FAST 12 LEFT SHUTTER STROBE 0 31 SHUTTER CLOSED 32 63 SHUTTER OPEN 64 95 STROBING SLOW FAST 3 Sixty 2R 21 Channel DMX Mode Channel Value Function 7 RIGHT GOBO WHEEL 176 182 GOBO 9 SHAKE 183 189 GOBO 10 SHAKE 190 196 GOBO 11 SHAKE 197 203 GOBO 12 SHAKE 204 210 GOBO 13 SHAKE 211 217 GOBO 14 SHAKE 218 255 GOBO WHEEL ROTA...

Страница 25: ...SOUND ACTIVE PROGRAM The pan degree can be changed between 540 and 630 See page 28 to change the pan degree 3 Sixty 2R 21 Channel DMX Mode Channel Value Function 12 LEFT SHUTTER STROBE 96 127 SHUTTER OPEN 128 159 PULSE EFFECT IN SEQUENCES 160 191 SHUTTER OPEN 192 223 RANDOM STROBE SLOW FAST 224 255 SHUTTER OPEN 13 0 255 LEFT MASTER DIMMER 0 100 14 RIGHT SHUTTER STROBE 0 31 SHUTTER CLOSED 32 63 SHU...

Страница 26: ... GOBO 11 96 103 GOBO 12 104 111 GOBO 13 112 119 GOBO 14 120 126 GOBO 1 SHAKE 127 133 GOBO 2 SHAKE 134 140 GOBO 3 SHAKE 141 147 GOBO 4 SHAKE 3 Sixty 2R 24 Channel DMX Mode Channel Value Function 1 0 255 PAN MOVEMENT 8bit 540 or 630 2 0 255 PAN FINE 16bit 3 0 255 LEFT TILT MOVEMENT 8bit 4 0 255 LEFT TILT FINE 16bit 5 0 255 RIGHT TILT MOVEMENT 8bit 6 0 255 RIGHT TILT FINE 16bit 7 LEFT COLOR WHEEL 0 8...

Страница 27: ...96 103 GOBO 12 104 111 GOBO 13 112 119 GOBO 14 120 126 GOBO 1 SHAKE 127 133 GOBO 2 SHAKE 134 140 GOBO 3 SHAKE 141 147 GOBO 4 SHAKE 148 154 GOBO 5 SHAKE 3 Sixty 2R 24 Channel DMX Mode Channel Value Function 10 RIGHT GOBO WHEEL 155 161 GOBO 6 SHAKE 162 168 GOBO 7 SHAKE 169 175 GOBO 8 SHAKE 176 182 GOBO 9 SHAKE 183 189 GOBO 10 SHAKE 190 196 GOBO 11 SHAKE 197 203 GOBO 12 SHAKE 204 210 GOBO 13 SHAKE 21...

Страница 28: ...HOLE MOVEMENT 160 255 NO FUNCTION 20 PAN CONTINUOUS ROTATION 0 127 NO FUNCTION 128 189 FORWARDS ROTATION FAST SLOW 190 193 NO FUNCTION 194 255 BACKWARDS ROTATION SLOW FAST 21 LEFT TILT CONTINUOUS ROTATION 0 127 NO FUNCTION 128 189 FORWARDS ROTATION FAST SLOW 190 193 NO FUNCTION 194 255 BACKWARDS ROTATION SLOW FAST 3 Sixty 2R 24 Channel DMX Mode Channel Value Function 12 LEFT PRISM ROTATION 128 189...

Страница 29: ... COLOR 1 18 26 COLOR 2 27 35 COLOR 3 3 Sixty 2R 24 Channel DMX Mode Channel Value Function 22 RIGHT TILT CONTINUOUS ROTATION 0 127 NO FUNCTION 128 189 FORWARDS ROTATION FAST SLOW 190 193 NO FUNCTION 194 255 BACKWARDS ROTATION SLOW FAST 23 PAN TILT MOVEMENT SPEED 0 225 MAX TO MIN SPEED 226 235 BLACKOUT BY MOVEMENT 236 245 BLACKOUT BY WHEEL CHANGING 246 255 NO FUNCTION 24 LAMP ON OFF RESET PROGRAMS ...

Страница 30: ... GOBO 5 48 55 GOBO 6 56 63 GOBO 7 64 71 GOBO 8 72 79 GOBO 9 80 87 GOBO 10 88 95 GOBO 11 96 103 GOBO 12 104 111 GOBO 13 112 119 GOBO 14 ADJ Products LLC www adj com 3 Sixty 2R Instruction Manual Page 59 3 Sixty 2R 32 Channel DMX Mode Channel Value Function 9 RIGHT COLOR WHEEL 36 44 COLOR 4 45 53 COLOR 5 54 62 COLOR 6 63 71 COLOR 7 72 80 COLOR 8 81 89 COLOR 9 90 98 COLOR 10 99 107 COLOR 11 108 116 C...

Страница 31: ... MACRO 16 3 Sixty 2R 32 Channel DMX Mode Channel Value Function 13 RIGHT GOBO WHEEL 120 126 GOBO 1 SHAKE 127 133 GOBO 2 SHAKE 134 140 GOBO 3 SHAKE 141 147 GOBO 4 SHAKE 148 154 GOBO 5 SHAKE 155 161 GOBO 6 SHAKE 162 168 GOBO 7 SHAKE 169 175 GOBO 8 SHAKE 176 182 GOBO 9 SHAKE 183 189 GOBO 10 SHAKE 190 196 GOBO 11 SHAKE 197 203 GOBO 12 SHAKE 204 210 GOBO 13 SHAKE 211 217 GOBO 14 SHAKE 218 255 GOBO WHEE...

Страница 32: ...ER MOTOR RESET 100 119 INTERNAL PROGRAM 1 ADJ Products LLC www adj com 3 Sixty 2R Instruction Manual Page 63 ADJ Products LLC www adj com 3 Sixty 2R Instruction Manual Page 62 3 Sixty 2R 32 Channel DMX Mode Channel Value Function 19 RIGHT PRISM ROTATION 0 127 PRISM INDEXING 128 189 FORWARD PRISM ROTATION FAST SLOW 190 193 NO ROTATION 194 255 BACKWARD PRISM ROTATION SLOW FAST 20 0 255 RIGHT PRISM R...

Страница 33: ...d allow the unit ample time to cool before attempting to replace the lamp Please see page 7 for important information regarding the discharge lamp 1 Be sure to follow the proper handling procedures that deal with discharge lamps 2 Remove the four small screws labeled A B C D on the rear of the moving head 3 After removing the screws gently remove the panel 4 Carefully disconnect the two wires conn...

Страница 34: ...d above Except to the extent prohibited by applicable law all implied warranties made by ADJ Products LLC in connection with this product including warranties of merchantability or fitness are limited in duration to the warranty period set forth above And no warranties whether expressed or implied including warranties of merchantability or fitness shall apply to this product after said period has ...

Страница 35: ...3 Sixty 2R Notes ADJ Products LLC www adj com 3 Sixty 2R Instruction Manual Page 68 3 Sixty 2R Notes ADJ Products LLC www adj com 3 Sixty 2R Instruction Manual Page 69 ...

Страница 36: ... Specifications and improvements in the design of this unit and this manual are subject to change without any prior written notice 3 Sixty 2R Specifications Auto Sensing Voltage This fixture contains a electronic bal last which will auto sense the voltage when it is plugged into the power source ADJ Products LLC 6122 S Eastern Ave Los Angeles CA 90040 USA Tel 323 582 2650 Fax 323 725 6100 Web www ...

Отзывы: