MEASUREMENT FOUNDATION
17
ROTARY
500
HV
Servo
8. Field Calibration Test
The instrument leaves the factory fully calibrated. Kapro recommends that the level is checked regularly, and
after the unit has been dropped or mishandled.
Horizontal Plane Calibration Test
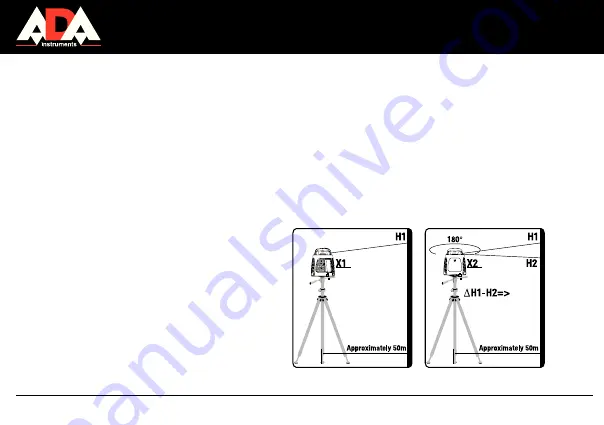
1. Set up the instrument approximately 150ft (50m) from a wall or a measuring staff.
2. Level the instrument as accurately as possible. Position it so that the X-axis is pointing in the direction of the
measuring staff or wall.
3. Turn on the instrument.
4. Note the height of the laser beam on the mea-
suring staff or make a mark on the wall.
5. Rotate the instrument 180°.
6. Note the height of the laser beam on the mea-
suring staff or make a new mark on the wall. The
difference between the heights or marks should
not exceed 5 mm.
7. Repeat the procedure for the Y axis.
5 mm


