


Installation and Commissioning Guide
Classic 2 Outdoor Units
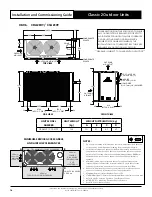
Installation and Commissioning Guide - Classic 2 Split Ducted Outdoor Unit
Doc. No.0525-073 Ver. 8 210414
23
CAUTION
Brazed joints should only be made while purging Nitrogen through the system.
Failure to do so will cause carbon deposit to be left on the internal pipe surface, that in turn can cause system failure and void
warranty.
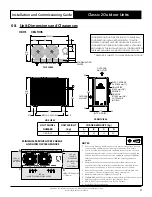
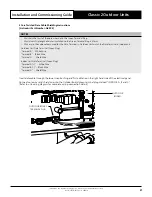
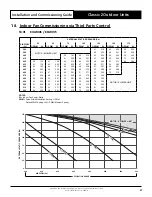
Detail A
OPEN PIPE
Rubber bung
into pipe opening
to create seal
Nitro
Regulator
Set to 2 L/s
N
I
T
R
O
G
E
N
LIQUID
PIPE
A
GAS PIPE
BRAZE JOINTS
Installing interconnecting pipe work to indoor, nitrogen bleed procedure (First fit or rough in stage only)
3. Run interconnecting pipe work from condenser location to evaporator.
4. Release pressure in evaporator and remove caps.
5. Fit copper tube into tail, set nitro bottle and regulator up at condenser end of pipe work.
6. Fit nitrogen line into liquid line with rubber bung to seal the connection. The seal will prevent air being sucked into pipe
work.
7. Leave suction line open, set nitro regulator for nitrogen to flow through pipe work at 2 l/s flow rate @20kPa.
8. Braze required joints as quick as possible.
See Diagram Above.
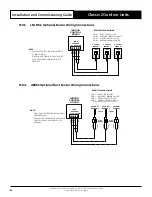
Installing interconnecting pipe work to outdoor, nitrogen bleed procedure (First fit or rough in stage only)
1. Starting with circuit 1 system, remove piping caps from the condenser and fit pipe work into tails.
2. Fit nitro hose onto suction ball valve and fit open hose onto liquid line post valve.
3. Set nitrogen regulator to 2 l/s flow rate through pipe work and evaporator.
4. Braze remaining joints as quick as possible.
5. Allow the brazed joints to cool and conduct leak test in the connections.


