background image

Printing

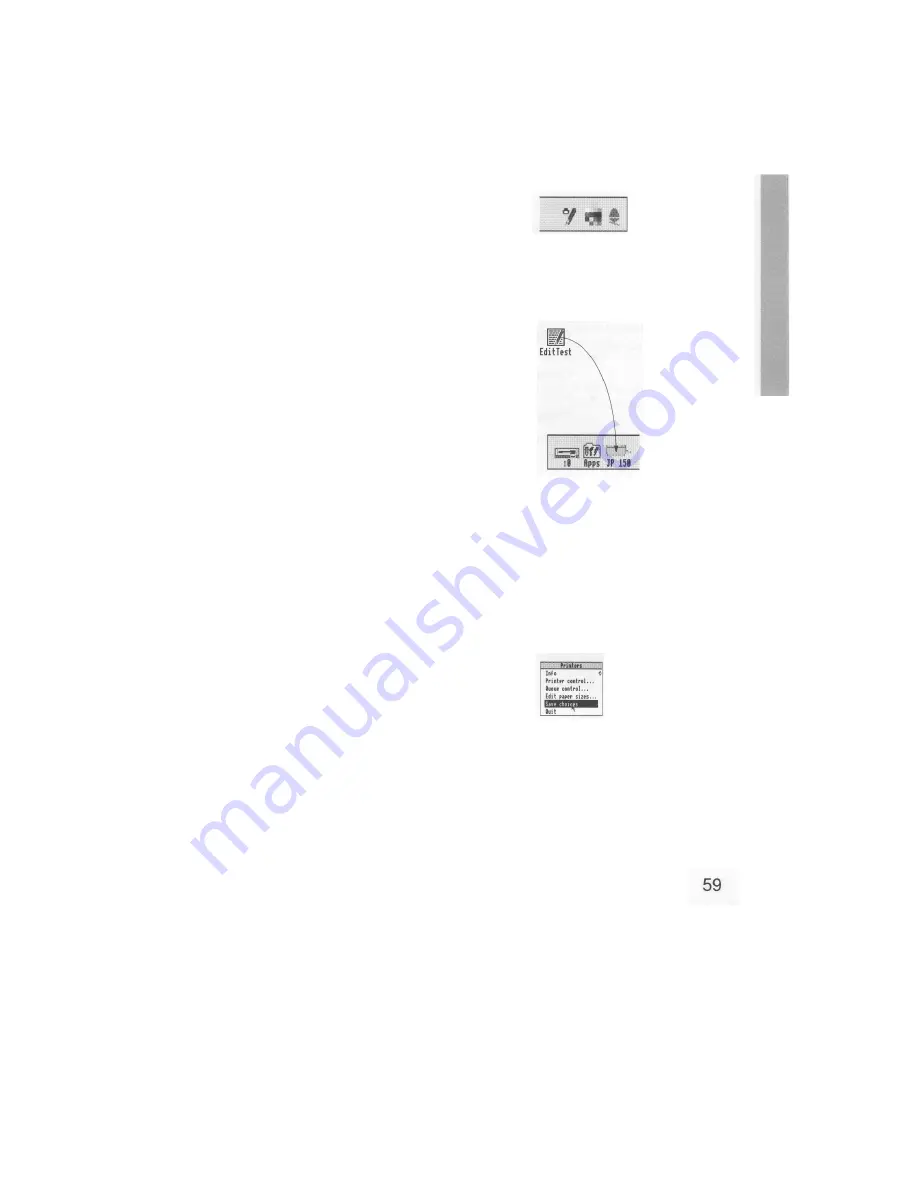
Another way of printing

You can often print a file by dragging its icon 
and dropping it on the printer icon bar icon.

1 Follow step 1 from the previous section

For example, load Edit.

2 Open the directory containing the file's icon

For example, open the 

TestFiles1

 directory on 

your workdisc, that you created in the previous 
chapter.

You will see an icon for the file 

EditTest

You 

don't need to double-click on it.

3 Print the file

Drag the file's icon over the printer icon on the 
icon bar and release the mouse button. Your file 
will print out.

Try this with the file 

EditTest

.

Not all applications allow you to print this way, 
however. Check either in the RISC OS 3 
Applications Guide, or the manual supplied with 
the application.

Saving printer configuration settings

It's worth saving the printer configuration so that 
you don't have to set it up every time you switch 
on the computer.

Click Menu over the printer icon on the icon bar 
and choose Save choices. Next time you load !
Printers it will automatically start up with this 
saved configuration.

Содержание A5000

Страница 1: ...Acorn A5000 Welcome Guide ...

Страница 2: ......

Страница 3: ...Acorn A5000 Welcome Guide ...

Страница 4: ......

Страница 5: ...formed about new developments You are not of course obliged to answer all the questions should you prefer to leave any of them blank The first part of this guide introduces the computer to you it explains how to connect it together and how to start using it It doesn t matter if you ve never used a computer before the system is easy to use and you need learn only a few simple techniques to get goin...

Страница 6: ...ual please complete the form at the back of the manual and send it to the address given there Acorn supplies its products through an international distribution network Your supplier is available to help resolve any queries you may have Within this publication the term BBC is used as an abbreviation for British Broadcasting Corporation ACORN ARCHIMEDES the ACORN logo and ECONET are trademarks of Ac...

Страница 7: ...lastic bags contained in the packaging away from children If you re going to move the computer make sure you park the hard disc first if fitted See Switching off the computer on page 61 If you re pack your computer for any reason be sure to put any leads back in their protective plastic bags to stop any reaction between the leads and the polystyrene packing material if they are left in direct cont...

Страница 8: ...oured brown must be connected to the terminal which is coloured red or marked with the letter L The mains lead supplied is already fitted with a moulded plug incorporating a 5A fuse If it does not fit your socket outlet the plug should be removed from the mains lead and safely disposed of The flexible cord insulation should then be stripped back as appropriate A suitable alternative plug should th...

Страница 9: ...e Any costs of carriage to and from the supplier must be paid by the purchaser 4 If ACORN agrees with the supplier that the equipment should be forwarded to ACORN for repair then ACORN will arrange for collection and return of the equipment at no charge In all other cases the supplier will be responsible for effecting any necessary repairs in accordance with ACORN s service policy Any repairs unde...

Страница 10: ...e RISC OS desktop Using the mouse 13 Describes what the mouse does and how to use it Windows 17 Explains the special features of the screen display Menus 25 Explains how menus work within the RISC OS desktop Discs and disc drives 29 Tells you about floppy disc drives and hard disc drives Using the keyboard 37 Introduces the keyboard and some of its features Using applications 43 Tells you how to s...

Страница 11: ... your computer Appendix B Monitor connections 69 Lists some commonly used monitors and describes how to connect them to your computer Appendix C Attaching peripheral devices 77 Explains how to connect other devices to your computer such as serial and parallel printers and modems Appendix D Hardware components and connectors 81 Identifies the main hardware features of the computer including the soc...

Страница 12: ...x ...

Страница 13: ...arton as well as for the computer Take everything out of the carton making sure you don t break the packaging material as you may need this later Warning the packaging contains plastic bags which can be dangerous to young children Please keep them out of their reach Checklist Check that you have received all the items shown below If you don t have all of these items or if any of them appears damag...

Страница 14: ...pplier too you must pack it back into the original carton Choosing where to set up your computer Bear the following points in mind when deciding exactly where to place your computer You ll need a firm flat surface with enough space at one side to move the mouse around and space at the other side for manuals and papers you may be working on You ll need space nearby for any peripheral equipment such...

Страница 15: ...astic bags The mouse has a straight cable with a plug on the end of it This goes into the socket at the back of the keyboard The plug has an arrow moulded into it this should be uppermost when you push it in The plug won t go in any other way so don t try to force it Connect keyboard to computer Insert the plug on the end of the keyboard cable into the socket on the rear of the computer unit Make ...

Страница 16: ...marked VIDEO Note If you have trouble check in Appendix B Monitor connections you might need an adaptor cable for your particular monitor Connect monitor to power supply but don t switch on yet The power cable for your monitor will have a socket on one end like the type you connect to a kettle Plug this into the power connector on the back of the monitor The other end of the monitor s power cable ...

Страница 17: ...onnect other peripherals to power supply but don t switch on yet Connect the power cables for any other peripherals to power outlets on the wall Connect computer to power supply Finally plug the connector on the computer power cable the one that looks like the type you plug into a kettle into the socket marked 2A 220 240V on the back of the computer unit Plug the other end into the power supply ou...

Страница 18: ...6 ...

Страница 19: ... where they are The ON OFF switch for the computer is on the front ON OFF switch ON switch pushed in OFF switch flush with front panel Switching on 1 Switch on the mains supply for the computer at the power outlet on the wall and that for the monitor if its power cable is not plugged into the back of the computer and printer if you have one 2 Switch on the monitor and printer The manual for your m...

Страница 20: ...screen change colour while the computer performs some self tests The LED on the floppy disc drive will also flash once when the drive is being checked Next you will see an introductory screen After a few seconds you should have a picture on your screen looking something like this If the display does not look similar to that shown above or if the floppy drive light flashes more than once see If thi...

Страница 21: ...o Later on when you ve been using your computer a while you ll find that it s better to follow the instructions in Switching off the computer on page 61 Motorway route If you re familiar with computers mice discs and so on and you want to start doing something right away start by trying out some of the computer s own applications For example play a tune with Maestro this will sound even better if ...

Страница 22: ...10 ...

Страница 23: ...nd be able to see the RISC OS desktop on your screen The desktop is your working area At first it is clear except for the bar across the bottom of the screen As you perform tasks and use applications things will be added to the desktop You can move them around change their size hide and remove them to make room for others Icons The pictures in the lower margin of the screen represent the tools sto...

Страница 24: ...de are the applications icons These represent things you can do such as word processing and drawing programs Initially there are only two The pointer Palette The palette enables you to change the colours or grey scales on the screen depending on your monitor and to set the screen mode see MonitorType and screen modes on page 75 for more information Task manager The Task manager enables you to look...

Страница 25: ...his Move the mouse around and watch the pointer move around the screen If you run out of space to move the mouse lift it up and put it down again in a more convenient position While the mouse is lifted the pointer will not move and when you put it down again you can carry on where you left off Use the mouse on a smooth but non slippery surface A mouse mat available from your supplier is ideal Othe...

Страница 26: ... menu on the screen on page 27 includes one instance and the RISC OS 3 User Guide describes many more Mouse techniques The following mouse techniques are all you need to start using your computer clicking pressing the mouse button just once and then releasing it immediately double clicking pressing and releasing twice in quick succession This is used to initiate an action or to load an application...

Страница 27: ...e click on For example point at the Edit icon in the Apps directory display 2 Double click on the icon Press and release the Select lefthand mouse button twice in quick succession You have to make the second click while the second little arrow the double click arrow which appears on the pointer after the first click is still visible If the item is highlighted but nothing else happens try again but...

Страница 28: ...e top of the Apps directory display The title bar is the part of the directory display containing the words Resources Apps 2 Select it with the mouse Press and hold down the lefthand button of the mouse 3 Move the mouse and drag the object Move the mouse to drag the object across the screen Release the mouse button when the object is where you want it 16 ...

Страница 29: ... of a window you have seen so far is the Apps directory display which appears when you click on the Apps icon on the icon bar Features of windows Most windows can be moved around the screen hidden behind other windows or closed completely Icons on the windows allow you to do these things Most windows also have icons which allow you to change their size Title bar The title bar displays the title of...

Страница 30: ... such that the window fills the whole screen This alternating action is called toggling Adjust size icon Dragging the adjust size icon lets you alter the size and shape of a window Clicking the Select button on it also brings a window to the front of a stack of windows Practising manipulating windows Practise using the window icons to do the things described on the following pages You can use the ...

Страница 31: ...e Shift key on the keyboard and press the F12 key This will bring the icon bar to the front Press the same key combination again to send it to the back this is another instance of toggling Toggling window size 1 Click on the toggle size icon Move the pointer over the toggle size icon and click the Select lefthand button The window size will snap to nearly the width of the screen 2 Click on the tog...

Страница 32: ...ag a window without bringing it to the front of a stack use Adjust instead of Select Send a window to the back Click on the back icon to send a window to the back again Closing windows Click on the close icon Position the pointer on the close icon and click the Select lefthand button For example close the Apps directory display The window will disappear from the screen If it s an application windo...

Страница 33: ...size and shape of the window The part of the file you can see alters as you move the window around the file The technique of moving the window around a large file is called scrolling You move the window frame over the file but because the window actually stays in the same position on the screen it appears as though the file is scrolling past the window This is not as complicated as it sounds Try o...

Страница 34: ...le is visible To display a different area of the file drag the slider along the scroll bar This technique is useful for moving quickly around a large file Scroll arrows The scroll arrows are at each end of the scroll bar Click on the arrow showing the direction you want to move the window in left right up or down This technique allows you a finer control over scrolling than dragging the slider Som...

Страница 35: ...olling techniques Scrolling step by step Click on the scroll arrow Position the pointer on the scroll arrow and click the Select lefthand button to scroll by small steps at a time Hold the button down to continue scrolling Click the Adjust righthand button to scroll back the other way Alternatively click Select on the scroll arrow pointing in the opposite direction Use the horizontal scroll bar on...

Страница 36: ...the slider to display the part of the file you want to view Move from one side of a document to the other by using the horizontal scroll bar if the window has one Note If you drag either slider with the Adjust button you can move both from side to side and up and down Try it The pointer disappears while you re dragging a slider then reappears when you release the Adjust button 24 ...

Страница 37: ...his is the main way of doing things in the RISC OS desktop Menu options shown in grey like Clear selection above are not available at that time Often you must perform another action before the option becomes available Using menus To display a menu click the Menu middle mouse button over a window or over an icon on the icon bar or over a blank area of the desktop the latter will display the Pinboar...

Страница 38: ... each icon in turn with Adjust not Select before you bring the menu up Use Adjust to deselect icons too You can make the menu apply to all the icons in a window by choosing Select all from the menu see below Choosing from a menu Highlight the menu item you want and click on ii Display a menu then move the pointer over the menu Notice that menu items are highlighted as you move the pointer over the...

Страница 39: ... item with an arrow An arrow indicates that a submenu is available For example point at the Display option on the Filer menu 2 Display the submenu Move the pointer onto the arrow The Display submenu will appear on the screen 3 Click on the submenu item Highlight and make your submenu choice by moving the pointer over it and clicking on it Click on Small icons The icons in the directory display wil...

Страница 40: ...om the New directory menu option in the Filer menu You ll find out how to display it in Creating a new directory on page 49 2 Type in the information requested Press Ctrl U to remove the default name if there is one Decide on a new name and type it in The text will appear to the left of the vertical bar called the caret 3 Apply the name There are four ways of applying the name you ve typed in depe...

Страница 41: ...er Floppy disc storage sizes on page 31 tells you which discs to ask for Before you use them you ll have to format them see Formatting a floppy disc on page 32 You put the discs into the floppy disc drive see Inserting and ejecting floppy discs on page 30 The drive can only take one disc at a time Hard discs A hard disc is fitted to some computers The amber light on the front panel of the computer...

Страница 42: ...You will build up a collection of discs as time passes Label them so that you always know which one holds the information you need Store them carefully and keep them away from extremes of temperature strong magnetic fields e g TVs or loudspeakers dust dirt drinks pets etc Don t open the metal shutter on the disc as the disc surface is easily contaminated by dust and small particles For this reason...

Страница 43: ...er nail Remove write protection by moving the tab back again Floppy disc storage sizes Floppy discs are a bit like audio cassettes they both store or record information Some audio cassettes hold more information than others for instance a C90 holds more than a C60 even though they are the same physical size This is the same for floppy discs the discs your computer uses are all 3 5 in diameter but ...

Страница 44: ...re you can use a new floppy disc you need to format it Formatting a disc prepares it to receive information from the computer This is rather like drawing straight lines on a blank piece of paper before you start writing on it It tells the computer where to put the information it writes along the lines called tracks Formatting also tells the computer how much information a floppy disc can hold Warn...

Страница 45: ...o format the disc after all simply click on the close icon of the window to abandon the operation During formatting an indication of the progress of the operation will be displayed The RISC OS 3 User Guide gives you more information about formatting discs When you ve formatted a disc it s a good idea to stick a label on it and write on a name something to help you remember what is or will be on th...

Страница 46: ... disc drive 3 Move the pointer over the floppy disc drive icon and click Menu 4 Move the pointer over the arrow to the right of the Name disc option 5 Type the new disc name in the Disc name writable menu box that appears Note The name must be at least 2 characters up to a maximum of 10 but you can t use any spaces or the characters 6 Click Select on the name or press Return The disc now has a new...

Страница 47: ...urce disc Take the following steps to make a backup copy of a floppy disc 1 Write protect the source disc and put it into the floppy disc drive 2 Click Menu on the floppy disc drive icon on the icon bar then click on the Backup option You ll see the Backup window 3 Click on OK The computer will read the source disc 4 Follow the rest of the instructions until backing up is complete the computer wil...

Страница 48: ... develops any errors This can happen during the lifetime of a hard disc but don t worry it s not usually catastrophic The RISC OS 3 User Guide tells you what to do if you do get any errors from your hard disc Format a blank floppy disc and copy any important files from your hard disc onto it see Copying and moving a file to another directory on page 51 Then rename your floppy disc to remind you wh...

Страница 49: ...locks as illustrated in the picture overleaf The typewriter keys are in the main block and are similar to a typewriter keyboard The Return key on the right completes a line either starting a new line of text or sending a name or instruction to the computer depending on what you are doing The CapsLock key when its light is on makes everything you type appear in capitals If you don t want this press...

Страница 50: ...The lefthand side of the keyboard The Iefthand side of the keyboard ...

Страница 51: ...Using the keyboard The righthand side of the keyboard ...

Страница 52: ...d for many tasks such as supplying answers to questions the computer asks in writable menu boxes including giving names for files and documents you create using a word processor or a text editor like Edit for an example of this see Using applications on page 43 choosing some menu options using keyboard shortcuts for example F3 to Save a file entering data in a spreadsheet or database Whenever you ...

Страница 53: ... black area in one corner These keys allow you to accent characters The accent in each case is the character nearest the black area of the key For example to type an e with an acute accent é 1 Whilst holding down the Alt key press and release the I key 2 Release the Alt key 3 Press and release the E key Typing other special characters You can type the other special characters shown in the keyboard...

Страница 54: ......

Страница 55: ...vailable from your supplier Starting an application There are two main ways you can start an application Double clicking move the pointer over the application s icon and double click Dragging move the pointer over the application s icon then drag it onto the icon bar and release You can also start an application if the computer has already seen it by double clicking on an associated file e g doubl...

Страница 56: ... the text Press the Return key to start a new line and press it again to leave a blank line Once you have typed a few lines of text move the caret around the text by moving the pointer with the mouse and clicking Select the caret will jump to the position of the pointer You can insert or delete text at the new position If you aren t sure what the different keys on the keyboard are for refer to Usi...

Страница 57: ... in the second window Now move the pointer over the first Edit window and click Select to change the input focus Close the second window You don t need it now Quitting applications When you ve finished using an application you will usually want to quit it To quit an application 1 Display the application s icon bar menu Click Menu over the application s icon on the icon bar For example try this on ...

Страница 58: ...crap onto each new floppy disc you use after you ve formatted the disc This will save you having to swap discs too often There are some fonts already in the computer s memory and some extra ones in Fonts If you want to use these extra fonts copy Fonts from the Applications disc onto a disc of its own Bring up its directory display before you start any applications that use fonts like a desktop pub...

Страница 59: ...r directories subdirectories and applications Directory icons usually look like folders to indicate that they can contain files or other directories There is a special sort of directory called an application directory Its name always begins with a and it contains an application program such as a word processor or a drawing package There is more about applications in the previous chapter and in the...

Страница 60: ...icking Adjust on an application icon will simultaneously load the application and close its directory display Clicking Adjust on the close icon closes a directory display and simultaneously opens its parent directory Building a file structure You need to organise your files carefully If you leave them all in the main directory on the disc it will soon become large and unwieldy There is also a limi...

Страница 61: ...a new directory 1 Open a directory display Decide where you want to create the new directory and open a directory display For example put your work disc in the floppy disc drive and click on the floppy disc icon on the icon bar 2 Display the Filer menu Click Menu middle button with the pointer somewhere over the directory display and the Filer menu will appear 3 Select New directory Highlight the ...

Страница 62: ...e box for you to type in the file name you want 3 Type in the file name Type in the name you want to give to the file If there is a name already in the box like TextFile here which you don t want erase it first with the Delete key or Ctrl U For example call your Edit file EditTest Filenames and directory names can have between one and ten characters but not blank spaces or the characters You can u...

Страница 63: ...r the directory you want to hold the copy Its directory display will be opened For example create another new directory on your disc WorkDisc called TestFiles2 follow the instructions in Creating a new directory on page 49 Open the new directory so both TestFiles1 and TestFiles2 are displayed 2 Select the file to be copied Point at the icon of the file to be copied and press the Select lefthand bu...

Страница 64: ... use this option with caution 1 Select the file or directory to be deleted Click Select on the icon you want to delete The icon will be highlighted For example select the copy of EditTest in directory TestFiles2 You can select more than one icon by clicking on them with Adjust or by choosing Select all from the Filer menu 2 Display the File or Directory submenu in the Filer menu Click Menu to disp...

Страница 65: ...nk area of the desktop you will see a menu called Pinboard Don t worry too much about this at the moment It s explained in the RISC OS 3 User Guide and enables you to do things like changing the whole background of the desktop into a picture leaving file or application icons stuck to the desktop background so you can see and use them even when the directory they came from is closed closing a windo...

Страница 66: ...the dropped icon and click Menu 2 Remove the icon Choose Remove icon from the menu If that option is greyed out it means that the pointer wasn t quite over the icon when you clicked Menu Try again This action does not delete the file itself the icon stuck on the pinboard is merely a pointer to the real file on your disc 54 ...

Страница 67: ...nter whether you need to change any settings switched the printer and computer on If you haven t you can find out how to do this in Switching on on page 7 Follow the instructions in this chapter carefully and you shouldn t have any trouble printing your work If you do get into difficulties see Problems with printing on page 60 or check with your supplier Setting up Before you can print anything yo...

Страница 68: ... directory display Double click on the subdirectory which corresponds to the make of your printer in this case Acorn You ll then see a directory display containing all the available printer drivers Decide which printer driver suits your printer and load it by dragging its icon into the Printer control window If you can t see a printer driver that matches your printer see Problems with printing on ...

Страница 69: ...ttings are correct click on OK 5 Set the Connection options Click Menu on the printer name in the Printer control window to display the Printers menu again This time choose Connection You ll see the Connections window displayed Click on the button to the left of the connection that your printer uses In the case of the JP 150 choose Parallel Click on OK The details in the Printer control window wil...

Страница 70: ...ke some time If it doesn t print out follow the rest of the steps in this section 4 Display the application menu Click Menu inside the file s window Do this in the window for EditTest 5 Highlight the Print option The Print option is not always in the top level menu of an application You may have to search through the submenus to find it To get to the Print option in Edit move the pointer to the ri...

Страница 71: ...nt the file Drag the file s icon over the printer icon on the icon bar and release the mouse button Your file will print out Try this with the file EditTest Not all applications allow you to print this way however Check either in the RISC OS 3 Applications Guide or the manual supplied with the application Saving printer configuration settings It s worth saving the printer configuration so that you...

Страница 72: ...inter driver If there isn t one that matches your printer you ll probably still be able to print most printers have an Epson or IBM compatible mode Check in the printer s manual if this is the case and then choose one of the Epson or IBM printer drivers Make sure that you have set the options correctly in the Printers menu and the Connections and Configuration windows Make sure the printer is on l...

Страница 73: ...ny work and that the computer is in a safe state before you turn off at the switch 1 Save your work Make sure that you save any work you have been doing or you might lose it see Files and directories on page 47 2 Shut the computer down Move the pointer over the Task manager icon the Acorn and click Menu Choose Shutdown from the menu The computer checks to see whether you have left any work unsaved...

Страница 74: ...isc drive Switch off the computer at the ON OFF switch on the front Switch the monitor off unless it was plugged into the power outlet on the back of the computer and switched off with the computer If you have any other peripherals connected to your computer check in the manuals supplied with them to see whether you need to switch them off every time you switch off the computer Note When the windo...

Страница 75: ...r is not turned down Flickering or flashing display Check that the connectors between the monitor and the computer are tight Switch off both the computer and the monitor and push in the connectors firmly Tighten the screws of the connector to the computer back panel with a small flat bladed screwdriver Different screen display If the computer starts up with a different display or other unexpected ...

Страница 76: ...to allow the mouse ball to move Move the ball with your fingers to check that the mouse works You might need to clean the mouse ball See Cleaning the mouse on page 67 If all this fails try holding down Ctrl and pressing the RESET button to start the computer up again The pointer is not visible on the RISC OS desktop If the pointer is not visible at all check whether the command line with prompt is...

Страница 77: ...ill investigate The self test does not complete properly If you do not see a message similar to the following when the self test is performed RISC OS 4096k Acorn ADFS or if the self test does not complete properly the screen may stay red after you switch on and the floppy drive indicator light may flash on and off a few times then contact your supplier There may be a fault with the computer s hard...

Страница 78: ......

Страница 79: ...st does sometimes get caught up in the ball on the underside of the mouse Clean the mouse occasionally to keep it running smoothly To clean the mouse you need the following items some tape head cleaner a cotton swab a lint free dry cloth To remove the ball and clean the mouse take the following steps 1 Unplug the mouse and turn it upside down 2 Unlock the ball retainer by twisting it in the direct...

Страница 80: ... not use a cloth which may leave lint and do not use cleaning liquid on the ball To replace the ball and retainer take the following steps 1 Turn the mouse upside down and place the ball back in the case 2 Return the retainer to its original position lock it in place by twisting it clockwise by a quarter of a turn 68 ...

Страница 81: ...your supplier whether your monitor needs an adaptor and the right one was supplied the MonitorType best suited to your monitor 2 If your monitor needs an adaptor that isn t supplied make one or ask your supplier to make one for you using the information in Cables and adaptors 3 Connect the monitor to your computer using the cable information gained from steps 1 and 2 4 Follow the instructions in S...

Страница 82: ...ow only the VGA or VGA SVGA modes to be selected set MonitorType to 3 or 4 respectively see MonitorType and screen modes on page 75 otherwise all the MonitorType 1 modes will be made available No adaptor required See Cable type A on page 71 for a typical pinout 70 ...

Страница 83: ...omputer end with a 15 way VGA style D type plug The table below shows the typical pinout for the computer end of this type of cable You can use this cable without modification Note 1 Normally linked to pin 10 0V in the cable or in the monitor Note 2 A NEC Multisync II monitor comes supplied with a 9 way connector on the computer end of the cable and an adaptor which allows you to connect this to t...

Страница 84: ... work satisfactorily when driven with separate horizontal and vertical sync signals Adaptor type C The cable supplied with some Multiscan monitors requiring composite sync is terminated at the computer end with a 9 pin D type plug In this case you need a 15 way plug to 9 way socket adaptor Note HSync pin 13 linked back into ID 2 pin 4 tells the computer that composite rather than separate sync is ...

Страница 85: ...d and that only modes compatible with a TV standard monitor can be displayed Cable type E You need to make this cable if it s not supplied for use with televisions and monitors using a SCART input socket Note 1 HSync pin 13 linked back to ID 0 pin 11 tells the computer that composite rather than vertical sync is required and that only modes compatible with a TV standard monitor can be displayed No...

Страница 86: ...mposite monochrome signal you can fit these components into a 15 way connector shell You need to make an adaptor cable that has a 15 way D type plug on one end and a phono plug on the other The connections you need to make are as follows Note HSync pin 13 linked back into ID 0 pin 11 tells the computer that Composite sync CSync is required rather than VSync on pin 14 and that only modes compatible...

Страница 87: ...ing the MonitorType Normally you don t have to worry about this as it is set automatically when you connect a monitor and switch on the computer the default Auto setting Sometimes however you need to be able to change this variable to make use of all the screen modes available to your monitor For instance the way some cables are wired may make the computer think that a Multiscan monitor is a VGA o...

Страница 88: ...ve the pointer to the right of the Mode menu option 3 Click on one of the screen modes listed or move the pointer to the bottom of the Mode box type in your chosen mode number after the caret then press Return You can configure your computer so that it always displays a particular screen mode using the Configure application See the RISC OS 3 Applications Guide 76 ...

Страница 89: ...e used to attach peripheral devices the Serial port and the Parallel port The characteristics of each of the above ports are described in the following sections along with information about the types of devices that can be connected to them Note Various third party monitors and other peripheral equipment are depicted or described in this Guide The illustration or description of these or any other ...

Страница 90: ...circumstances or RTS CTS signals on additional wires on the interface cable An example The diagram right shows the serial port signals used to connect to an Apple LaserWriter laser printer Software connection For information on how to set up the software side of things see Prinfing on page 55 You ll also find more information in Prinfing in the RISC OS 3 User Guide Modems on the serial port A mode...

Страница 91: ...are it s best if you check with your supplier who will be able to tell you the communications package to use that best suits your modem Parallel port The parallel port is commonly used to connect a printer or to send receive data to from a device using eight data pins in parallel making a byte of character data There is a diagram of the parallel port pinout in Appendix D Hardware components and co...

Страница 92: ...ect cable Check the printer s documentation for more information Software connection Printing on page 55 tells you how to configure your computer to use a Acorn JP 150 printer You ll find more information in Printing in the RISC OS 3 User Guide and the manual supplied with your printer 80 ...

Страница 93: ... the computer on Hard disc drive indicator light Your computer will have this light whether or not it has a hard disc installed The amber light only comes on when the hard disc drive is being accessed by the system If your computer hasn t got a hard disc drive you can obtain one from your supplier 3 5 inch floppy disc drive The floppy disc drive is located on the right It includes a disc insertion...

Страница 94: ...disc pops partially out of the slot allowing you to remove it by hand ON OFF switch This is the computer s power switch When you switch it on the ON OFF indicator light comes on The back of the computer The drawing below shows a typical view of the back of the computer The following subsections describe the connectors on the back of the computer an asterisk after a signal name denotes active low 1...

Страница 95: ...on an Econet local area network LAN A LAN allows you to communicate with several computers within a single geographic location To use the Econet network you must install an optional Econet expansion card in the machine A blanking plug may have been fitted to this socket if the Econet expansion card is not installed See your supplier for more information on the Econet expansion card 4 Parallel prin...

Страница 96: ...ching peripheral devices The pins on the plug are as follows 6 Keyboard connector The keyboard has a 6 way plug on the end of its cable that goes into the 6 way socket on the back of the computer The pins on the socket are wired as follows 7 Headphones The headphones 32 Ohm socket allows you to connect stereo headphones or your stereo amplifier system to the computer through which you can hear sou...

Страница 97: ...anels The blanking panels cover any expansion card slots not in use It s not a good idea to operate the computer with these removed Expansion cards make your computer more versatile Ask you supplier about expansion cards that might be useful to you Keyboard The functions of the various keys are described in Using the keyboard on page 37 What follows here is a description of the back of the keyboar...

Страница 98: ...N OFF switch press Ctrl RESET Refer to the RISC OS 3 User Guide Warning You ll lose any unsaved work when you do this Mouse connector Use this 9 way connector to attach the mouse cable to the keyboard the other end of the cable is permanently fixed to the mouse Keyboard cable The coiled keyboard cable to the right of the mouse connector is permanently attached to the keyboard It connects the keybo...

Страница 99: ...de of the icon bar Clicking on this will give you access to the applications stored permanently in the computer s memory ROM such as Draw and Paint auto start You can configure the computer so that any or all of the ROM applications in the Apps directory will automatically start every time you switch on back icon Click on this to send a window to the back of a pile of windows on the screen Click o...

Страница 100: ...ices really means storage devices places where information files directories or programs is kept Click on the device icon on the lefthand side of the icon bar to see what is stored on the associated device directory Storage area like a folder in which you can keep files or subdirectories directory display Window that displays the contents of a directory or storage device Double click on a director...

Страница 101: ...stem e g ADFS A logical and structured way of storing and manipulating files See the RISC OS 3 User Guide for more information floppy discs Removable discs for storing information Your computer uses 3 5 inch floppy discs font Typeface that the computer uses e g Homerton Trinity format Formatting a disc prepares it to receive information from the computer function keys Set of keys along the top of ...

Страница 102: ...munications from the computer Monitors can be colour or monochrome black and white Also known as a Visual Display Unit VDU MonitorType A computer variable that determines which screen modes your monitor can display mouse Small plastic box with three buttons on top and a cable attaching it to the computer Hold it in your right hand if you re right handed Moving it moves the pointer on the screen mo...

Страница 103: ... is accessible for storing or retrieving information without using discs Information in RAM is lost when the computer is switched off resources The means with which your computer runs programs and applications Return key Key on the keyboard that you press to signify the end of an instruction to the computer e g when you ve finished typing in a file name in a writable menu box or to start a new lin...

Страница 104: ... applications Task manager Icon on righthand side of icon bar Use it to control how the computer uses its memory title bar Along the top of a window in which the name of the file application or directory appears toggle size icon Icon in the top righthand corner of a window Clicking on this toggles between full size and the last size at which a window was displayed toggling Switching something betw...

Страница 105: ...n 17 B back icon see windows backup see floppy discs and hard discs C CapsLock key see keyboard caret 28 moving in Edit 44 cleaning the computer monitor and keyboard 67 clicking 14 15 close icon see windows closing files and directories with Adjust 48 computer cleaning 67 diagram of rear panel 82 front panel diagram 81 ON OFF switch 7 switching off 9 switching on 7 computer control keys see keyboa...

Страница 106: ... file 51 starting applications 43 E Econet pinout 83 Edit printing an Edit file 58 starting 44 94 using 44 efficient use of applications 46 Escape key see keyboard expansion cards 85 F file structure 48 Filer menu 49 files accessing 53 application directory icons 47 closing 48 closing a file down to an icon on the back ground see Pinboard closing with Adjust 48 copying 51 deleting 52 icons 47 load...

Страница 107: ...isplaying large or small icons 27 files 47 selecting and deselecting 51 IEC 320 outlet 82 input focus changing 45 inserting and ejecting floppy discs see floppy discs Index J JP 150 see printing K keyboard 37 41 85 accented characters 41 Alt key 40 Caps Lock key 37 44 computer control keys 40 connecting to computer 3 connector 84 Copy key 40 Ctrl control key 40 cursor keys 40 Delete key 40 Escape ...

Страница 108: ...ing to computer 3 connector 86 connector pinout 86 dragging 16 holding 13 moving the pointer 13 techniques 14 moving files 51 96 multiple keystrokes see keyboard multitasking working in more than one window 45 N naming files and directories 28 49 New directory option 49 no picture 63 numeric keypad see keyboard 0 ON OFF indicator light 81 82 ON OFF switch 7 82 opening files and directories 47 usin...

Страница 109: ...restarting the computer 62 RISC OS 11 desktop 9 11 Index ROM Read Only Memory 91 root directory 46 S safety standards v saving files 50 saving work 44 50 SCART connecting monitor or TV 70 pinout of connector 73 screen modes 12 75 and memory usage 46 setting with the palette 82 76 scrolling see windows seeing what s on a hard or floppy disc see floppy discs and hard discs accessing Select button 14...

Страница 110: ...er 1 using applications on floppy discs see applications 98 W where to put your computer 2 windows 17 adjust size icon 18 back icon 18 close icon 18 20 closing with Adjust 48 dragging off the screen 19 features 17 manipulating 18 24 obscuring the icon bar 19 resizing 18 scroll arrows 22 scroll bars 22 scrolling 21 scrolling techniques 23 24 shuffling 20 slider 22 title bar 17 toggle size icon 18 1...

Страница 111: ...way the information is presented General comments If there is not enough room for your comments please continue overleaf How would you classify your experience with computers Cut out or photocopy and post to Dept RC Technical Publications Acorn Computers Limited 645 Newmarket Road Cambridge CB5 8PB England Your name and address This information will only be used to get in touch with you in case we...

Страница 112: ......

Страница 113: ......

Страница 114: ...ALJ 16 ...

Отзывы: