background image


8A 

Press the 

MENU

 button up to when the 

  is shown on the display. Pressing 

ENTER


button and the display will blink. Use 

DOWN

 and 

UP

 button to select the 

  (sound 

control  on)  or 

  (sound  control  off).  Once  the  mode  has  been  selected,  press  the 

ENTER 

button  to  setup  or  automatically  return  to  the  main  functions  without  any  change 

after  8 seconds.  To  go back  to  the  functions  without  any  change press  the

  MENU

  button 

again. 


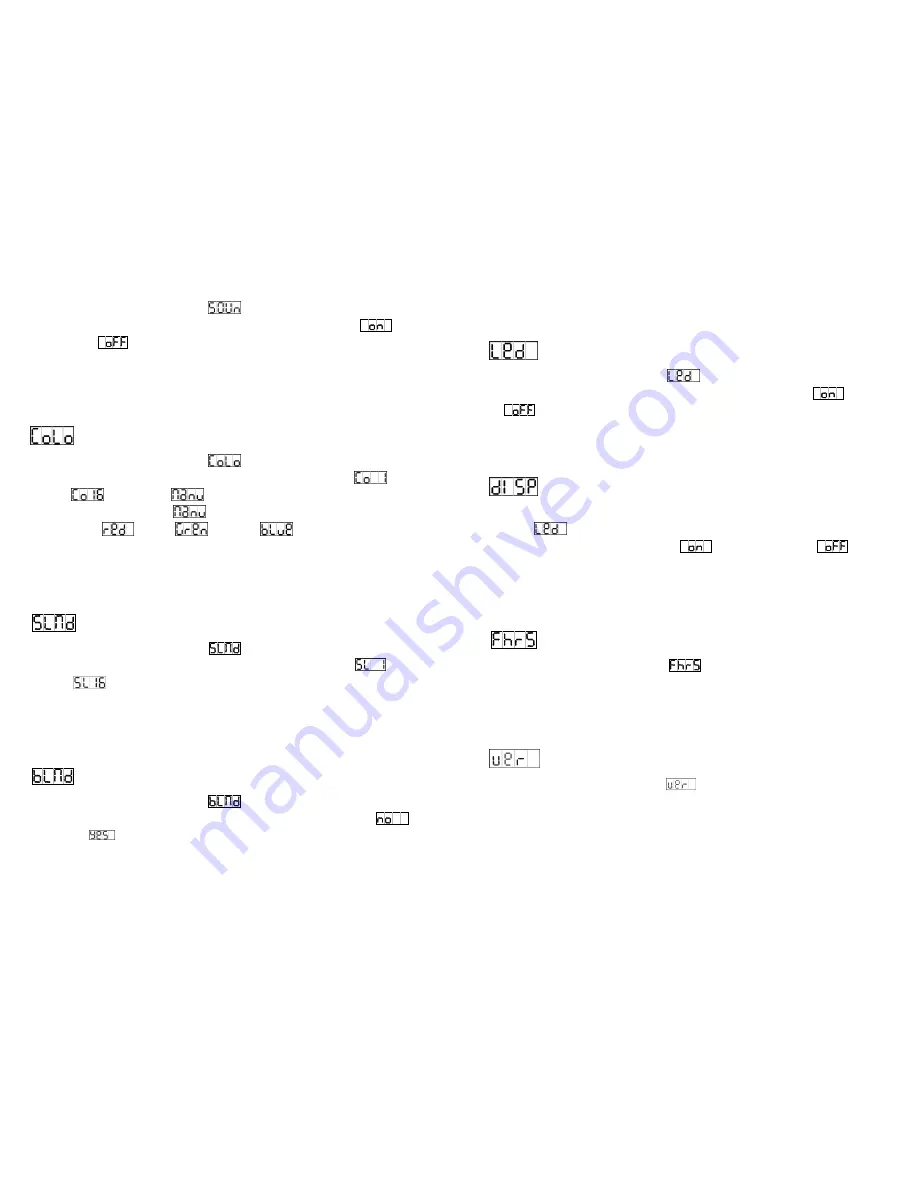
  Color Mode 

Press the 

MENU

 button up to when the 

  is shown on the display. Pressing 

ENTER


button and the display will blink. Use 

DOWN

 and 

UP

 button to select the 

  (color 1) 

or  …  or 

  (show  16)  or 

  (manual  setting).  Once  select,  press  the 

ENTER


button  to  confirm,  if  you  select 

  (manual  setting),  you  can  press 

DOWN

  and 

UP


button to select 

  (red) or 

  (green) or 

  (blue), press 

ENTER

 button to 

confirm,  then  use

  DOWN

  and

  UP

  button  to  adjust  the  value  (0-255)  and  press 

ENTER 

button  to  store,  automatically  return  to  the  main  functions  without  any  change  after  8 

seconds. To go back to the functions without any change press the

 MENU

 button again. 


    Slave Mode 

Press the 

MENU

 button up to when the 

  is shown on the display. Pressing 

ENTER


button and the display will blink. Use 

DOWN

 and 

UP

 button to select the 

  (normal) 

or  …  or


  (16  light  show)  mode.  Once  the  mode  has  been  selected,  press  the 

ENTER

  button  to  setup  or  automatically  return  to  the  main  functions  without  any  change 

after  8 seconds.  To  go back  to  the  functions  without  any  change press  the

  MENU

  button 

again. 


    Blackout Mode 

Press the 

MENU

 button up to when the 

  is shown on the display. Pressing 

ENTER


button  and  the  display  will  blink.  Use 

DOWN

  and 

UP

  button  to  select  the

  (no 

blackout)  or 

  (yes  blackout)  mode.  Once  the  mode  has  been  selected,  press  the 

ENTER

  button  to  setup  or  automatically  return  to  the  main  functions  without  any  change 

after  8 seconds.  To  go back  to  the  functions  without  any  change press  the

  MENU

  button 


9A 

again. 


    Led Display 

Press the 

MENU

 button up to when the 

  is shown on the display. Pressing 

ENTER


button and the display will blink. Use 

DOWN

 and 

UP

 button to select the 

  (Led on) 

or 

  (Led off) mode. Once the mode has been selected, press the 

ENTER 

button to 

setup or automatically return to the main functions without any change after 8 seconds. To 

go back to the functions without any change press the

 MENU

 button again. 


  Display Inversion 

It is good for you to install the unit on the floor or under ceiling. Press the 

MENU

 button up to 

when the 

  is shown on the display. Pressing 

ENTER

 button and the display will blink. 

Use 

DOWN

  and 

UP

  button  to  select  the 

  (display  inversion)  or 

  (display 

normal). Once select, press the 

ENTER 

button to setup or automatically return to the main 

functions  without  any  change  after  8  seconds.  To  go  back  to  the  functions  without  any 

change press the

 MENU

 button again. 


    Fixture Hours 

Press the 

MENU

 button up to when the 

  is blinking on the display. Pressing 

ENTER


button and the display will show the number of working hours of the unit. To go back to the 

functions press the

 MENU

 button again. 


Software version


Press the 

MENU

 button up to when the 

  is blinking on the display. Pressing 

ENTER


button  and  the  display  will  show  the  version  of  software  of  the  unit.  To  go  back  to  the 

functions press the

 MENU

 button again. 


Содержание LED-212RGB

Страница 1: ...lease read the instructions carefully before use 1A TABLE OF CONTENTS 1 Safety Instructions 2 Technical Specifications 3 Installation 4 How to set the unit 5 How to control the fixture 6 DMX512 Configuration 7 DMX512 Connections 8 Troubleshooting 9 Fixture Cleaning ...

Страница 2: ... directly at the LED light beam while the fixture is on Warning Please read the instructions carefully which includes important information about the installation operation and maintenance For power supply do not connect in series much more than 31 units use another mains supply for next 31 units 3A To prevent or reduce the risk of electrical shock or fire do not expose the unit to rain or moistur...

Страница 3: ...ction 12DMX output For DMX512 link use 3 5 pin XLR plug cable to link the next unit 5A 13DMX input For DMX512 link use 3 5 pin XLR plug cable to input DMX signal 14Mains input Connect to supply mains power 15Mains output Connect to supply mains power for the next unit 4 2 Main Function To select any of the given functions press the MENU button up to the required one is shown on the display Select ...

Страница 4: ...ode Press the MENU button up to when the is shown on the display Pressing ENTER button and the display will blink Use DOWN and UP button to select the auto show or show 1 or show 2 or show 12 Once the show has been selected press the ENTER button to confirm if you select show 1 or show 2 or show 12 you can press DOWN and UP button to select slowest or fastest press ENTER button to store or automat...

Страница 5: ... shown on the display Pressing ENTER button and the display will blink Use DOWN and UP button to select the no blackout or yes blackout mode Once the mode has been selected press the ENTER button to setup or automatically return to the main functions without any change after 8 seconds To go back to the functions without any change press the MENU button 9A again Led Display Press the MENU button up...

Страница 6: ...t s DMX input cable will have nothing connect it and the other fixtures will be set in slave mode automatically Their DMX input cables connect the last fixture DMX output cable daisy chain Any fixture can act as a Master or as a Slave C Easy Controller by CA 8 The easy remote control is used only in master slave mode There is a terminator for connect the easy controller inside the fixture By conne...

Страница 7: ...gestions for easy troubleshooting 13A A The fixture does not work no light 1 Check the connection of power and main fuse 2 Measure the mains voltage on the main connector B Not responding to DMX controller 1 DMX LED should be on If not check DMX connectors cables to see if link properly 2 If the DMX LED is on and no response to the channel check the address settings and DMX polarity 3 If you have ...

Страница 8: ...ration of Conformity We declare that our products lighting equipments comply with the following specification and bears CE mark in accordance with the provision of the Electromagnetic Compatibility EMC Directive 89 336 EEC EN55103 1 199601 2 EN55103 2 1996 EN61000 3 2 2000 A2 2005 EN61000 3 3 1995 A1 2001 A2 2005 Harmonized Standard EN 60598 1 2004 IEC 60598 1 2003 corrigendum 2004 Part 1 General ...

Страница 9: ...16A Innovation Quality Performance ...

Отзывы: