


Chapter 1
7
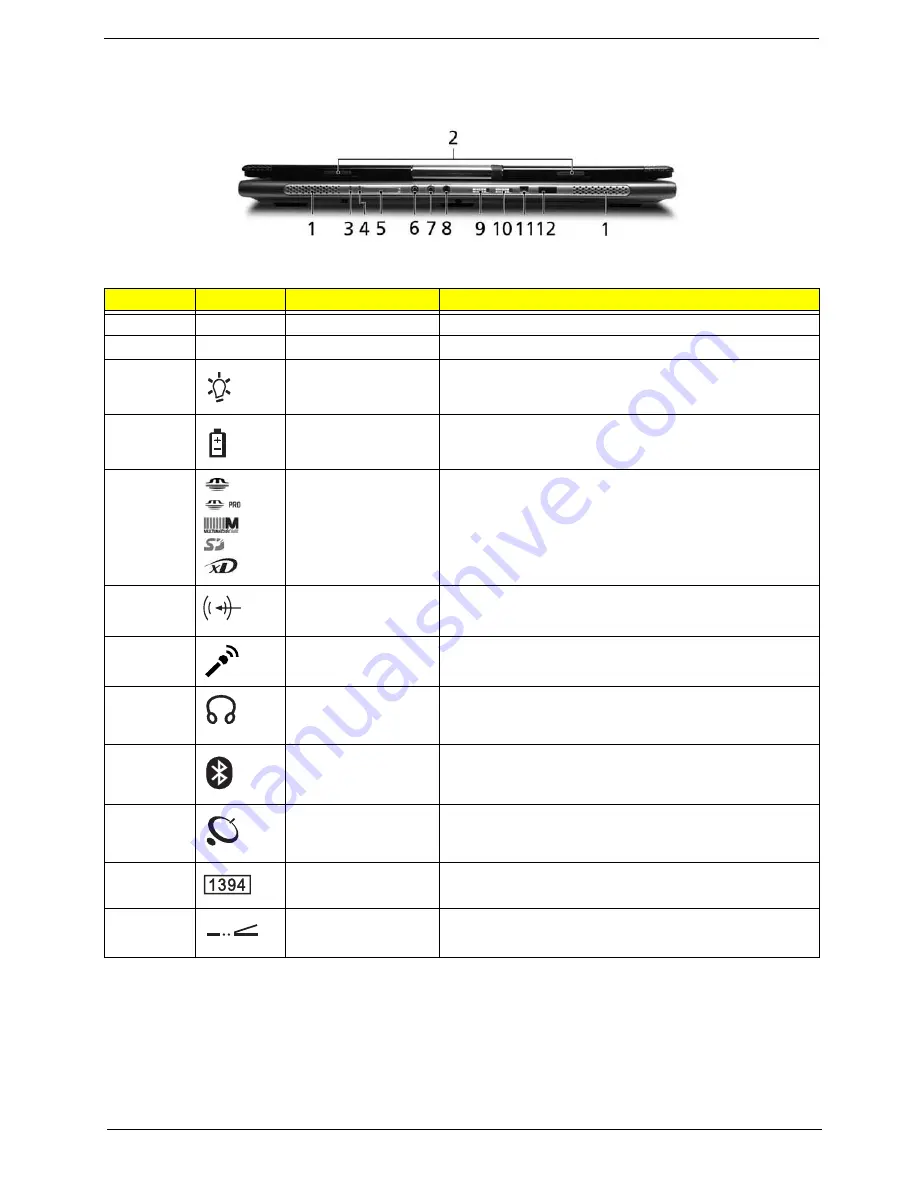
Closed Front View
No.
Icon
Item
Description
1
N/A
Speakers
Left and right speakers deliver stereo audio output.
2
N/A
Latch
Locks and releases the LCD panel.
3
Power indicator
Lights when the computer is on.
4
Battery indicator
Lights when the battery is being charged.
5
Five-in-one card
reader
Accepts Memory Stick, Memory Stick Pro, Multi Media
Card (MMC), Secure Digital (SD) and xD-Picture Card
NOTE:
Only one card can operate at any given time.
6
Audio-in jack
Accepts audio line-in devices.
7
Microphone
Accepts inputs from an external microphone.
8
Headphones/speaker/
line-out jack with S/
PDIF support
Connects to audio line-out devices.
9
Bluetooth
communication button/
indicator
Slide to enable/disable Bluetooth function. Lights to
indicate the status of Bluetooth communications.
(manufacturing option)
10
Wireless
communications
button/indicator
Slide to enable/disable Wireless function. Lights to indicate
the status of wireless LAN communications.
(manufacturing option)
11
Four-pin IEEE 1394
port
Connects to IEEE 1394 devices.
12
Infrared port
Interfaces with infrared devices.
#
Icon
Item
Description
Note:
#
Item
Description
"Launch keys" on page 10
#
Icon
Item
Description
#
Item
Description
"Launch keys" on page 10
#
Icon
Item
Description
#
Item
Description
"Easy-launch buttons" on page 10
#
Icon
Item
Description
#
Item
Description
"Launch keys" on page 10
#
Icon
Item
Description
#
Item
Description
"Easy-launch buttons" on page 10
#
Icon
Item
Description
#
Item
Description
#
Icon
Item
Description
#
Icon
Item
Description
"Launch keys" on page 10
#
Icon
Item
Description
#
Item
Description
"Launch keys" on page 10
#
Icon
Item
Description
#
Item
Description
#
Item
Description
#
Icon
Item
Description
#
Icon
Item
Description
"Launch keys" on page 10
#
Icon
Item
Description
#
Item
Description
Содержание TravelMate 8200
Страница 2: ...II PRINTED IN TAIWAN ...
Страница 30: ...20 Chapter 1 ...
Страница 35: ...Chapter 1 25 ...
Страница 37: ...Chapter 1 27 View information about Acer ePower Management ...
Страница 107: ...Chapter 4 97 8 You will see the screen displaying PASS when the system has built NAPP Master hard disk drive ...
Страница 108: ...Chapter 5 98 Top View of Main Board Jumper and Connector Locations Chapter 5 ...
Страница 109: ...99 Chapter 5 Part One of Top View Part Two of Top View ...
Страница 111: ...101 Chapter 5 Bottom View Part One of Bottom View ...
Страница 113: ...103 Chapter 5 CN12 PCMCIA card header SW03 Slider switch CN14 Five in one card reader Item Description Item Description ...
Страница 115: ...105 Chapter 6 Exploded Diagram ...


