


10
Chapter 1
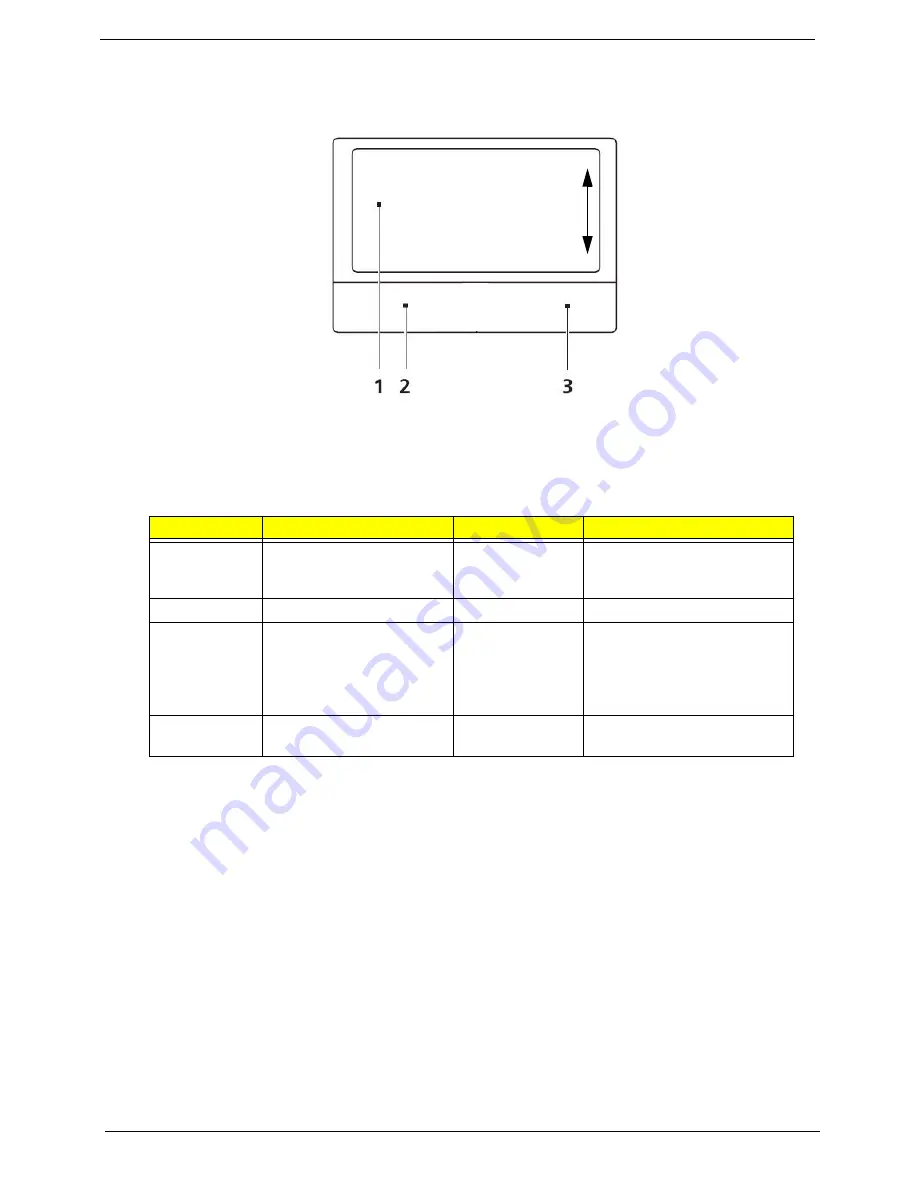
TouchPad Basics
The following items show you how to use the TouchPad:
•
Move your finger across the TouchPad (1) to move the cursor.
•
Press the left (2) and right (3) buttons located beneath the TouchPad to perform selection and
execution functions. These two buttons are similar to the left and right buttons on a mouse.
Tapping on the TouchPad is the same as clicking the left button.
NOTE:
When using the TouchPad, keep it - and your fingers - dry and clean. The TouchPad is sensitive to
finger movement; hence, the lighter the touch, the better the response. Tapping too hard will not
increase the TouchPad’s responsiveness.
Function
Left Button (2)
Right Button (3)
Main TouchPad (1)
Execute
Quickly click twice.
Tap twice (at the same speed
as double-clicking a mouse
button).
Select
Click once.
Tap once.
Drag
Click and hold, then use
finger on the TouchPad to
drag the cursor.
Tap twice (at the same speed
as double-clicking a mouse
button); rest your finger on
the TouchPad on the second
tap and drag the cursor.
Access
context menu
Click once.
Содержание LX.PWJ02.001
Страница 6: ...VI ...
Страница 10: ...X Table of Contents ...
Страница 34: ...24 Chapter 1 ...
Страница 52: ...42 Chapter 2 ...
Страница 72: ...62 Chapter 3 3 Turn the computer over and disconnect the following four 4 cables from the Mainboard A B C D ...
Страница 76: ...66 Chapter 3 5 Lift the Speaker clear of the Upper Cover ...
Страница 78: ...68 Chapter 3 5 Lift the Right Speaker Module clear of the device ...
Страница 84: ...74 Chapter 3 5 Lift the USB board clear of the device ...
Страница 90: ...80 Chapter 3 11 Disconnect the Bluetooth to mainboard cable ...
Страница 92: ...82 Chapter 3 4 Carefully lift the Thermal Module clear of the Mainboard ...
Страница 103: ...Chapter 3 93 7 Disconnect the LVDS cable from the panel ...
Страница 105: ...Chapter 3 95 5 Lift the microphone set and cable clear of the LCD cover ...
Страница 114: ...104 Chapter 3 Replacing the Camera Module 1 Place the Camera in the module 2 Connect the camera cable ...
Страница 121: ...Chapter 3 111 5 Connect the fan cable ...
Страница 124: ...114 Chapter 3 6 Connect the LVDS cable to the mainboard 7 Connect the microphone cable ...
Страница 127: ...Chapter 3 117 4 Connect the USB cable to the mainboard and lock the connector ...
Страница 130: ...120 Chapter 3 4 Replace the FFC and press down as indicated to secure it to the Upper Cover ...
Страница 135: ...Chapter 3 125 3 Connect the following cables to the Mainboard 4 Connect D as shown 5 Connect C as shown A B C D ...
Страница 146: ...136 Chapter 3 ...
Страница 173: ...Chapter 6 163 Base Assembly No Description Acer P N 1 Logic Lower Door 2 3G Door 3 Lower Cover 1 2 3 ...
Страница 175: ...Chapter 6 165 Aspire 5251 5551G 5551 FRU List ...
Страница 176: ...166 Chapter 6 Screw List ...
Страница 177: ...Chapter 6 167 ...
Страница 206: ...196 Appendix C ...
Страница 210: ...200 ...


