background image


18

English

Expanding through options

Your notebook PC offers you a complete mobile computing experience.

Connectivity options

Ports allow you to connect peripheral devices to your computer as you would 
with a desktop PC. For instructions on how to connect different external devices 
to the computer, read the following section.

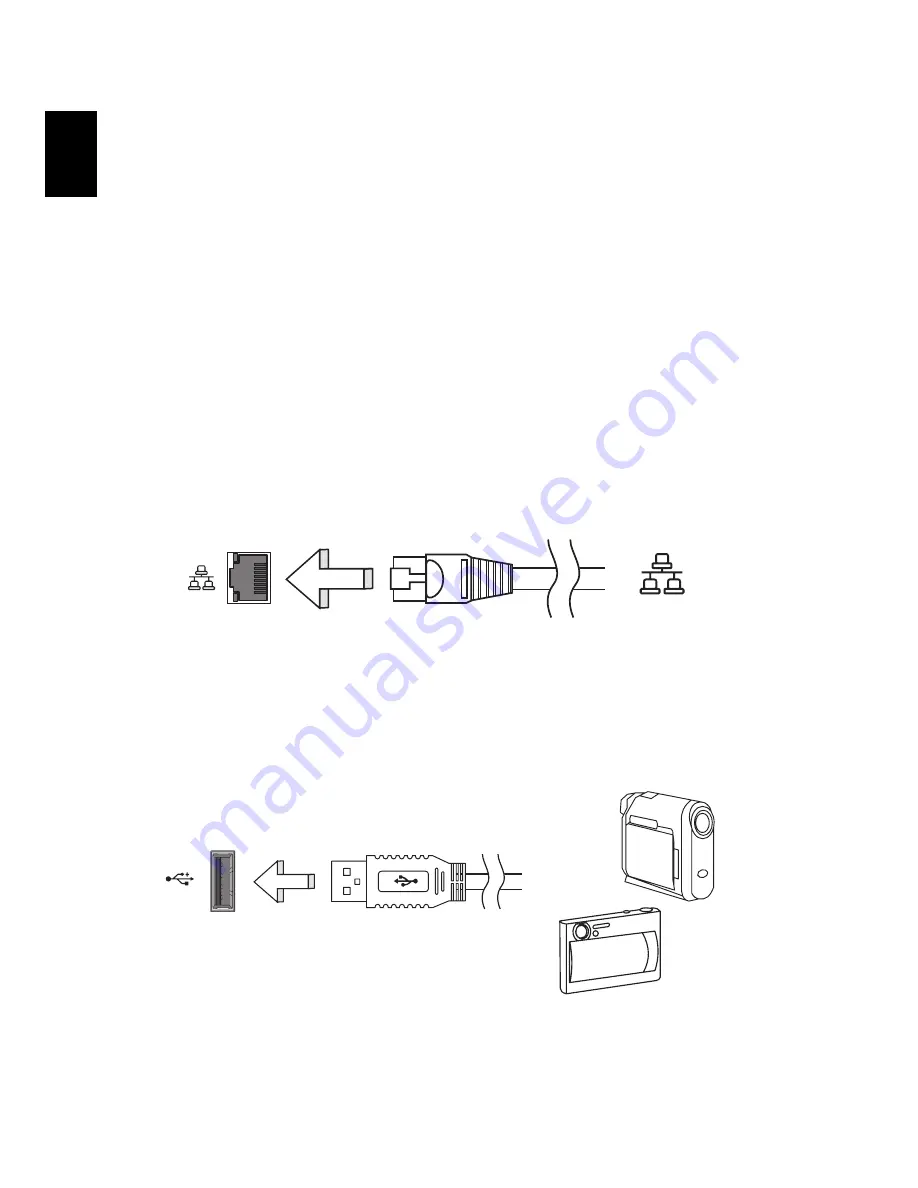
Built-in network feature

The built-in network feature allows you to connect your computer to an 
Ethernet-based network.

To use the network feature, connect an Ethernet cable from the Ethernet 
(RJ-45) port on the chassis of the computer to a network jack or hub on 
your network.

Universal Serial Bus (USB)

The USB 2.0 port is a high-speed serial bus which allows you to connect USB 
peripherals without taking up precious system resources. 

Содержание eMachines Series

Страница 1: ...eMachines Series Generic User Guide ...

Страница 2: ...________ Serial number ___________________________________ Date of purchase ________________________________ Place of purchase ________________________________ Copyright 2009 Acer Incorporated All Rights Reserved eMachines Series Notebook PC ...

Страница 3: ... by unplugging all power cords from the power supplies CAUTION for Accessibility Be sure that the power outlet you plug the power cord into is easily accessible and located as close to the equipment operator as possible When you need to disconnect power to the equipment be sure to unplug the power cord from the electrical outlet CAUTION for bundled dummy cards Your computer shipped with plastic du...

Страница 4: ...ttom surface ventilation opening and AC power adapter may become hot keep them away from human body Your device and its enhancements may contain small parts Keep them out of the reach of small children Using electrical power This product should be operated from the type of power indicated on the marking label If you are not sure of the type of power available consult your dealer or local power com...

Страница 5: ...servicing to qualified service personnel Unplug this product from the wall outlet and refer servicing to qualified service personnel when the power cord or plug is damaged cut or frayed liquid was spilled into the product the product was exposed to rain or water the product has been dropped or the case has been damaged the product exhibits a distinct change in performance indicating a need for ser...

Страница 6: ... may damage the battery or the connecting object The capacity and lifetime of the battery will be reduced if the battery is left in hot or cold places such as in a closed car in summer or winter Always try to keep the battery between 15 C and 25 C 59 F and 77 F A device with a hot or cold battery may not work temporarily even when the battery is fully charged Battery performance is especially limi...

Страница 7: ...t in use and or before servicing To avoid the remote risk of electric shock from lightning do not connect the telephone line to this equipment during lightning or thunderstorms Warning For safety reasons do not use non compliant parts when adding or changing components Consult your reseller for purchase options Operating environment Warning For safety reasons turn off all wireless or radio transmi...

Страница 8: ...with pacemakers should do the following Always keep the device more than 15 3 centimeters 6 inches from the pacemaker Not carry the device near your pacemaker when the device is switched o If you suspect interference switch off your device and move it Hearing aids Some digital wireless devices may interfere with some hearing aids If interference occurs consult your service provider Vehicles RF sig...

Страница 9: ...Do not switch the notebook on when wireless phone use is prohibited or when it may cause interference or danger Emergency calls Warning You cannot make emergency calls through this device To make an emergency call you shall dial out through your mobile phone or other telephone call system Disposal instructions Do not throw this electronic device into the trash when discarding To minimize pollution...

Страница 10: ...nagement Note The statement above is applicable only to the notebooks with an ENERGY STAR sticker located in the bottom right hand corner of the palm rest As an ENERGY STAR partner Acer Inc has determined that this product meets the ENERGY STAR guidelines for energy efficiency This product has been shipped enabled for power management Activate display s Sleep mode within 15 minutes of user inactiv...

Страница 11: ...ew your monitor more than your documents place the display at the center of your desk to minimize neck strain Taking care of your vision Long viewing hours wearing incorrect glasses or contact lenses glare excessive room lighting poorly focused screens very small typefaces and low contrast displays could stress your eyes The following sections provide suggestions on how to reduce eyestrain Eyes Re...

Страница 12: ... Develop the following work habits to make your computer use more relaxing and productive Take short breaks regularly and often Perform some stretching exercises Breathe fresh air as often as possible Exercise regularly and maintain a healthy body Warning We do not recommend using the computer on a couch or bed If this is unavoidable work for only short periods take breaks regularly and do some st...

Страница 13: ...ons of your new computer For more on how your computer can help you to be more productive please refer to the User Guide This guide contains detailed information on such subjects as system utilities data recovery expansion options and troubleshooting In addition it contains warranty information and the general regulations and safety notices for your notebook It is available in Portable Document Fo...

Страница 14: ...puter to magnetic fields Do not expose the computer to rain or moisture Do not spill water or any liquid on the computer Do not subject the computer to heavy shock or vibration Do not expose the computer to dust or dirt Never place objects on top of the computer Do not slam the computer display when you close it Never place the computer on uneven surfaces Taking care of your AC adapter Here are so...

Страница 15: ... of used batteries according to local regulations Recycle if possible Cleaning and servicing When cleaning the computer follow these steps 1 Turn off the computer and remove the battery pack 2 Disconnect the AC adapter 3 Use a soft moist cloth Do not use liquid or aerosol cleaners If either of the following occurs the computer has been dropped or the body has been damaged the computer does not ope...

Страница 16: ...xvi ...
Страница 17: ... care of your AC adapter xiv Taking care of your battery pack xv Cleaning and servicing xv Touchpad 1 Touchpad basics with two click buttons 1 Using the keyboard 2 Lock keys and embedded numeric keypad 2 Windows keys 3 Special keys 4 Frequently asked questions 5 Battery pack 8 Battery pack characteristics 8 Maximizing the battery s life 8 Installing and removing the battery pack 9 Charging the bat...

Страница 18: ...iversal Serial Bus USB 18 Installing memory 19 BIOS utility 20 Boot sequence 20 Enable disk to disk recovery 20 Password 20 Using software 21 Playing DVD movies 21 Power management 22 eMachines Recovery Management 23 Burn backup discs 24 Restore 25 Restore Windows from backup discs 26 Troubleshooting 29 Troubleshooting tips 29 Error messages 29 Regulations and safety notices 31 FCC statement 31 Mo...

Страница 19: ...touchpad is the same as clicking the left button Note1 When using the touchpad keep it and your fingers dry and clean The touchpad is sensitive to finger movement hence the lighter the touch the better the response Tapping harder will not increase the touchpad s responsiveness Note2 By default vertical and horizontal scrolling is enabled on your touchpad It can be disabled under Mouse settings in ...

Страница 20: ...models Lock key Description Caps Lock When Caps Lock is on all alphabetic characters typed are in uppercase Num Lock Fn NumLk When Num Lock is on the embedded keypad is in numeric mode The keys function as a calculator complete with the arithmetic operators and Use this mode when you need to do a lot of numeric data entry A better solution would be to connect an external keypad Desired access Num ...

Страница 21: ...ork domain M Minimizes all windows R Open the Run dialog box T Cycle through programs on the taskbar U Open Ease of Access Center X Open Windows Mobility Center BREAK Display the System Properties dialog box SHIFT M Restore minimized windows to the desktop TAB Cycle through programs on the taskbar by using Windows Flip 3 D SPACEBAR Bring all gadgets to the front and select Windows Sidebar CTRL F S...

Страница 22: ...l and the US dollar sign at the upper center of your keyboard The US dollar sign 1 Open a text editor or word processor 2 Hold Shift and then press the 4 key at the upper center of the keyboard Note This function varies according to the language settings ...

Страница 23: ... on the screen The computer s power management system automatically blanks the screen to save power Press any key to turn the display back on If pressing a key does not turn the display back on three things might be the cause The brightness level might be too low Press Fn increase to adjust the brightness level The display device might be set to an external monitor Press the display toggle hotkey ...

Страница 24: ...er s parallel port or a USB port and the corresponding port on the printer I want to restore my computer to its original settings without recovery CD DVDs Note If your system is the multilingual version the operating system and language you choose when you first turn on the system will be the only option for future recovery operations This recovery process helps you restore the C drive with the or...

Страница 25: ...the system 2 While the eMachines logo is showing press Alt F10 at the same time to enter the recovery process 3 Refer to the onscreen instructions to perform system recovery Important This feature occupies 15 GB in a hidden partition on your hard disk ...

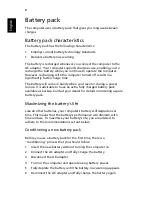
Страница 26: ...tra fully charged battery pack available as backup Contact your dealer for details on ordering a spare battery pack Maximizing the battery s life Like all other batteries your computer s battery will degrade over time This means that the battery s performance will diminish with time and use To maximize your battery s life you are advised to adhere to the recommendations set out below Conditioning ...

Страница 27: ... of the battery is adversely affected by the following usage patterns Using the computer on constant AC power with the battery inserted If you want to use constant AC power you are advised to remove the battery pack after it is fully charged Not discharging and recharging the battery to its extremes as described above Frequent use the more you use the battery the faster it will reach the end of it...

Страница 28: ...ng enables you to start the next day with a fully charged battery Checking the battery level The Windows power meter indicates the current battery level Rest the cursor over the battery power icon on the taskbar to see the battery s present charge level Optimising battery life Optimizing battery life helps you get the most out of battery operation prolonging the charge recharge cycle and improving...

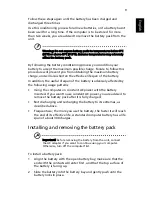
Страница 29: ... outlet are available 1 Plug the AC adapter into the computer and then connect to the mains power supply 2 Save all necessary files 3 Resume work Turn off the computer if you want to recharge the battery rapidly An extra fully charged battery pack is available 1 Save all necessary files 2 Close all applications 3 Shut down the operating system to turn off the computer 4 Replace the battery pack 5 ...

Страница 30: ...e the computer Moving around When you are just moving within short distances for example from your office desk to a meeting room Preparing the computer Before moving the computer close and latch the display cover to place it in Sleep mode You can now safely take the computer anywhere you go within the building To bring the computer out of Sleep mode open the display then press and release the powe...

Страница 31: ... on the battery by putting the computer in Sleep mode Press Fn F4 or close the display cover whenever you are not actively using the computer To resume open the display if closed then press and release the power button Taking the computer home When you are moving from your office to your home or vice versa Preparing the computer After disconnecting the computer from your desktop follow these steps...

Страница 32: ...ure between outside and room temperature Setting up a home office If you frequently work on your computer at home you may want to purchase a second AC adapter for use at home With a second AC adapter you can avoid carrying the extra weight to and from home If you use your computer at home for significant periods of time you might also want to add an external keyboard monitor or mouse Traveling wit...

Страница 33: ... cords that are appropriate for the country to which you are traveling Spare fully charged battery packs Additional printer driver files if you plan to use another printer Proof of purchase in case you need to show it to customs officials International Travelers Warranty passport Special considerations Follow the same special considerations as when traveling with the computer In addition these tip...

Страница 34: ...rotect your computer from unauthorized access Setting these passwords creates several different levels of protection for your computer and data Supervisor Password prevents unauthorized entry into the BIOS utility Once set you must enter this password to gain access to the BIOS utility User Password secures your computer against unauthorized use Combine the use of this password with password check...

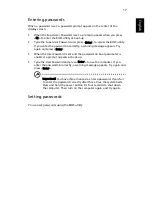
Страница 35: ...ss Enter When the User Password is set and the password on boot parameter is enabled a prompt appears at boot up Type the User Password and press Enter to use the computer If you enter the password incorrectly a warning message appears Try again and press Enter Important You have three chances to enter a password If you fail to enter the password correctly after three tries the system halts Press ...

Страница 36: ...ices to the computer read the following section Built in network feature The built in network feature allows you to connect your computer to an Ethernet based network To use the network feature connect an Ethernet cable from the Ethernet RJ 45 port on the chassis of the computer to a network jack or hub on your network Universal Serial Bus USB The USB 2 0 port is a high speed serial bus which allo...

Страница 37: ...er then lift up and remove the memory cover 3 a Insert the memory module diagonally into the slot then b gently press it down until it clicks into place 4 Replace the memory cover and secure it with the screw 5 Reinstall the battery pack and reconnect the AC adapter 6 Turn on the computer The computer automatically detects and reconfigures the total memory size Please consult a qualified technicia...

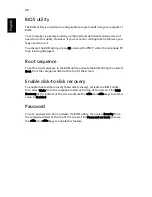
Страница 38: ...t sequence in the BIOS utility activate the BIOS utility then select Boot from the categories listed at the top of the screen Enable disk to disk recovery To enable disk to disk recovery hard disk recovery activate the BIOS utility then select Main from the categories listed at the top of the screen Find D2D Recovery at the bottom of the screen and use the F5 and F6 keys to set this value to Enabl...

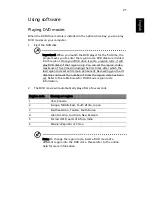
Страница 39: ...uding the first time after which the last region code set will remain permanent Recovering your hard disk does not reset the number of times the region code has been set Refer to the table below for DVD movie region code information 2 The DVD movie will automatically play after a few seconds Note To change the region code insert a DVD movie of a different region into the DVD drive Please refer to ...

Страница 40: ... to the computer and video memory If no activity is detected for a period of time called an inactivity timeout the computer stops some or all of these devices in order to conserve energy This computer employs a power management scheme that supports the advanced configuration and power interface ACPI which allows for maximum power conservation and maximum performance at the same time Windows handle...

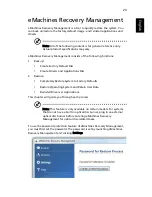
Страница 41: ...d Applications Disc 2 Restore Completely Restore System to Factory Defaults Restore Operating System and Retain User Data Reinstall Drivers or Applications This chapter will guide you through each process Note This feature is only available on certain models For systems that do not have a built in optical disc burner plug in an external optical disc burner before entering eMachines Recovery Manage...

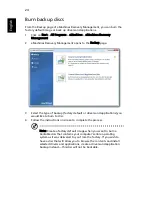
Страница 42: ...backup factory default or drivers and applications you would like to burn to disc 4 Follow the instructions on screen to complete the process Note Create a factory default image when you want to burn a bootable disc that contains your computer s entire operating system as it was delivered to you from the factory If you wish to have a disc that will allow you to browse the contents and install sele...

Страница 43: ...s You can also reinstall applications and drivers for your Gateway system 1 Click on Start All Programs eMachines eMachines Recovery Management 2 Switch to the Restore page by clicking Restore 3 You can choose to restore the system from a factory default image or reinstall drivers and applications 4 Follow the instructions on screen to complete the process ...

Страница 44: ...to the optical disc drive Restart your computer 2 The system will reboot 3 After rebooting when the eMachines logo shows press the F12 key to open the BOOT Menu 4 Here you can select which device to boot from 5 Use the arrow keys to select the IDE1 then press the ENTER key Windows will be installed from the recovery disc 6 Insert the second recovery disc when prompted then follow the on screen pro...

Страница 45: ...art your computer 2 During startup when the eMachines logo shows press the F2 key to enter BIOS Setup where you can set system parameters 3 Use the left and right arrow keys to select the Boot submenu 4 Use the up and down arrow keys to select the IDE1 device 5 Use the F6 key to move the IDE1 device to the highest boot priority or use the F5 key to move other devices to a lower boot priority Ensur...

Страница 46: ...tem will reboot 7 When you reboot Windows will be installed from the recovery disc 8 Insert the second recovery disc when prompted then follow the onscreen prompts to complete the restore 9 Remove the recovery disc from the optical drive once the restore is complete Do this before rebooting your computer Note Actual product specifications may vary ...

Страница 47: ...tical order together with the recommended course of action Error messages Corrective action CMOS battery bad Contact your dealer or an authorized service center CMOS checksum error Contact your dealer or an authorized service center Disk boot failure Insert a system bootable disk into the floppy drive A then press Enter to reboot Equipment configuration error Press F2 during POST to enter the BIOS...

Страница 48: ...glish If you still encounter problems after going through the corrective measures please contact your dealer or an authorized service center for assistance Some problems may be solved using the BIOS utility ...

Страница 49: ...re of the following measures Reorient or relocate the receiving antenna Increase the separation between the device and receiver Connect the device into an outlet on a circuit different from that to which the receiver is connected Consult the dealer or an experienced radio television technician for help Notice Shielded cables All connections to other computing devices must be made using shielded ca...

Страница 50: ...t with the FCC Your telephone company may make changes in its facilities equipment operations or procedures that could affect the proper functioning of your equipment If they do you will be notified in advance to give you an opportunity to maintain uninterrupted telephone service If this equipment should fail to operate properly disconnect the equipment from the phone line to determine if it is ca...

Страница 51: ...m s Telepermit requirements are dependent on the equipment PC associated with this device The associated equipment shall be set to operate within the following limits for compliance with Telecom s Specifications a There shall be no more than 10 call attempts to the same number within any 30 minute period for any single manual call initiation and b The equipment shall go on hook for a period of not...

Страница 52: ...ulatory information is for models with wireless LAN and or Bluetooth only General This product complies with the radio frequency and safety standards of any country or region in which it has been approved for wireless use Depending on configurations this product may or may not contain wireless radio devices such as wireless LAN and or Bluetooth modules Below information is for products with such d...

Страница 53: ...ntenna for the integrated wireless LAN Mini PCI Card built in to the screen section and all persons Note The wireless Mini PCI adapter implements a transmission diversity function The function does not emit radio frequencies simultaneously from both antennas One of the antennas is selected automatically or manually by users to ensure good quality radiocommunication 2 This device is restricted to i...

Страница 54: ... for the general population consult Safety Code 6 obtainable from Health Canada s website at www hc sc gc ca rpb LCD panel ergonomic specifications Design viewing distance 500 mm Design inclination angle 0 0 Design azimuth angle 90 0 Viewing direction range class Class IV Screen tilt angle 85 0 Design screen illuminance Illuminance level 250 250cosα lx where α 85 Color Source D65 Reflection class ...

Отзывы: