


Chapter 1
17
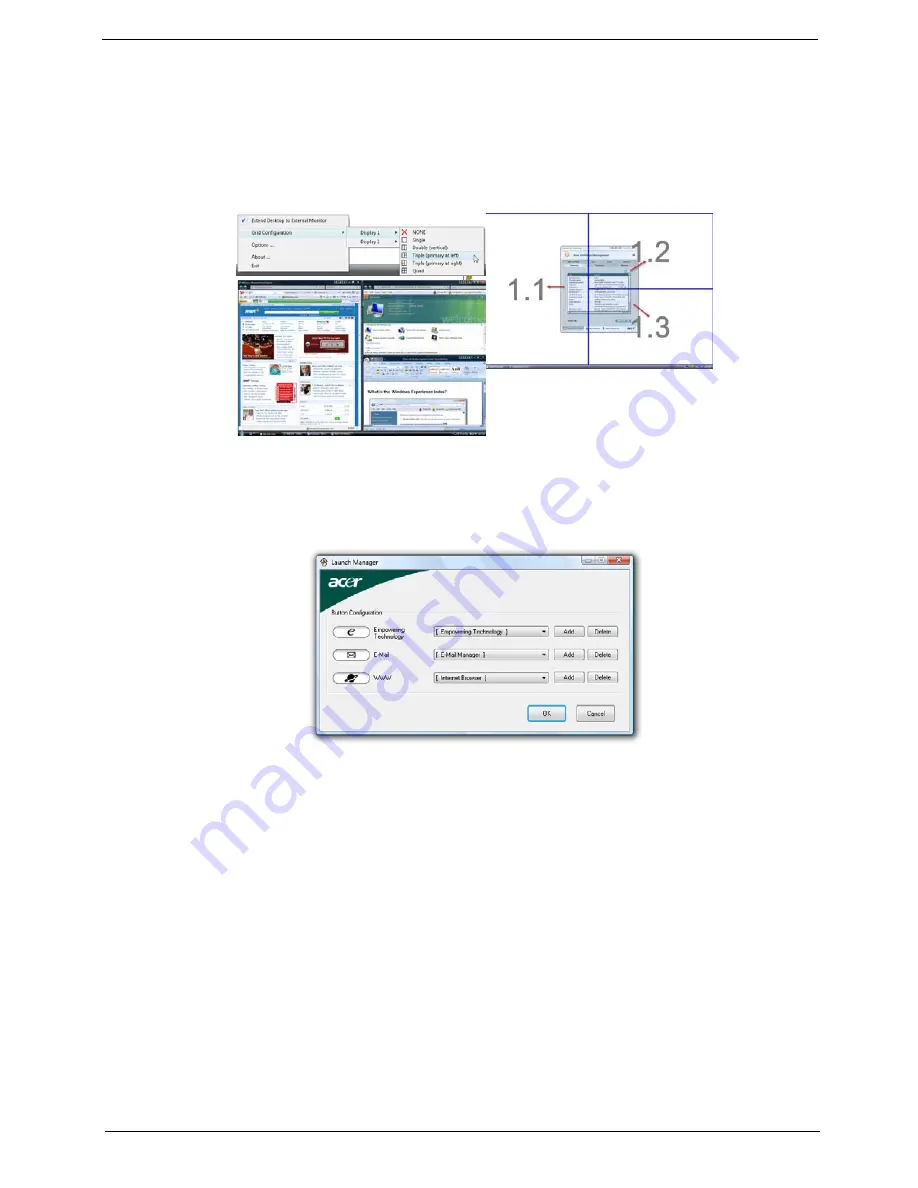
Double (vertical), Triple (primary at left), Triple (primary at right), or Quad Acer Gridvista is dual-display
compatible, allowing two displays to be partitioned independently.
Acer Gridvista is dual-display compatible, allowing two displays to be partitioned independently.
AcerGridVista is simple to set up:
1.
Run Acer GridVista and select your preferred screen configuration for each display from the task bar.
2.
Drag and drop each window into the appropriate grid.
3.
Enjoy the convenience of a well-organized desktop.
NOTE:
Please ensure that the resolution setting of the second monitor is set to the manufacturer's
recommended value.
Launch Manager
Launch Manager allows you to set the four easy-launch buttons located above the keyboard. You can access
the Launch Manager by clicking on Start > All Programs > Launch Manager to start the application.
Содержание Aspire 7730 Series
Страница 6: ...VI ...
Страница 14: ...4 Chapter 1 System Block Diagram ...
Страница 36: ...26 Chapter 1 Normal voltage 11 1V Charge voltage 16 0V Item Specification ...
Страница 52: ...42 Chapter 2 3 Reboot the system and key in the selected string qjjg9vy 07yqmjd etc for the BIOS user password ...
Страница 84: ...74 Chapter 3 9 Grasp the cover by the opposite edge and lift up to remove the Upper Cover ...
Страница 90: ...80 Chapter 3 4 Remove the module as shown Step Size Quantity Screw Type Speaker M2 3 NL 2 ...
Страница 94: ...84 Chapter 3 4 Lift the ExpressCard module away from the upper cover ...
Страница 105: ...Chapter 3 95 4 Remove the LCD brackets by pulling away from the LCD Panel as shown ...
Страница 108: ...98 Chapter 3 8 Connect the left and right Inverter cables 9 Connect the camera cable ...
Страница 120: ...110 Chapter 3 6 Connect the MIC and speaker cables 7 Gently pull the Antenna Cables through the HDD housing ...
Страница 124: ...114 Chapter 3 6 Angle the keyboard plate to insert 7 Tighten the captive screw on the keyboard plate Connect E as shown ...
Страница 136: ...126 Chapter 3 ...
Страница 170: ...160 Chapter 6 Aspire 7730 7730G Exploded Diagrams Upper Cover Number Description Part Number 1 2 3 4 5 6 7 ...
Страница 171: ...Chapter 6 161 Lower Cover Number Description Part Number 1 2 3 4 ...
Страница 172: ...162 Chapter 6 LCD Panel Number Description Part Number 1 2 3 4 5 6 7 8 9 10 ...
Страница 202: ...Appendix A 192 ...
Страница 208: ...198 Appendix C ...


