8
Chapter 1
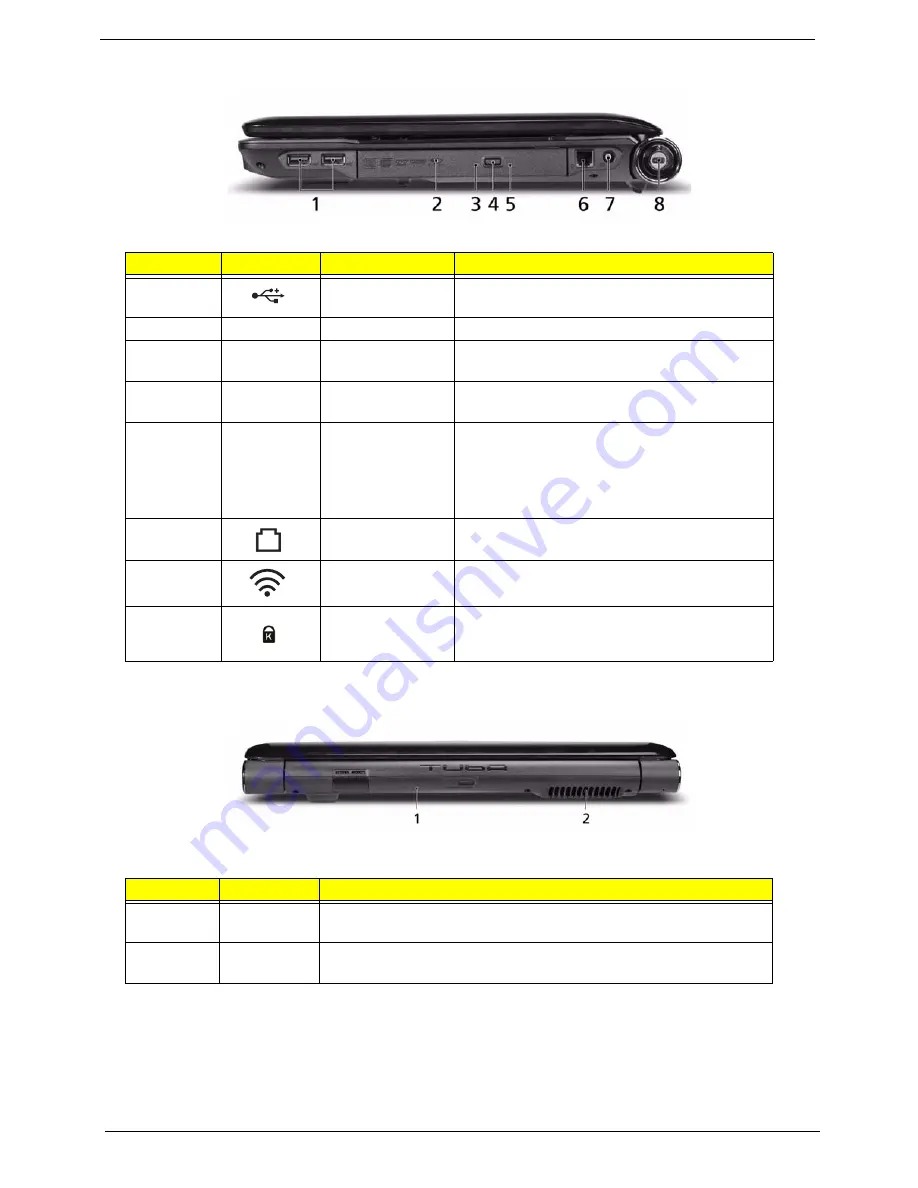
Right View
Rear View
No.
Icon
Item
Description
1
USB 2.0 port
Connect to USB 2.0 devices (e.g. USB mouse,
USB camera).
2
Optical drive
Internal optical drive; accepts CDs or DVDs.
3
Optical disk access
indicator
Lights up when the optical drive is active.
4
Optical drive eject
button
Ejects the optical disk from the drive.
5
Emergency eject
hole
Ejects the optical drive tray when the computer is
turned off.
Note:
Insert a paper clip into the emergency eject
hole to eject the optical drive tray when the
computer is off.
6
Modem (RJ-11)
port
Connects to a phone line.
7
RF-in port
Accepts input signals from digital TV Tuner
devices (only for certain models).
Kensington lock
slot
Connects to a Kensington-compatible computer
security lock.
No.
Item
Description
1
Tuba
The dedicated Tuba CineBass subwoofer pumps out earthshaking
movie-house audio.
2
Ventilation
slots
Enable the computer to stay cool, even after prolonged use.
Содержание Aspire 6930 Series
Страница 6: ...VI ...
Страница 10: ...X Table of Contents ...
Страница 42: ...32 Chapter 1 ...
Страница 55: ...Chapter 2 45 3 Reboot the system and key in the selected string qjjg9vy 07yqmjd etc for the BIOS user password ...
Страница 56: ...46 Chapter 2 ...
Страница 70: ...60 Chapter 3 5 Lift the HDD carrier to remove 6 Grasp the HDD connector and pull firmly to remove ...
Страница 91: ...Chapter 3 81 4 Grasp the module by the right side and lift up to remove ...
Страница 99: ...Chapter 3 89 7 Disconnect the Mic cable and remove the LCD bezel ...
Страница 110: ...100 Chapter 3 4 Replace the ten securing screws and screw caps on the LCD bezel ...
Страница 112: ...102 Chapter 3 3 Connect fan cable to the mainboard as shown ...
Страница 126: ...116 Chapter 3 7 Turn the computer over and replace the ten screws as shown ...
Страница 234: ...224 Appendix B ...
Страница 236: ...226 Appendix C ...
Страница 239: ...www s manuals com ...


