background image

11

ENGLISH

Playback

a

Verify that the VOLUME control is turned fully down, and then turn power to
the E-213 and the other components on. Select the OPTION position of the
input selector. (This position is for the slot where the AD-9 or AD-10 is
installed.)

b

Lower the stylus onto the record and adjust the volume to a suitable level.

c

If the record is notably warped or if there are excessive woofer excursions
caused by turntable rumble, enabling the subsonic filter can help to reduce
noise.

n

n

n

n

n

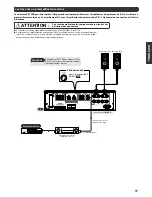
Connect the output cable from the analog record player correctly to
the input jacks on the board. Also connect the ground cable from the
analog record player to the ground (GND) terminal on the board.

Analog Disc Input Board AD-9

This board serves for playback of analog records. It contains a
high-performance, high-gain phono equalizer. The board can be
used with any type of phono cartridge.

m

By installing two of these boards, two different phono cartridges
can be connected at the same time.

LEFT, RIGHT analog record player input jacks

Connect the output cable from the analog record player to these
jacks.

GND terminal

Connect the ground cable from the analog record player to this
terminal.

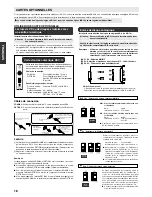
Before inserting the board, the DIP switches must be set
to the required positions.

A

Set the power switch of the E-213 to OFF.

B

On the rear panel, remove the panel covering the option slot.

C

Insert the option board by sliding it into the top and bottom guide rails of
the option board slot. When the board touches the internal connector,
give it a slight push until the board is firmly seated. (The board must be
flush with the panel.)

D

Secure the board with the two screws at the top and bottom.

Guide rail

Guide rail

The illustration shows the
DAC-10.

R

CAUTION

m

Be sure to turn the E-213 OFF before inserting or removing any
option board. Otherwise damage to the board or to the amplifier can
occur.

m

Take care not to touch the components, the printed circuit side, or
the connector edge of the board, to prevent possible contact problems
or damage. Hold the board only by the edges or the rear panel.

m

Be sure to securely fasten the board with the two screws. Otherwise
insufficient grounding may lead to function problems and damage.

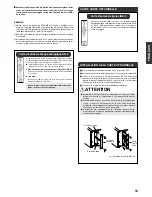
Line Input Board LINE-9

This option board provides an additional set of analog line
inputs that are similar to the INPUTS of the E-213. They can
be used to connect a CD player, tuner, or other component
with analog output.

OTHER OPTION BOARD

OPTION BOARD INSTALLATION

Sub-
panel

Option
board

Содержание E-213

Страница 1: ...INTEGRATED STEREO AMPLIFIER E 213...

Страница 2: ......

Страница 3: ...Remote Sensor VOLUME Volume Control Option Board Slot LINE INPUTS BALANCED Balanced Input connectors RECORDER Recorder REC PLAY Jacks AC Inlet SPEAKERS A B Speaker Terminals COMP Loudness Compensator...

Страница 4: ...hock If there is a problem with the unit or if malfunction occurs always disconnect the power cord from the AC outlet This is absolutely essential because simply setting the power switch to OFF will n...

Страница 5: ...quer des risques de d c s ou de graves blessures corporelles ATTENTION Le non respect des instructions portant ce symbole peut provoquer des risques de blesssures corporelles mineures ou l endommageme...

Страница 6: ...icherheitshinweise 1 m Wechselstrom Netzkabel 2 m 1 m IEC R6 Batterien Gr e AA 2 m Fernbedienung RC 23 1 RWAARSCHUWINGEN Lees de Belangrijke veiligheidsinstructies voor gebruik zorgvuldig door om van...

Страница 7: ...creases This often causes the sound to be perceived as thin or deficient especially in the bass range The COMP switch makes up for this effect by boosting the low range 6 dB at 200 Hz This boost is ap...

Страница 8: ...it Using any other type of cable except the supplied power cord poses the risk of fire and damage m This product is available in versions for 120 230 V AC Make sure that the voltage shown on the rear...

Страница 9: ...esired station adjust the listening level with the VOLUME control Recording and Playback With a Recorder Confirm that the inputs and outputs of the recorder are properly connected to the RECORDER jack...

Страница 10: ...tall the AI2 U1 and AO2 U1 in the DG 38 option slot Set switch on AI2 U1 board to 96 kHz Select E 213 source input with the INPUT SELECTOR Playback With DG 38 Connected The DigitalVoicing Equalizer DG...

Страница 11: ...lly using the internal preamplifier NOTE Left speaker Right speaker To POWER IN jacks Audio cable with RCA type plugs Preamplifier output m Connect the output of the external preamplifier to the POWER...

Страница 12: ...g frequency 32 96 kHz Digital input COAXIAL 0 5 Vp p 75 ohms OPTICAL 27 to 15 dBm A S1 S2 MM MC equalizer gain selection Factory default setting MM For moving magnet cartridges with high output Gain 3...

Страница 13: ...nalog record player to this terminal Before inserting the board the DIP switches must be set to the required positions A Set the power switch of the E 213 to OFF B On the rear panel remove the panel c...

Страница 14: ...batteries will last for about 8 months with normal use When you notice that the effective range of the remote commander decreases you should replace the batteries When the batteries are totally exhaus...

Страница 15: ...es ayant une imp dance nominale de 8 ohms ou plus car les deux paires sont connect es en parall le Cette position est galement utilis e pour le bic blage d une simple paire d enceintes utilisant des c...

Страница 16: ...c bles pour les gammes de fr quences basses et pour les fr quences moyennes hautes POWER IN Prises d entr e de l amplificateur de puissance POWER IN EXT PRE IN Ces prises permettent d utiliser s par m...

Страница 17: ...ssaire l aide de la minuterie sans m me allumer l amplificateur Confirmer que les entr es et sorties de l enregistreur sont connect es correctement aux prises RECORDER du panneau arri re du E 213 Pris...

Страница 18: ...cteur INPUT SELECTOR Lecture avec le DG 38 connect L galiseur num rique DG 38 peut tre connect au E 213 permettant d obtenir une compensation tr s pr cise du champ sonore pendant la lecture de sources...

Страница 19: ...t les autres fonctions de pr am plificateur doivent tre effectu es sur l quipement externe Pr amplficateur externe amplificateur A V etc Composant source Panneau avant S assurer de mettre tous les com...

Страница 20: ...hors circuit m Si un signal appara t l entr e OPTICAL lors de la lecture du signal prove nant de l entr e COAXIAL la lecture sera commut e sur l entr e OPTICAL R glage par d faut B S3 S lecteur d imp...

Страница 21: ...dre le E 213 avant d ins rer ou de retirer une carte optionnelle Autrement la carte ou l amplificateur E 213 risquent d tre endom mag s m Prendre garde ne pas toucher les composants le c t imprim du c...

Страница 22: ...neuves m Utiliser uniquement le type de pile sp cifi et ne pas m langer des piles de marques diff rentes m Retirer les piles si la t l commande ne sera pas utilis e pendant une longue p riode m En cas...

Страница 23: ...h als schwach oder unzureichend wahrgenommen Die COMP Taste gleicht diesen Effekt durch Verst rkung des Niederfrequenzbereiches 6 dB bei 200 Hz aus Diese Verst rkung wird bei der Einstellung 30 dB des...

Страница 24: ...ch Besch digungen verursachen m Dieses Produkt ist in Versionen f r 120 230 V Wechselstrom erh ltlich Vergewissern Sie sich dass die auf der Ger ter ckseite angegebene Spannung den an Ihrem Wohnort he...

Страница 25: ...Sie den gew nschten Sender eingestellt haben stellen Sie die Lautst rke mit dem VOLUME Regler ein Aufnahme und Wiedergabe mit einem Recorder berpr fen Sie dass die Eing nge und Ausg nge des Recorders...

Страница 26: ...eren Sie die AI2 U1 und AO2 U1 im DG 38 Zusatzschlitz Stellen Sie den Schalter auf der AI2 U1 Platine auf 96 kHz W hlen Sie den E 213 Quellen eingang mithilfe des INPUT SELECTOR Wiedergabe mit angesch...

Страница 27: ...des internen Vorver st rkers HINWEIS Linker Lautsprecher Rechter Lautsprecher Zu die POWER IN Buchsen Audiokabel mit Cinch Steckern Vorverst rkerausgang m Schlie en Sie den Ausgang des externen Vorver...

Страница 28: ...h abweichend sein k nnen sollte die letzte Einstellung nach Geh r vorgenommen werden m Der S3 Schalter beeinflusst sowohl den linken als auch den rechten Kanal C S4 S5 Subsonic Filter ein aus Werkseit...

Страница 29: ...s an Vor dem Einstecken der Platine m ssen die DIP Schalter auf die entsprechenden Positionen gebracht werden A Stellen Sie den Netzschalter des E 213 auf OFF B Entfernen Sie die sich auf der Ger ter...

Страница 30: ...vollst ndig aufgebraucht sind bewirkt das Dr cken der Tasten auf der Fernbedienung nichts mehr Bei den Batterien handelt es sich um den Typ IEC R6 Gr e AA Tauschen Sie immer beide Batterien gleichzei...

Страница 31: ...e afneemt Dit heeft dikwijls tot ge volg dat het geluid zwak of onvoldoende overkomt vooral in het bereik van de lage tonen De COMP toets compenseert dit effect door de lage frequenties te versterken...

Страница 32: ...n van de behuizing van het toestel kan ernstig schokgevaar opleveren m Wanneer het toestel niet functioneert kan een zekering gesmolten zijn Probeer de zekering nooit zelf te vervangen Neem contact op...

Страница 33: ...s uit Stel het luisterniveau in met behulp van de VOLUME regelaar nadat u op de gewenste zender heeft afgestemd Opname en weergave met een recorder Controleer of de in en uitgangen van de recorder goe...

Страница 34: ...talleer de AI2 U1 en de AO2 U1 in de optiegleuf van de DG 38 Zet de schakelaar van de AI2 U1 kaart op 96 kHz Kies de geluidsbron met de INPUT SELECTOR van de E 213 Weergave wanneer de DG 38 is aangesl...

Страница 35: ...vermogensversterkergedeelte van de E 213 gebruikt De voorversterker is nu inactief Veranderen van geluidsbron instellen van het volume en andere voorversterkerfuncties moeten via het externe component...

Страница 36: ...ment Omdat er echter per element nogal wat verschil len optreden moet de uiteindelijke instelling op het gehoor worden gedaan m De S3 schakelaar be nvloedt het linker n het rechterkanaal C S4 S5 Subso...

Страница 37: ...gen Aarde aansluiting GND Sluit de aardedraad van de analoge platenspeler aan op deze aansluiting V r de kaart wordt ingestoken moeten de DIP schake laars in de gewenste stand worden gezet A Zet de ne...

Страница 38: ...atterijen gaan bij normaal gebruik ongeveer 8 maanden mee Wanneer u merkt dat het werkingsbereik van de afstandsbediening afneemt moet u de batterijen vervangen Wanneer de batterijen volledig leeg zij...

Страница 39: ...catore riproduce la sorgente del programma selezionato e il segnale viene inviato alle uscite REC PLAY Selezionate questa posizione per riprodurre il segnale di un registratore colle gato agli ingress...

Страница 40: ...si cambia l impostazione del selettore EXT PRE ON OFF quando si cambiano le sorgenti di programma e quando si attiva disattiva l unit il comando del volume dovrebbe sempre essere com pletamente verso...

Страница 41: ...olate il livello di ascolto con il comando VOLUME Registrazione e riproduzione con un registratore Accertatevi che gli ingressi e le uscite del registratore siano collegati in maniera corretta alle pr...

Страница 42: ...la fessura opzionale del DG 38 Impostate l interruttore della scheda AI2 U1 su 96 kHz Selezionate la sorgente di ingresso E 213 con l INPUT SELECTOR Riproduzione con il DG 38 collegato Potete collegar...

Страница 43: ...tore interno NOTA Altoparlante sinistro Altoparlante destro Alle prese POWER IN Cavo audio con le spine di tipo RCA Uscita del preamplificatore Preamplificatore esterno amplificatore A V ecc Component...

Страница 44: ...tuccia Tuttavia poich i requisiti di alcune cartucce possono essere diversi l impostazione finale va determinata a orecchio m L interruttore S3 influisce sui canali sinistro e destro C S4 S5 Accension...

Страница 45: ...ie di ingressi analogici di linea simili agli ingressi INPUTS dell E 213 Possono essere usati per collegare un lettore CD un sin tonizzatore o un altro componente dotato di un uscita analo gica Riprod...

Страница 46: ...ll esaurimento il raggio d azione del telecomando diminuisce ed necessario sostituire le batterie Quando le batterie sono completamente scariche i pulsanti non hanno alcun effetto Il telecomando utili...

Страница 47: ...ut shorted A weighting EIA S N S N ratio at rated output HIGH LEVEL INPUT 110 dB 81 dB BALANCED INPUT 92 dB 81 dB POWER INPUT 123 dB 100 dB Power Level Meters Logarithmic compression peak reading mete...

Страница 48: ...0 2 4 6 8 10 12 14 16 18 1 WATT OUTPUT VOLUME CONTROL at MAX Frequency Response 8 ohm load stereo 1 W Tone Control Characteristics Response in dB 18 16 14 12 10 8 6 4 2 0 2 4 6 Frequency in Hz 0 dB Vo...

Страница 49: ...HANNEL SPEAKER POWER SWITCH TIME LAG FUSE INPUT RELAY DRIVER INPUT INDICATOR DRIVER MOTOR DRIVER POWER ON DETECTOR MEMORY RECORDER INPUT SELECTOR INFRARED RECEIVER MICROPROCESSOR REGULATOR To BALANCED...

Страница 50: ...PRINTED IN JAPAN 820 3230 00 K1 C053X 2 14 10 SHIN ISHIKAWA AOBA KU YOKOHAMA 225 8508 Japan...

Отзывы: