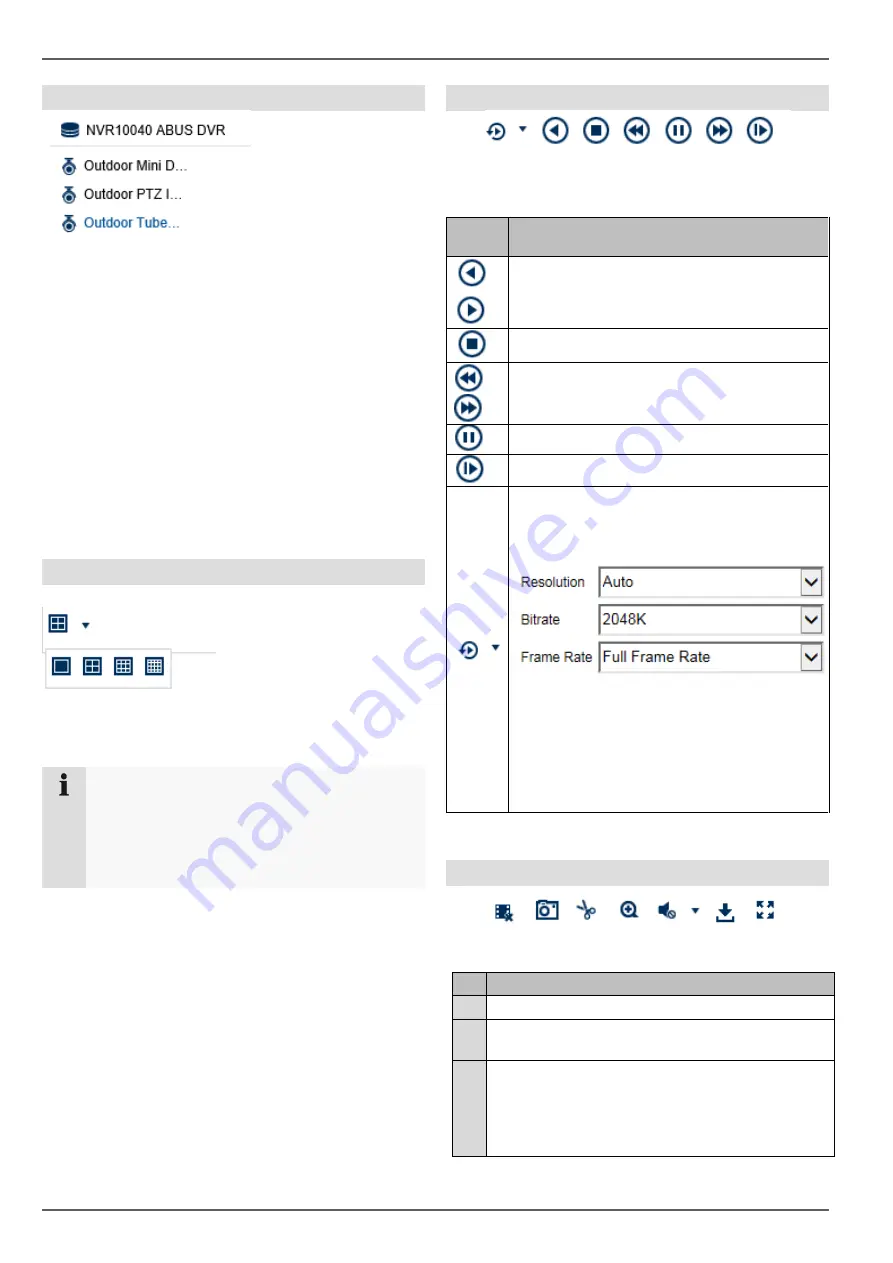
Playback view
18
Using the archive list
The archive list contains the recordings of all cameras
connected to the recorder. Double-clicking an archive
name displays the corresponding camera archive in the
playback view and plays it directly.
To display the camera archive at a specific position on
the screen (multi-view), proceed as follows:
1. Select the position in the playback view (red
frame).
2. Double-click the desired camera archive in the
archive list.
3. The image is displayed at the desired position.
Using the view bar
Configure the playback panel distribution (number of
camera archives which can displayed at the same time).
Note
The more camera archives playing at the same
time, the more data that is transferred via the net-
work. Since the data is generally always recorded
in the best possible quality, this may result in a
large upload for a remote connection.
Using the playback controls
The playback controls are the core element of playback.
The basic functions for playing recorded data are pro-
vided here.
Using the action bar
(1) (2) (3) (4) (5) (6) (7)
No. Meaning of the symbol
(1) Stop all active playback
(2)
Create a snapshot of the selected camera (red
frame)
(3)
Create a manual data export (video clip)
First, click the symbol to set the start time for the
export. Click again to set the end time. A video clip
file is then exported to your PC. The length of the
clip is based on the duration of the played data.
Ac-
tion
Meaning of the symbol
Reverse play
Forward play
Stop
Go forward in slow-motion (8x
→
1x)
Fast forward (1x
→
8x)
Pause
Single frame play
Activate transcoded playback.
Set the resolution, bit rate and frame rate
here.
When this function is activated, the recorder
scales down the recorded video material in
real time to suit a lower resolution/bit
rate/frame rate. Click the icon again to stop
transcoded playback for the selected camera.


