background image

Warranty Terms

By purchasing and using your Absima product, you agree to the warranty terms of Absima GmbH.

The warranty applies only to material and/or functional defects already present at the time of purchase of the product.

Excluded from the guarantee:

• 

Damage caused by incorrect use

• 

Damage due to neglect of duty of care

• 

Damage due to improper handling and maintenance errors

• 

Fluid damages

Please report warranty claims to your dealer.


If it is necessary to return your product, please enclose your proof of purchase and a detailed description of the fault 

with the shipment. We also need your complete contact details (legible). 

The direct sending to the service department of Absima GmbH requires the previous arrangement. This can be done 

by telephone under +49 911 65084130 or by e-mail to [email protected] 

The shipping costs are borne by the sender. Parcels that are not free of charge or are subject to charges will not be 

accepted.

Each incoming warranty case is first checked by our service department for admissibility. Complaints that are not 

covered by the warranty may incur costs for the inspection. Repairs or services that are not covered by the warranty 

will be charged in advance.

Disclaimer

Since Absima GmbH cannot at any time monitor the observance of the operating instructions as well as the operation 

and conditions of use of the product, Absima GmbH does not assume any liability for damages, costs, losses resulting 

from incorrect handling and/or incorrect operation or in any way related thereto. To the extent permitted by law, the 

obligation to pay damages, for whatever legal reason, will be limited to the invoice value of the Absima product 

involved in the event. This does not apply as far as we have to assume unlimited liability due to mandatory legal 

regulations or gross negligence.

Declaration of conformity

The manufacturer hereby declares that the product complies with the essential requirements and other relevant 

provisions of the EU Directive.

The declaration of conformity can be found at 

http://absima.com/index.php/downloads/erklaerungen/ 

or can be consulted under 

Absima GmbH - Gibitzenhofstrasse 127a/RG - 90443 Nuremberg, Germany

can be requested.

Disposal

Waste electronic equipment is a raw material and should not be disposed of with household waste. If the product is at 

the end of its service life, dispose of it at your local collection points in accordance with the applicable legal regulations. 

Disposal with household waste or at the expense of the environment is prohibited.

Important! Remove the batteries or rechargeable batteries before disposal. A separate take-back system applies to 

batteries and rechargeable batteries. 

By properly disposing of your old appliances, you make an important contribution to environmental protection.


Absima GmbH

Gibitzenhofstrasse 127 a / RG

90443 Nürberg , Germany

Phone: +49 911 65084130 / Fax: +49 911 65084140

www.absima.com

Technical changes, design and equipment subject to change without notice.

Содержание CR6S

Страница 1: ...14 This product is only for 14 years old or above WARNING ...

Страница 2: ...riebnahme einem sorgfältigen Funktions und Reichweitentest zu unterziehen Nehmen Sie das Gerät bzw Modell nicht in Betrieb wenn die Funktionalität beeinträchtigt scheint Absima übernimmt für Fremdfabrikate keinerlei Verantwortung oder und Haftung Konfigurieren Sie ein neues Modell mit der nötigen Sorgfalt und in Ruhe Stellen Sie sicher dass der Antrieb des Modells nicht ungewollt anlaufen kann Übe...

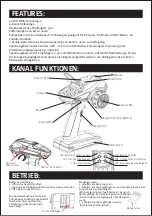
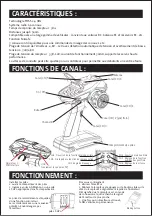
Страница 3: ...H1 Lenkeinschlag CH2 Reverse Funktion CH2 Trim Funktion Gas Bremse CH2 Einstellung Geschwindigkeit Kanal CH 5 Kanal CH 6 Antenne Kanal CH 1 Kanal CH 2 Gas Bremse Kanal CH 3 Batteriefach Kanal CH 4 An Aus Simulator PPM interface USB nur bis 5V MAX BETRIEB Batterien installieren 1 Öffnen Sie das Batteriefach 2 Legen Sie 4x AA Mignon Batterien oder einen passenden 2S LiPo Akku in das Fach ein Die Ans...

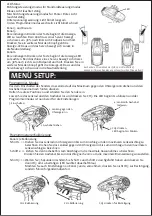
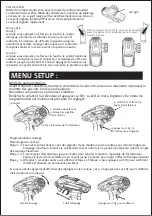
Страница 4: ...ositionen und schalten Sie den Sender ein Lassen Sie das Lenkrad und den Gashebel los und drücken Sie CH3 Die LED beginnt zu blinken und der Programmiermodus ist nun bereit für die Einstellungen 1 Lenken gegen den Uhrzeigersinn 2 Gashebel ziehen 4 Lenkrad Gashebel loslassen 3 Einschalten 5 CH3 drücken LED beginnt zu blinken Kanal 1 2 Kalibrierung Schritt 1 Drehen Sie das Lenkrad im Uhrzeigersinn b...

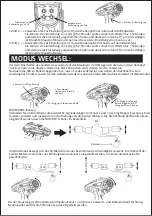
Страница 5: ...en kann eingestellt werden durch die NOR REV Schalter im Bedienfeld Im Mix Modus bewegt sich das RC Modell mit einer bestimmten Geschwindigkeit vorwärts Die Drehzahl der beiden Motoren kann über das Richtungsrad von Kanal 1 eingestellt werden um einen Geradeauslauf zu gewährleisten Bei der Steuerung des Mix Modus durchlaufen Kanal 1 und Kanal 2 Vorwärts und Rückwärtslauf Richtung Neutralpunkt und ...

Страница 6: ...Absima GmbH überwacht werden kann übernimmt die Absima GmbH keinerlei Haftung für Schäden Kosten Verluste die sich aus falscher Handhabung und oder fehlerhaften Betrieb ergeben oder in irgendeiner Weise damit zusammenhängen Soweit gesetzlich zugelassen wird die Verpflichtung zur Schadensersatzleistung aus welchen rechtlichen Begründungen auch immer auf den Rechnungswert des am Ereignis beteiligten...

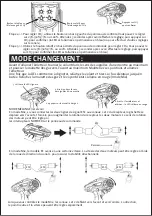
Страница 7: ...l appareil ou le modèle si son fonctionnement semble compromis Absima n assume aucune responsabilité pour les produits de tiers Configurez un nouveau modèle avec le soin et la tranquillité d esprit nécessaires Veillez à ce que l entraînement du modèle ne puisse pas démarrer involontairement Vérifier toutes les fonctions Familiarisez vous avec le fonctionnement de l émetteur avant de mettre le modè...

Страница 8: ...ion CH1 Angle de braquage CH2 Fonction marche arrière CH2 Réglage de la fonction papillon des gaz frein CH2 Réglage de la vitesse Canal CH 5 Canal CH 6 Antenne Canal CH 1 Canal CH 2 gaz frein Canal CH 3 Compartiment des piles Channel 4 On Off Simulateur PPM Interface USB seulement jusqu à max 5V FONCTIONNEMENT Installez les piles 1 ouvrir le compartiment des piles 2 Insérez 4x piles AA Mignon ou u...

Страница 9: ... calculer l angle de braquage maximum Étape 2 Tirez le levier d accélérateur jusqu en butée pour calculer la réponse maximale de l accélérateur Poussez le levier de l accélérateur vers l avant jusqu à la butée pour régler l effet de freinage maximal Étape 3 Attendez 3 secondes après avoir effectué l étape 1 et l étape 2 puis appuyez sur CH3 pour confirmer la DEL est allumée en permanence en bleu S...

Страница 10: ...lage puis appuyez sur CH3 pour confirmer la LED est allumée en permanence en bleu Bouton rotatif pour l étalonnage du CH3 Bouton rotatif pour l étalonnage du CH4 Appuyez sur CH3 pour confirmer 1 appuyer sur la manette des gaz 2 direction dans le sens des aiguilles d une montre 4 tirez sur l accélérateur et relâchez la LED s allume en rouge 3 s allume la LED clignote En mode Mix le modèle RC avance...

Страница 11: ...d une mauvaise manipulation et ou d une mauvaise utilisation ou de toute autre manière y étant liée Dans la mesure permise par la loi l obligation de payer des dommages intérêts pour quelque raison légale que ce soit sera limitée à la valeur de la facture du produit Absima impliqué dans l événement Ceci ne s applique pas dans la mesure où nous devons assumer une responsabilité illimitée en raison ...

Страница 12: ...l function and range test before commissioning Do not operate the device or model if its functionality appears to be impaired Absima assumes no responsibility and or liability for third party products Configure a new model with the necessary care and peace of mind Make sure that the drive of the model cannot start unintentionally Check all functions Familiarize yourself fully with the operation of...

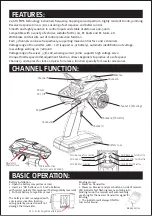
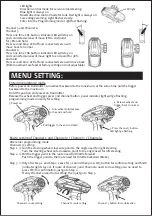
Страница 13: ...or Crawler accessories FEATURES CHANNEL FUNCTION CH1 Reverse for steering CH1 Sub trim for steering CH1 EPA for steering CH2 Reverse for throttle CH2 Sub trim for throttle CH2 EPA for throttle Channel 5 Channel 6 Antenna Channel 1 Steering Channel 2 Throttle Channel 3 Battery case Channel 4 Power On Off Simulator PPM interface USB Connection only for up to 5V MAX BASIC OPERATION Battery installati...

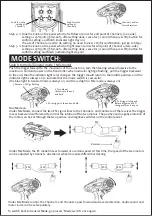
Страница 14: ...mitter Release the wheel and trigger press 3nd channel button panel indicator light will go flashing programming mode on ready for setting 1 Turn wheel anticlockwise to the end and hold 2 Pull trigger to the end and hold 4 Release wheel and trigger back to normal 3 Power on 5 Press Channel 3 button LED light go flashing After enter programming mode Channel 1 2 setting Step 1 Turn the steering whee...

Страница 15: ...tting as 25 50 75 100 after setting done cease for 3 second then press CH3 button for confirm setting and finish indicator light stay on knob for route setting of Channel 3 knob for route setting of Channel 4 Channel 3 button for confirmation 1 Push trigger to the end and hold 2 Turn wheel clockwise to the end and hold 4 Pull trigger to the end Relase trigger and LED change color and stay on 3 Pow...

Страница 16: ...ssume any liability for damages costs losses resulting from incorrect handling and or incorrect operation or in any way related thereto To the extent permitted by law the obligation to pay damages for whatever legal reason will be limited to the invoice value of the Absima product involved in the event This does not apply as far as we have to assume unlimited liability due to mandatory legal regul...

Отзывы: