background image

C-2 

Appendix C 

NV7m Motherboard 


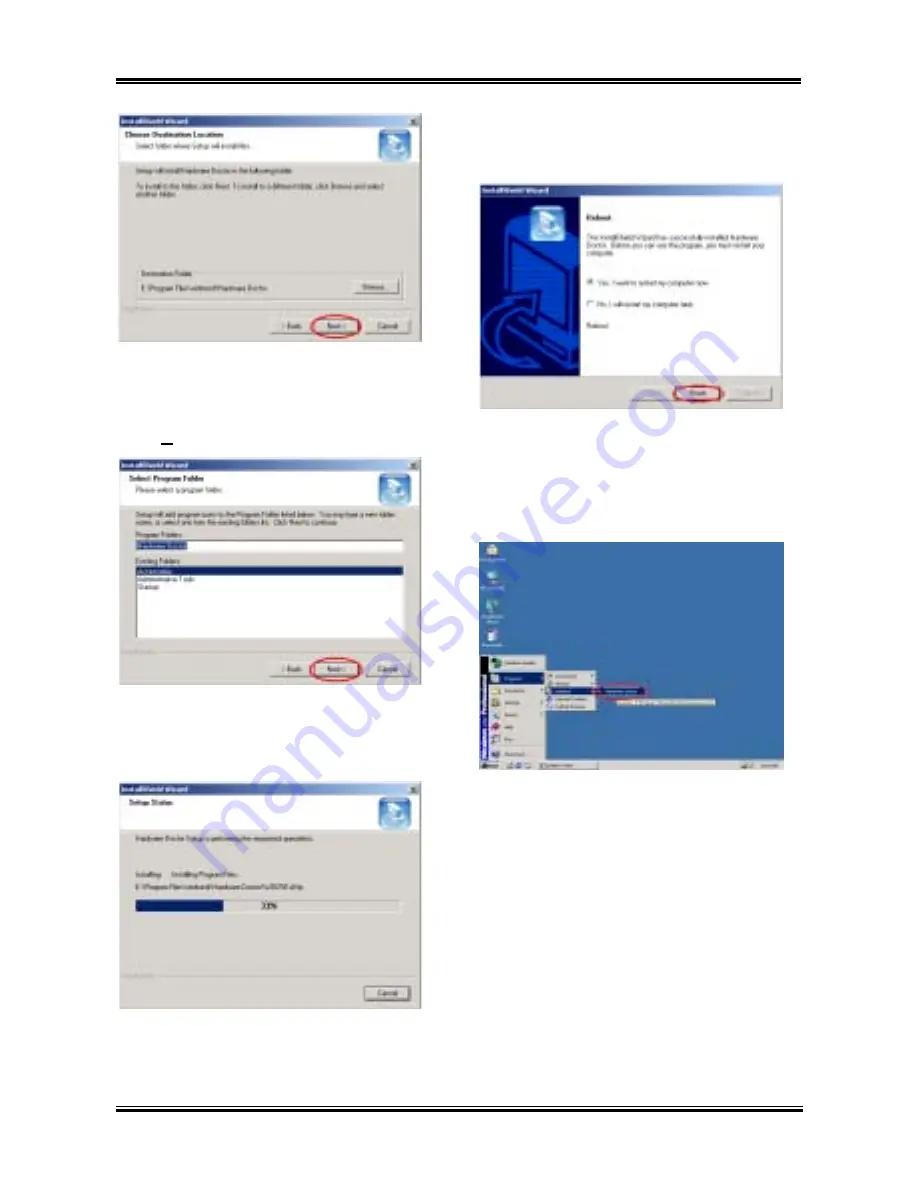
Step 5:

 Now you can choose the destination 

location where you want to install the drivers. 
We suggest that you use the default folder as the 
destination location. After checking the folder 
click “

Next>

” button.


Step 6:

 You can choose the name of the program 

folder. We suggest you use the default program 
folder name. After checking the program folder 
name then click “

Next>

” button. 


Step 7:

 Program will start to install drivers the 

system needs. The installer will show the install 
progress percentage. 


Step 8: 

When the installation is complete, the 

installer will ask you to restart your computer. 
We suggest that you choose “

Yes, I want to 

restart my computer now.

” then click the 

Finish

” button to restart your computer to finish 

the driver update.


Step 9: 

You can select the program from Start 

toolbar, and then choose “

Programs

”. You will 

see the item called “

winbond


*

 “

Hardware 

Doctor

”. Click it, and you will be able to see the 

screen below.


Содержание NV7M

Страница 1: ...cidental or consequential damages arising from any defect or error in this manual or product Product names appearing in this manual are for identification purpose only and trademarks and product names or brand names appearing in this document are the property of their respective owners This document contains materials protected under International Copyright Laws All rights reserved No part of this...

Страница 2: ......

Страница 3: ...DVANCED BIOS FEATURES SETUP MENU 3 6 3 3 ADVANCED CHIPSET FEATURES SETUP MENU 3 8 3 4 INTEGRATED PERIPHERALS 3 10 3 5 POWER MANAGEMENT SETUP MENU 3 14 3 6 PNP PCI CONFIGURATIONS SETUP MENU 3 17 3 7 PC HEALTH STATUS 3 20 3 8 LOAD FAIL SAFE DEFAULTS 3 21 3 9 LOAD OPTIMIZED DEFAULTS 3 21 3 10 SET SUPERVISOR PASSWORD 3 21 3 11 SET USER PASSWORD 3 21 3 12 SAVE EXIT SETUP 3 22 3 13 EXIT WITHOUT SAVING 3...

Страница 4: ...NV7m Motherboard ...

Страница 5: ...ing Ultra DMA 33 technology by increasing both performance and data integrity This new high speed interface almost doubles the Ultra DMA 66 burst data transfer rate to 100 Mbytes sec The result is maximum disc performance using the current PCI local bus environment Another benefit is you can connect four IDE devices in your system through either Ultra DMA 66 or Ultra DMA 100 You will have more fle...

Страница 6: ...Audio nVIDIA MCP 1 built in Audio processing unit w 256 total voices Support AC3 encode purpose Professional digital audio interface supporting SPDIF out Optional AC 97 Audio CODEC onboard Audio driver included 6 LAN Onboard Realtek 8201L physical layer interface 10 100 Mb Operation User friendly driver included 7 System BIOS Award Plug and Play BIOS supports APM and DMI Write Protect Anti Virus f...

Страница 7: ... speeds of 66 MHz 100 MHz 133 MHz that are used by specific PCI processor and chipset specifications Exceeding these standard bus speeds is not guaranteed due to the specific component specifications Specifications and information contained in this manual are subject to change without notice Note All brand names and trademarks are the property of their respective owners 1 3 Item Checklist Check th...

Страница 8: ...Chapter 1 NV7m Motherboard 1 4 1 4 Layout Diagram for NV7m Figure 1 1 NV7m motherboard component location ...

Страница 9: ...ember to turn the ATX power supply switch off fully turn the 5V standby power off or take the power cord off Otherwise you may cause the motherboard components or add on cards to malfunction or be damaged User Friendly Instructions Please read our instructions carefully and follow them step by step Our objective is to enable the novice computer user to perform the installation by himself We have a...

Страница 10: ...cket you can easily fix the processor firmly into position Figure 2 1 shows you what the socket A looks like and how to open the lever The socket A has more pins than the socket 7 Therefore a Pentium level processor cannot be inserted into a socket A When you raise the lever you have to loosen the socket lock Please raise the lever to the end and prepare to insert the processor Next you need to al...

Страница 11: ... and cause circuit damage break socket hooks or damage the die on the top of processor Please follow the sequence metioned below Do Not inverse the sequence Otherwise you may have a situation like the photo on the left Because of the design of the CPU socket the left side hooks are not as strong as the right side hooks If you follow our suggestions you will prevent your processor and socket from d...

Страница 12: ...e motherboard back into the chassis When all above procedures done you can connect the ATX power cable to the motherboard If you have different types of heatsink kit please refer to the manual that came with the heatsink kit The left photo shows another type of heatsink fix plate design The install sequences are still the same from right side to left side Just remember that We strongly recommand y...

Страница 13: ... up and there are only slots this means you can only attach the motherboard with spacers Take the tip of the spacers and insert them into the slots After doing this to all the slots you can slide the motherboard into position aligned with the slots After the motherboard has been positioned check to make sure everything is OK before putting the casing back on Figure 2 4 shows you the way to affix t...

Страница 14: ...stalling DDR SDRAM modules to your motherboard is an easy thing to do You can refer to Figure 2 5 to see what a 184 pin PC 1600 and PC 2100 DDR SDRAM module looks like Unlike installing SIMMs DIMMs may be snapped directly into the socket Note Certain DDR DIMM sockets have minor physical differences If your module doesn t seem to fit please do not force it into the socket as you may damaged your me...

Страница 15: ...will show you all of the connectors headers and switches here and tell you how to connect them Please pay attention and read the entire section for necessary information before attempting to finish all of the hardware installation inside the computer chassis Figure 2 7 shows you all of the connectors and headers that we ll discuss in the next section you can use this diagram to visually locate eac...

Страница 16: ...We will show you all the connectors and headers 1 ATXPWR1 ATX Power Input Connector Attach the connector from the power supply to the ATXPWR1 connector here Remember you have to push the connector from the ATX power supply firmly to the end with the ATXPWR1 connector insuring that you have a good connection Note Watch the pin position and the orientation ...

Страница 17: ...g a voltage meter you will find that the live wire slot will register a higher voltage If you reverse the polarity of AC plug it may affect the life of computer equipment or cause an electric shock when you touch the computer chassis We suggest that you plug the computer AC plug to a three hole wall outlet for better safety and to avoid electric shock 2 CPUFAN1 CHAFAN1 PWRFAN1 and EXTFAN1 headers ...

Страница 18: ...us Connectors This connector is reserved for the system management bus SM Bus The SM Bus is a specific implementation of an I 2 C bus I 2 C is a multi master bus this means that multiple chips can be connected to the same bus and each one can act as a master by initiating a data transfer If more than one master simultaneously tries to control the bus an arbitration procedure decides which master g...

Страница 19: ...dings in the BIOS or in the hardware monitoring application main screen 6 USB1 Headers Additional USB Plugs Header This header is for connecting the additional USB port plugs This connector can provides two additional USB plugs Which means total you can get two additional USB plugs You can use the special USB port expansion cable to connect it the cable come with the metal plate can fixed on the b...

Страница 20: ...ult position After that you can reboot your system and ensure that your system is working fine 8 FPIO1 Headers The Headers for Chassis s Front Panel Indicators and Switches FPIO1 are for switches and indicators for the chassis s front panel there are several functions that come from this header You have to watch the pin position and the orientation or you may cause LED do not light up Figure below...

Страница 21: ...ED Headers There is a specific orientation for pins 1 through 3 Insert the three threaded power on LED cable to this header Check to make sure the correct pins go to the correct connectors on the motherboard If you install them in the wrong direction the power LED light will not illuminate correctly Note Watch the power LED pin position and orientation For the PN1 and PN2 pin s count name list ple...

Страница 22: ... use This option can let you output the digital SPDIF signal to the external decode equipment This function is optional 10 JP8 Header Processor FSB Frequency Setting Header Jumper JP8 used to select processor FSB frequency The default setting is 100 MHz pin 2 and 3 shorted Please accord your processor FSB speed to set correct FSB frequency ...

Страница 23: ... 1 44M 3 5 or 2 88M 3 5 floppy disk drive A floppy disk drive ribbon cable has 34 wires and two connectors to provide the connection of two floppy disk drives After connecting the single end to the FDD1 connect the two connectors on the other end to the floppy disk drives In general people only install one floppy disk drive on their computer system Note A red mark on a wire typically designates th...

Страница 24: ...efer to the HDD documentation for jumper settings The first drive connected to IDE1 is usually referred to as Primary Master and the second drive as Primary Slave The first drive connected to IDE2 is referred to as Secondary Master and the second drive as Secondary Slave Keep away from connecting one legacy slow speed device like CD ROM together with another hard disk drive on the same IDE channel...

Страница 25: ...a PS 2 mouse to this 6 pin Din connector 16 Serial Port COM1 Connector This motherboard provides one COM port you can connect an external modem mouse or other devices that support this communication protocol to these connectors You can decide which external devices you want to connect to COM1 The COM port can only have one device connected at a time 17 VGA Port VGA1 Connector This motherboard had ...

Страница 26: ...e green LED shows the connection situation If the network active well this LED will light on The yellow LED shows if the data is active or not If the computer is translating or receiving data from the network this LED will flicker 21 Line Out Line In and Mic In Connector Line Out connector You can connect an external stereo speaker signal input plug to this connector or you can connect the plug fr...

Страница 27: ...ual 2 19 Note This chapter contains many color drawing diagram and photos we strongly recommend you to read this chapter use the PDF file we gave you that store in the CD Title It will provide you the better look and clearly color identify ...

Страница 28: ...Chapter 2 NV7m Motherboard 2 20 ...

Страница 29: ... not be able to boot the computer after it has crashed We recommend that you do not change the parameters inside the BIOS unless you are very familiar with them If you are not able to boot your computer anymore please refer to the section CCMOS1 Header in Chapter 2 to see how to discharge the CMOS date When you start the computer the BIOS program controls it The BIOS first operates an auto diagnos...

Страница 30: ...he screenshot may not same as you see on your screen because the BIOS version may change periodically However most of the functions covered in this manual will work We suggest that you go to our WEB site often to see if there are new manual releases Then you can check the newly updated BIOS items Computer Knowledge CMOS Data Maybe you have heard somebody saying that his or her CMOS DATA was lost W...

Страница 31: ... 2A Standard CMOS Features Screen Shot Date mm dd yy You can set the date in this item month mm date dd and year yy Time hh mm ss You can set the time in this item hour hh minute mm and second ss IDE Primary Master Slave and IDE Secondary Master Slave These items have a sub menu to let you choose further options You can refer to figure 3 3B to check what options are available Figure 3 2B IDE Prima...

Страница 32: ...t HDDs with capacities no bigger than 528MB any hard disk with more than 528MB was unusable AWARD BIOS features a solution to this problem you can according to your operating system choose four operating modes CHS LBA Large Auto The HDD auto detection option in the sub menu will automatically detect the parameters of your hard disk and the mode supported CHS Normal mode Standard normal mode suppor...

Страница 33: ...r you can enter is 65536 Warning Setting a value of 65536 means no hard disk exists Landing Zone This is a non data area on the disk s inner cylinder where the heads can rest when the power is turned off The minimum number you can enter is 0 the maximum number you can enter is 65536 Sector The minimum segment of track length that can be assigned to stored data Sectors usually are grouped into bloc...

Страница 34: ...e your system memory list in the lower right box it shows the Base Memory Extended Memory and total Memory size configurations in your system It is detected by the system during boot up procedure 3 2 Advanced BIOS Features Setup Menu In each item you can press Enter at any time to display all the options for this item Attention Advanced BIOS Features Setup Menu has already been set for maximum ope...

Страница 35: ...s Enabled This setting allows the BIOS to try to boot devices other than the three which are listed in the above First Second and Third Boot Devices If you set to Disabled the BIOS will boot from only the three kinds of boot devices that are set above Swap Floppy Drive This item can be set as Disabled or Enabled The default setting is Disabled When this feature is enabled you don t need to open th...

Страница 36: ...rd If you forget the password you will have to open the computer case and clear all information in the CMOS before you can start up the system But by doing this you will have to reset all previously set options 3 3 Advanced Chipset Features Setup Menu The Chipset Features Setup Menu is used to modify the contents of the buffers in the chipset on the motherboard Since the parameters of the buffers ...

Страница 37: ...or Memory Timings Two options are available Aggressive Optimal The default setting is Optimal Choose Aggressive for better memory performance choose Optimal for better memory compability CAS Latency Override Three options are available 2 Clocks 2 5 Clocks Auto The default setting is 2 5 Clocks You can select SDRAM CAS Column Address Strobe latency time according your SDRAM specification Clock Spre...

Страница 38: ...Shot This item can let you sets several items concerning the SIS OnChip IDE device parameters Onboard IDE 1 Controller The onboard IDE 1 controller can be set as Enabled or Disabled The default setting is Enabled Of course you can disable this item as well The enable items will show as white color and disabled items will show blue green color Master Drive PIO Mode Auto The BIOS can auto detect the...

Страница 39: ...d Auto When you select Auto the system automatically determines the optimal data transfer rate for each IDE device Default This field does not available to enter when the Onboard IDE 1 Controller field is Disabled Onboard IDE 2 Controller The onboard IDE 2 controller can be set as Enabled or Disabled Description is the same as the item Onboard IDE 1 Controller You can refer the above description P...

Страница 40: ...98 The default setting is Enabled KB Power ON Password This item let you set the password for keypad wakeup After you set the password any event affecting keypad will awaken a system that has powered down Hot Key Power ON Twelve options are available Ctrl F1 Ctrl F2 Ctrl F3 Ctrl F4 Ctrl F5 Ctrl F6 Ctrl F7 Ctrl F8 Ctrl F9 Ctrl F10 Ctrl F11 Ctrl F12 The default setting is Ctrl F1 Onboard FDD Control...

Страница 41: ...should set it to No Yes in order to match the transfer and receiving speed If you fail to do so you will not get an IR connection between the NV7m and the other computer Onboard Parallel Port Four options are available Disabled 378 IRQ7 278 IRQ5 3BC IRQ7 The default setting is 378 IRQ7 Select a logical LPT port name and matching address for the physical parallel printer port Parallel Port Mode Fiv...

Страница 42: ...n this mode the Power Management Program will control the access to video parallel ports serial ports and drives and the operating status of the keyboard mouse and other device These are referred to as Power Management Events In cases where none of these events occur the system enters the power saving mode When one of the controlled events occurs the system immediately returns to normal mode and o...

Страница 43: ...acpihtml home htm Note If you enable the ACPI function in the BIOS setup the SMI function will not work ACPI requires an ACPI aware operating system ACPI features include Plug and Play including bus and device enumeration and APM functionality normally contained in the BIOS Power management control of individual devices add in cards some add in cards may require an ACPI aware driver video displays...

Страница 44: ... sleeping state its behavior is as described below The processor is not executing instructions The processor s complex context is maintained Dynamic RAM context is maintained Power Resources are in a state compatible with the system S1 state All Power Resources that supply a System Level reference of S0 are in the OFF state Devices states are compatible with the current Power Resource states Only ...

Страница 45: ...ns as required to exit an S3 state and passes control to the firmware resume vector Please see the ACPI Specification Rev 1 0 book section 9 3 2 for more details on BIOS initialization From the software point of view this state is functionally the same as the S2 state The operational difference can be that some Power Resources that could be left ON in the S2 state might not be available to the S3 ...

Страница 46: ...interrupt as one of the following types depending on the type of device using the interrupt Legacy devices compliant with the original PC AT bus specification require a specific interrupt such as IRQ4 for serial port 1 PCI PnP devices comply with the Plug and Play standard whether designed for the PCI or legacy bus architecture Two options are available Auto ESCD or Manual The default setting is A...

Страница 47: ...n options are available 8K 16K 32K 64K The default setting is 8K This item can let you select a base address and length for the memory area used by any peripheral that requires high memory Note PCI slot 1 shares IRQ signals with the AGP slot If you want to install two PCI cards into those PCI slots that share IRQ with one another at the same time you must make sure that your OS and PCI devices dri...

Страница 48: ...ocessor temperature exceeds the settings value the system will give you an alarm message or sound to remind you that the processor is overheating All Voltages Fans Speed and Thermal Monitoring These items list the current states of the processor and environment using RT1 and RT2 to detect them temperatures as well as fan speeds processor fan and chassis fan It cann t be changed by the user The fol...

Страница 49: ...s of the setup menus 3 11 Set User Password Set Password Can enter but do not have the right to change the options of the setup menus When you select this function the following message will appear at the center of the screen to assist you in creating a password ENTER PASSWORD Type the password up to eight characters in length and press Enter The password typed now will clear any previously entere...

Страница 50: ...red both at boot and at entry to Setup If you set to Setup prompting only occurs when trying to enter Setup 3 12 Save Exit Setup Pressing Enter on this item asks for confirmation Save to CMOS and EXIT Y N Y Pressing Y stores the selections made in the menus in CMOS a special section of memory that stays on after you turn your system off The next time you boot your computer the BIOS configures your...

Страница 51: ...2 SP2 or latest service pack to get the best system performance You can download SP2 at Microsoft WEB site Note Details of the Windows 2000 operating system will not be mentioned in this manual If you have any problems with Windows 2000 installation operations or settings please refer to your Windows 2000 user s manual or other databases provided by Microsoft Corporation Insert the nForce series C...

Страница 52: ...happened the version may different with this picture but the install process won t be change at all Step 5 the Digital Signature Not Found screen show up click Yes to go on Step 6 When the installation is complete the installer will ask you to restart your computer We suggest that you choose Yes I want to restart my computer now then click the Finish button to restart your computer to finish the d...

Страница 53: ... s Manual A 3 nForce Audio click Finish to go on Step 9 System will ask you to restart your computer We suggest that you choose Yes to restart your computer Step 10 When OS restart you can then check the Device Manager to see that the devices are properly installed ...

Страница 54: ...Appendix A NV7m Motherboard A 4 ...

Страница 55: ...m and use it Insert the nForce series CD into your CD ROM drive It should execute the program automatically If not you can go to the CD location and execute the execution file from the main directory of this CD After it is executed you will see the screen below Step 1 Click NVIDIA VGA Driver button Step 2 The nForce driver setup InstallShield wizard shows up and it will go to the next screen for a...

Страница 56: ...l ask you to restart your computer We suggest that you choose Yes I want to restart my computer now then click the Finish button to restart your computer to finish the driver update Step 6 When OS restart you can then check the Device Manager to see that the VGA device are properly installed ...

Страница 57: ...p and remind the user to take proper measures The following description will tell you how to install the Winbond hardware monitor system and use it Insert the nForce series CD into your CD ROM drive It should execute the program automatically If not you can go to the CD location and execute the execution file from the main directory of this CD After it is executed you will see the screen below Ste...

Страница 58: ...er name then click Next button Step 7 Program will start to install drivers the system needs The installer will show the install progress percentage Step 8 When the installation is complete the installer will ask you to restart your computer We suggest that you choose Yes I want to restart my computer now then click the Finish button to restart your computer to finish the driver update Step 9 You ...

Страница 59: ...ser s Manual Step 10 This screen shows the hardware monitor system screen It shows information about system temperature voltages and fan speed Some items can let you set the warning range you can optimize values by setting them in accordance your system ...

Страница 60: ...C 4 Appendix C NV7m Motherboard ...

Страница 61: ...You can find it on one slot or at the back of the motherboard Each motherboard always has the label at the same place as shown in the photo below You will find the model name and version on the white sticker 2 Know the current BIOS ID For example in this case the current BIOS ID is 00 If you already have the latest BIOS no any update action is necessary If your BIOS is not the latest BIOS go on to...

Страница 62: ...e Go to our Web site and choose the correct BIOS file and download it 4 Double click the download file it will self extract to bin file 5 Make a bootable floppy disk and copy the necessary files onto it You may make a floppy disk bootable either in Explorer or in the DOS prompt mode ...

Страница 63: ...ser s Manual D 3 After formatting and transferring the system to the floppy disk copy two files into it One is the BIOS flash utility awdflash exe and the other is the decompressed BIOS binary file 6 Boot off floppy disk ...

Страница 64: ...lity can t be completed under a Windows 95 98 or Windows NT Windows 2000 Windows XP Windows ME environment you must be in a pure DOS environment You should check which BIOS file is to be used with your motherboard don t flash with the wrong BIOS file Otherwise you may cause system malfunctions Note During the updating the progress will be measured by white blocks The last four blue blocks of the f...

Страница 65: ... form Fax this form to your dealer or to the company where you bought the hardware in order to benefit from our technical support You can refer to the examples given below Example 1 With a system including motherboard with processor DDR DRAM etc HDD CD ROM FDD graphic adapter MPEG 2 card SCSI adapter audio card etc After the system is assembled if you cannot boot up check the key components of the...

Страница 66: ...HIGH C PLUGPLAY DWCFGMG SYS LASTDRIVE Z Restart the system If the system starts and does not reset you can be sure that the problem is due to the Sound Card Driver Write down the Sound Card model motherboard model BIOS identification number on the technical support file refer to main instructions and describe the problem in the space provided We will show you how to fill the Technical Support Form...

Страница 67: ... Brand space write Pioneer in the Specifications space write DVD 16 9 System Memory DDR SDRAM Indicate the brand and specifications DDR DIMM of your system memory Examples Density Description Module Components Module Part Number CAS Latency Speed MHz For example In the Brand space write Micron in the Specifications space write Density 128MB Description SS 16 Megx72 2 5V ECC Gold Module Components ...

Страница 68: ...r Contact Person Fax Number 2 E mail Address Model Name BIOS ID Part Number Motherboard PCB Version Driver Version OS Applications Hardware Name Brand Specifications Processor Type Hard Disk Drive IDE1 IDE2 CD ROM Drive IDE1 IDE2 System Memory DDRDRAM Add On Card Problem Description ...

Страница 69: ...written and thorough manual It is full of information that doesn t only pertain to motherboards The CD ROM included with your board will have the manual as well as drivers If you don t have either one go to the Program Download Area of our website or FTP server 2 Download latest BIOS software or drivers Please go to our Program Download area on our website to check to see if you have the latest BI...

Страница 70: ...s and don t have the resources to serve every end user However we will try to do our best to help every customer Please also remember that for many of our technical support team English is a second language you will have a better chance of getting a helpful answer if your question can be understood in the first place Be sure to use very simple concise language that clearly states the problem avoid...

Страница 71: ...mpatibility Problems to ABIT Because of tremendous number of email messages we receive every day we are forced to give greater weight to certain types of messages than to others For this reason any compatibility problem that is reported to us giving detailed system configuration information and error symptoms will receive the highest priority For the other questions we regret that we may not be ab...

Страница 72: ...F 4 Appendix F NV7m Motherboard ...

Отзывы: