RAID Setting Guide
4-5
User’s Manual
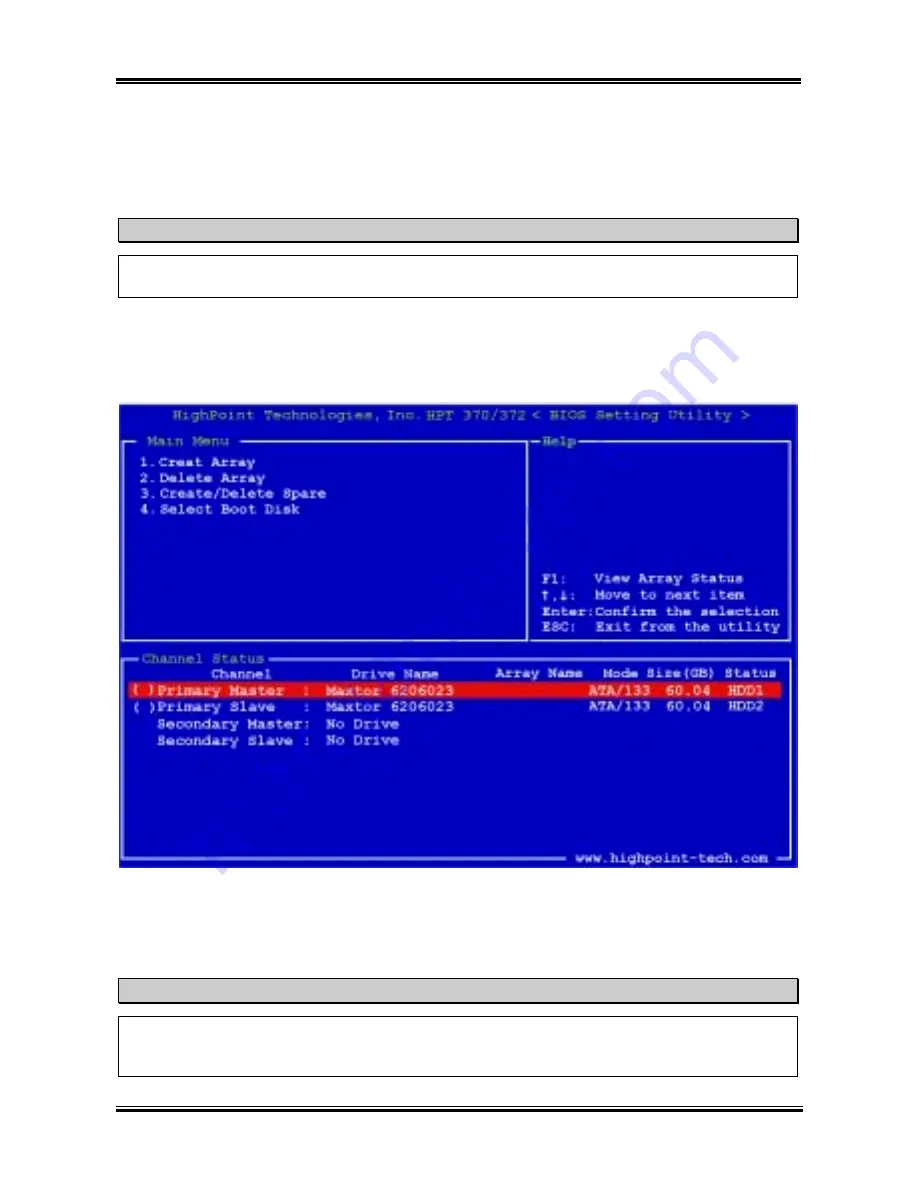
Delete Spare:
In the menu zone, select item “
3. Create/Delete Spare
” and press <
Enter
> to confirm.
In the validated channel status zone, select the spare disk to be removed and press <
Enter
> to confirm.
Note
You can creat more than one spare disk in the system, if you want to removed them, do the step
mentioned in “
Delete Spare
” several times, then you can delete all the spare disks you created.
4-3-4. OPTION 4: Select Boot Disk
This item allows you to select the boot disk among the hard disk(s).
Use the up/down arrow to select the menu option to “
Select Boot Disk
” and press <
Enter
>. In the
Channel Status, select the channel you would like to set as bootable disk and press <
Enter
>, an asterisk
appears in the parentheses to indicate that the channel has been selected.
Tips
We suggestion you to set the RAID function use “
RAID Management Software
” provide on the
product CD-ROM, it will give you more convenience and more help information to show you how to
create the RAID system. The detailed of software operation, you can refer the software “
Help
” menu.
Содержание KX7-333
Страница 2: ......
Страница 26: ...Chapter 2 KX7 333 KX7 333R 2 18 ...
Страница 68: ...4 6 Chapter 4 KX7 333 KX7 333R ...
Страница 76: ...6 4 Chapter 6 KX7 333 KX7 333R ...
Страница 82: ...A 6 Appendix A KX7 333 KX7 333R ...
Страница 88: ...B 6 Appendix B KX7 333 KX7 333R ...
Страница 96: ...D 4 Appendix D KX7 333 KX7 333R Note Items between the are absolutely necessary ...
Страница 100: ...D 8 Appendix D KX7 333 KX7 333R ...
Страница 104: ...E 4 Appendix E KX7 333 KX7 333R ...


