6-2
Chapter 6
KR7A/KR7A-RAID
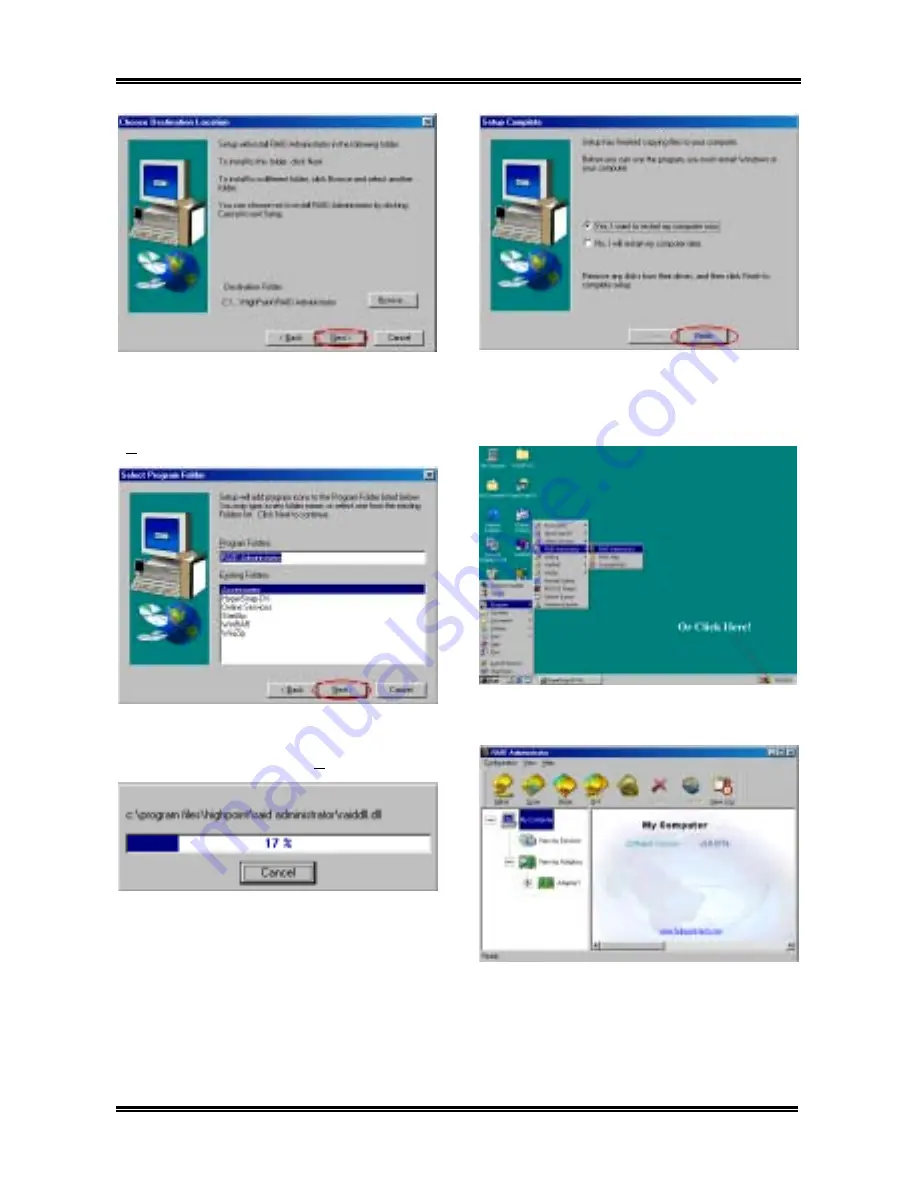
Step 5:
Now you can choose the folder for the
destination location you want. We suggest that
you use the default folder as the destination
location. When you are sure of the folder, click
“
Next>
” to go on.
Step 6:
Now you can select the program folder.
The setup wizard will add program icons to those
program folders listed. Click “
Next>
” to go on.
Step 7:
The system will start copying files. You
can see the percentage bar on the screen.
Step 8:
When the installation is completed,
choose “
Yes, I want to restart my computer
now.
” in the check box and click “
Finish
” to end
the setup.
Step 9:
After the system restart, you can run this
“
RAID Administrator
” program show at above.
The RAID Administrator screen then pops up.
Note that a shortcut icon appears in the tool bar.
This is used for bringing out the screen again
after you had clicked the “
Minimize
” icon on the
upper right corner of the screen. This short cut
icon will disappear after you click the “
Exit
”
Содержание KR7A
Страница 2: ......
Страница 10: ...Chapter 1 KR7A KR7A RAID 1 6 ...
Страница 28: ...Chapter 2 KR7A KR7A RAID 2 18 ...
Страница 78: ...6 4 Chapter 6 KR7A KR7A RAID ...
Страница 84: ...A 6 Appendix A KR7A KR7A RAID ...
Страница 90: ...B 6 Appendix B KR7A KR7A RAID ...
Страница 104: ...E 4 Appendix E KR7A KR7A RAID ...


