AirCleaner
•
User Guide
17
2. Installation
GPI, Ethernet & Power Connection
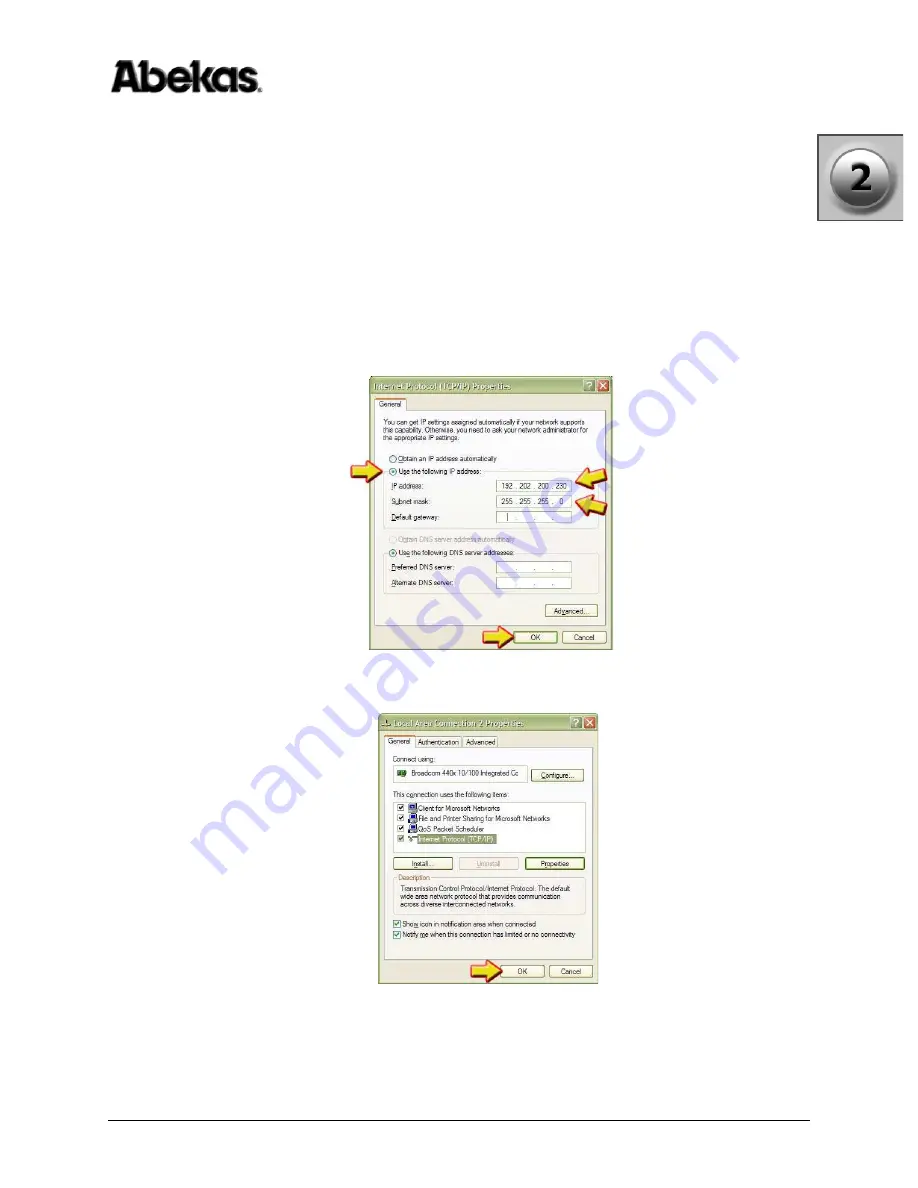
8. Check this window, and see if the “Use the following IP address” radio button
is selected or not (see below). If this radio button is ALREADY selected, then
write down the FIVE values that appear in this window. You will need to re-
enter these values later in this procedure.
If instead the “Obtain an IP address automatically” radio button is currently
selected, then there are no values you need to write down.
9. Click the “Use the following IP address” radio button.
10. In the “IP address:” entry field, type “192.20.200.230” as shown below.
11. In the “Subnet mask:” entry field, type “255.255.255.0” as shown below.
12. The other entry fields can remain blank; click the “OK” button when finished.
13. Click the “OK” button in the “Properties” window, which save the values and
closes this window.
14. Connect one end of a “Cross-Over” Ethernet cable to the Ethernet port on your
Windows PC, and the other end to the Ethernet port on the AirCleaner chassis.
15. Apply power to AirCleaner (if it’s not already powered).
Содержание AirCleaner
Страница 2: ...ii AirCleaner User Guide ...
Страница 10: ...x AirCleaner User Guide Table of Contents ...
Страница 54: ...44 AirCleaner User Guide 3 Updating Software Firmware Updating Software Firmware ...
Страница 100: ...90 AirCleaner User Guide 4 Operations Control Panel Menu Item Descriptions ...
Страница 106: ...96 AirCleaner User Guide Index ...


