23
24
Steps
Do This
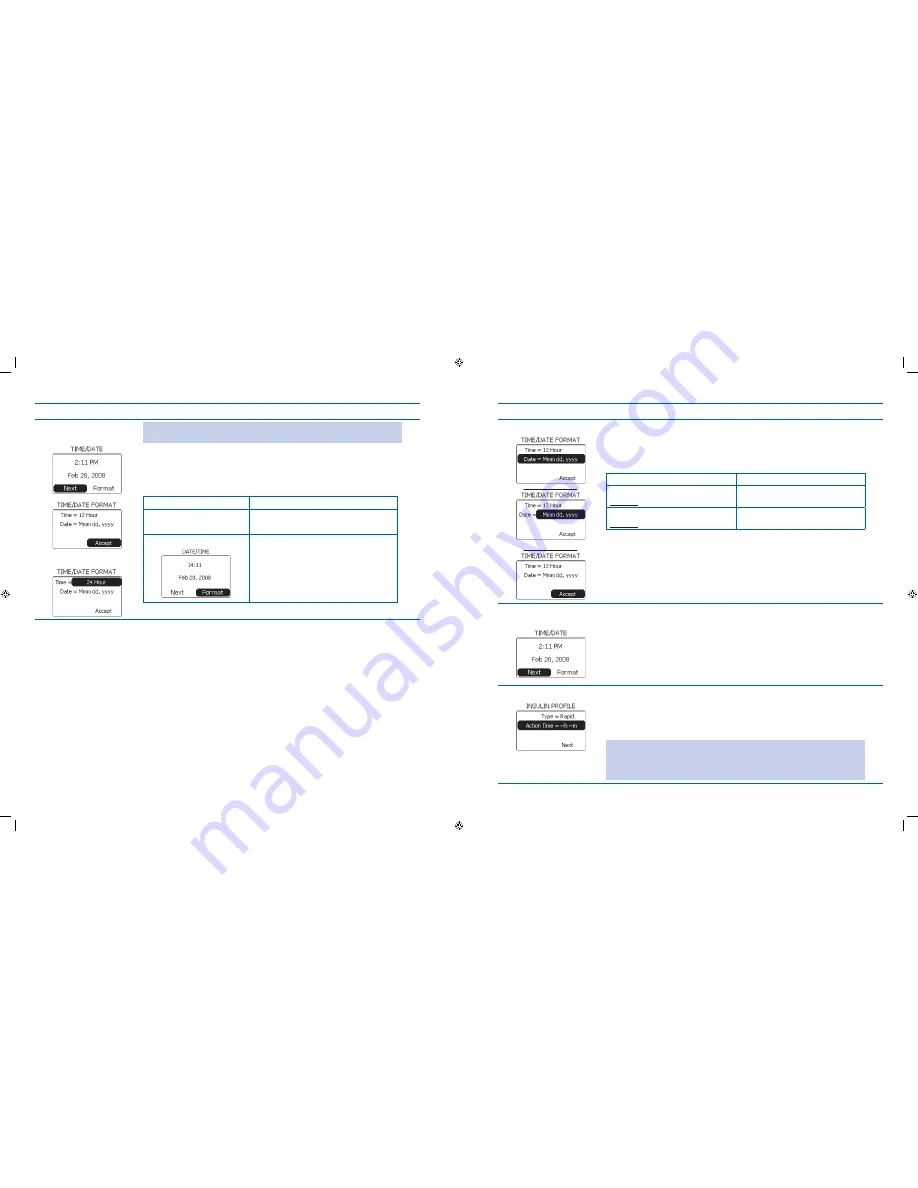
Select time format as
5.
needed.
OR
Note:
To keep the default time and date settings, press the
Enter
button on
Next
and go to Step 8.
Scroll to highlight
a.
Format.
Press
b.
Enter button.
Decide how you want your companion and pump to display the time.
c.
If you want this format
Then do this
Time = 12 Hour (default)
Notice Accept is highlighted.
Press Enter button.
Time = 24 Hour
Scroll to highlight
1.
Time.
Press
2.
Enter button.
Scroll to
3.
24 Hour.
Press
4.
Enter button.
Steps
Do This
Select date format.
6.
OR
Notice
a.
Date is highlighted.
Press
b.
Enter button.
Decide how you want your companion and pump to display the date.
c.
If you want this format
Then do this
Month Day Year (default)
Example: Dec 12, 2007
Notice Mmm dd, yyyy is displayed.
Press Enter button.
Day Month Year
Example: 12 Dec 2007
Scroll to dd Mmm yyyy.
Press Enter button.
Notice
d.
Accept is highlighted.
Press
e.
Enter button.
Confirm time and date
7.
format.
Verify that the time and date are correct on the
a.
TIME/DATE
screen.
Scroll to highlight
b.
Next.
Press
c.
Enter button.
Set Insulin Profile.
8.
Look at the INSULIN PROFILE settings on the display. Go to step 9 to make
changes.
To keep the default insulin profile settings, press the Enter button on Next and go
to Step 12.
WARNING:
Ask your healthcare professional which type of insulin you will be
using and what action time should be set. If you do
NOT
have these settings
correct, you may receive the wrong amount of insulin, which may result in
adverse medical events or serious injury.
Section 2: Using the System for the First Time – Quick Setup
2.1 Set Up Your System
Section 2: Using the System for the First Time – Quick Setup
2.1 Set Up Your System
DOC15736_Rev-A-Man.indd 23-24
2/9/09 11:29:34 AM


