background image


08 FAQ und Tipps 


ABB-free@home

®


72 


System Manual


08  FAQ und Tipps 

Mounting the System Access Point (Fig. 47) 

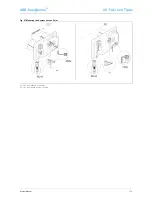
The System Access Point is installed surface-mounted. 
The bus line is always inserted on the rear side. The 230 
V power cord and the optional CAT wire can also be in-
serted on the rear side or installed surface-mounted. In 
case of surface-mounting, the wires are inserted from the 
underside of the device via the available breakout open-
ings. 

If the CAT wire is inserted on the rear side, it should be 
ensured that the distance between centres of the two 
installation boxes amounts to 80 mm.  

Connection of the CAT wire 

CAT wires that are already patched can be connected 
directly via the RJ45 female connector of the System 
Access Point. 

If an installation line is being used, the adapter cable 
enclosed with the device is to be used. On one end of this 
cable the installation cable can be installed via LSA tech-
nology. On the other end is an RJ45 plug, which can be 
connected with the female connector of the System Ac-
cess Point. 

Commissioning is always carried out via the System Ac-
cess Point. A smartphone, tablet or PC is required for 
commissioning. No additional software is required. The 
use of the free-of-charge free@home® app is recom-
mended for commissioning via smartphone or tablet. 

.  

Содержание ABB-free home

Страница 1: ...ABB free home System Manual ...

Страница 2: ...2 System Manual ...

Страница 3: ..._____________________ 6 04 Commissioning _____________________________________________________________________ 14 05 Types of Devices____________________________________________________________________ 34 06 Device Functions____________________________________________________________________ 60 07 Overview of Product Range ___________________________________________________________ 62 08 FAQ und T...

Страница 4: ...ion 9 Internet Explorer from version 11 Google Chrome Safari free home app For the installation of the free home app you require a smartphone or tablet with an Android from 4 4 or iOS from iOS 7 operating system Home network To be able to access the free home APP and Internet services e g e mail at the same time during standard operation the System Access Point must be integrated into the existing...

Страница 5: ...em Access Point a power supply sensors for local operation actuators for switching loads Performance features Up to 64 devices can be installed in a system power supply is not included The following versions of devices are available System devices System Access Point Power supply Sensors Control elements Panels Binary inputs Room temperature controller Movement detector Actuators Switch actuators ...

Страница 6: ...ation of the actuators Fig 2 The free home system offers both rail mounting actua tors for central installation in the switch cabinet as well as sensor actuator units for decentralized flush mounted installation Both types of installation can be mixed within the system as desired Advantages of the decentralized installation All in one Sensor and actuator are located in the one device Function does...

Страница 7: ...ess Point 02 Power supply 03 Sensor switching actuator unit 04 Room temperature controller 05 Sensor blind actuator unit 06 Mobile terminal devices Fig 2 Planning of the actuators 01 System Access Point 02 Power supply PS 03 Sensor blind actuator unit SAU 04 Sensor unit SU 05 Blind actuator BA ...

Страница 8: ...in almost any manner desired Mixing the line topologies of linear star and tree is permitted Only rings must not be set up No terminal resistors are required Lengths and distances of lines Fig 4 A Max lengths of lines The lengths of lines within a line are limited to a total length of max 1 000 m B The maximum distance between power supply and the last participant max 350 m C The maximum distance ...

Страница 9: ...lanning and Installation System Manual 9 Fig 3 Possible topologies 01 Linear topology 02 Tree topology 03 Star topology PS Power supply Part 1 Participant 1 SysAP System Access Point Fig 4 Lengths and distances of lines ...

Страница 10: ... the availa ble network infrastructure of the apartment either via the installed Ethernet port or the installed WLAN antenna Connection via WLAN Fig 5 If the System Access Point cannot be connected to the Internet router via cable it can be logged into the existing WLAN network via WLAN as client Connection via patch cable Fig 6 If the System Access Point and Internet router are in stalled side by...

Страница 11: ...cess Point 02 Distribution 03 IP router Fig 6 Connection via patch cable 01 System Access Point 02 Distribution 03 IP router Fig 7 Connection via installation cable in case of structured cabling 01 System Access Point 02 Distribution 03 Power supply 04 Ethernet patch terminals 05 Switch 06 IP router ...

Страница 12: ...de which is generated from the specific serial number is additionally available Although it does not clearly identify the device its accuracy however is sufficient to make it unique in the system To be able to identify the devices and channels more clearly during commissioning it is recommended to docu ment the three digit character code of the devices their function and location already during th...

Страница 13: ...ABB free home 03 Planning and Installation System Manual 13 Fig 8 Plan of devices 01 Distribution 02 Identification number 03 Serial number ...

Страница 14: ...tivate it Connect the terminal device with the WLAN of the 3 System Access Point SSID SysAPXXXX Enter the password see text on the interior side of the power adapter in the System Access Point open the cover for access Start the app 4 The app establishes a connection to the System Ac 5 cess Point automatically Option B Establishing the connection with the PC via WLAN Fig 11 Energize the System Acc...

Страница 15: ...ABB free home 04 Commissioning System Manual 15 Fig 10 Option A Connection with smartphone Fig 11 Option B Connection with PC via WLAN ...

Страница 16: ...signed to it automatical ly by the router Call up the user interface of the System Access Point 2 There are 2 options A Open the Windows Explorer on your PC The Sys tem Access Point is displayed as device under Net work Double click on the device to open the user in terface prerequisite the computer must support UPnP B Enter the IP address that has been assigned au tomatically by the browser in th...

Страница 17: ...ABB free home 04 Commissioning System Manual 17 Fig 12 Connection via patch cable Note The status LED is described in detail in Fig 46 ...

Страница 18: ...established User name Password Ensures protection against faulty configuration additional users can be added later Note The password must consist of at least 4 characters Name of installation Display name of device within the IP network The data are saved on the System Access Point The entry of the data can be skipped which however leads to the restriction of functions However the data can be also...

Страница 19: ...ABB free home 04 Commissioning System Manual 19 Fig 13 Basic settings ...

Страница 20: ...area Fig 15 The working area of menu items House structure Allocation and Linking is divided into two areas the floor plan working area on the left side and the list view on the right side Each area can be enlarged or reduced via the title bar All actions can be carried out both in the floor plan and in the list view If a change is made in the floor plan this change is also made in the list view a...

Страница 21: ...ABB free home 04 Commissioning System Manual 21 Fig 14 Setup of the main menu Fig 15 Setup of the working area 01 Floor plan 02 Enlarge Reduce 03 List view ...

Страница 22: ...ation is used during the next step to allocate the devices available in the house to a function and to their mounting position After commissioning has been completed the floor plan here created is also used for the visualization of the instal lation and as orientation for the switchable loads If devices are also to be switched outdoors e g lights on the terrace or in the garden you should create a...

Страница 23: ...ABB free home 04 Commissioning System Manual 23 Fig 16 Creating the house structure View of all floors Fig 17 Creating the house structure View of one floor ...

Страница 24: ...ed to the system The Add device bar displays only those devices func tions that are actually connected to the system and only until the devices have been moved on the floor plan via drag and drop This means that the list keeps getting shorter as the devices are being positioned In the Add devices bar select the desired application and pull it via drag and drop into the floor plan Fig 18 A pop up w...

Страница 25: ...ABB free home 04 Commissioning System Manual 25 Fig 18 Dragging the application from the add bar Fig 19 Pop up window with the suitable devices ...

Страница 26: ...o be linked with the selected application Actuate the device Actuator Press the Ident button on the device Sensor Press the rocker Movement detector Cover the lens with the hand The associated device is selected automatically In case an actuator has several channels you now need to select the correct channel Identification via switching only suitable for actuators Fig 22 Select a device and a chan...

Страница 27: ...ABB free home 04 Commissioning System Manual 27 Fig 20 Identification via serial number Fig 21 Identification via local operation Fig 22 Identification via switching Fig 23 Specifying a name ...

Страница 28: ... been completed the sensor can be operated directly locally Switching options Fig 25 Two way circuit 01 An actuator is connected with one or several sensors Group circuit 02 Several actuators of the same type e g all the lights in a corridor all roller blinds of a room are combined in a group The group acts like a single actuator and can be connected with sensors or integrated into scenes at ON al...

Страница 29: ...ABB free home 04 Commissioning System Manual 29 Fig 24 Allocation window Fig 25 Switching options 01 Two way circuit 02 Group circuit 03 Scene ...

Страница 30: ...mple of application After 11 p m the corridor light is no longer to switch on with maximum brightness but only with the reduced brightness of 40 Or The light for orientation of the sensors in the bedroom is to be switched off after 11 p m Presence profile The presence profile is a special time profile with which presence simulation can be implemented The timeline of the presence simulation is fill...

Страница 31: ...ABB free home 04 Commissioning System Manual 31 Fig 26 Time profiles 01 Timeline 02 Sunrise 03 Sunset 04 List view 05 Overview of profiles Fig 27 Time setting 01 Time setting ...

Страница 32: ...ourites bar can be selected from the bottom selection bar Important Only panels appear that have been previously positioned on the floor plan under commissioning step Allocation The allocated actuator channels can be positioned on the panel via drag and drop from the list view After the confirmation the configuration is taken over and becomes visible on the device after a few seconds ...

Страница 33: ...ABB free home 04 Commissioning System Manual 33 Fig 28 Panel ...

Страница 34: ...eir function as control element sen sor actuator units also serve as switch for the switching of loads The sensors and switching channels are pre programmed when supplied i e after activating the bus voltage and connecting the load it can be switched direct ly on the control element Control element order items Fig 29 The scope of delivery of the sensor unit or the sen sor switch actuators contains...

Страница 35: ...1 1 Sensor switch actuator 2 1gang 2 1 1 x 2300 W SSA F 2 2 1 Sensor switch actuator 2 2gang 2 2 2 x 1200 W SDA F 1 1 1 Sensor dimming actuator 1 1gang 1 1 1 x 180 W SDA F 2 1 1 Sensor dimming actuator 2 1gang 2 1 1 x 180 W SBA F 1 1 1 Sensor blind actuator 1 1gang 1 1 4 A cosϕ 0 5 SBA F 2 1 1 Sensor blind actuator 2 1gang 2 1 4 A cosϕ 0 5 Article number Product name Sensor channels SU F 1 0 1 Sen...

Страница 36: ...sor has been positioned in the allocation After the changeover a separate sensor icon is displayed on the floor plan for each of the push buttons LED behaviour of light for orientation Each rocker of a sensor has an LED At the point of deliv ery this LED is configured as light for orientation This means The LED lights up permanently to ensure that the sensor is easy to locate in the dark The brigh...

Страница 37: ...ABB free home 05 Types of Devices System Manual 37 Fig 31 Button function Fig 32 LED behaviour status indication possible Fig 33 LED behaviour status indication not possible ...

Страница 38: ... switchover is available The device channel must be linked with this application Application symbol 4 Selecting the LED operating mode Light for orientation LED lights permanent Status display LED lights when actuated For pre programmed devices the following parameter is available immediately For all other devices it only becomes available after being linked with an actuator The setting in the lis...

Страница 39: ...h on brightness in via the buttons This parameter can be used to specify how strong the LED lights percent age wise at night day Attention The parameter only functions when a time profile with the appli cation LED day night switchover is available The device channel must be linked with this application Application symbol 4 Selecting the LED operating mode Light for orientation LED lights permanent...

Страница 40: ...ights percent age wise at night day Attention The parameter only functions when a time profile with the appli cation LED day night switchover is available The device channel must be linked with this application Application symbol 4 Selecting the LED operating mode Light for orientation LED lights permanent Status display LED lights when actuated For pre programmed devices the following parameter i...

Страница 41: ...on Application symbol 4 Selecting the LED operating mode Light for orientation LED lights permanent Status display LED lights when actuated For pre programmed devices the following parameter is available immediately For all other devices it only becomes available after being linked with an actuator The setting in the list view is then made via the linking function of the Web based user interface o...

Страница 42: ...vements of the user are recorded and sent to the bus Remote actuators can be switched via the configuration Loads can not be switched directly Movement detector actuator unit Aside from their function as movement detector move ment detector actuator units also serve as switch for the switching of loads The sensors and switching channels are pre programmed when supplied i e after activating the bus...

Страница 43: ...Busch axcent Studio white 1 Tab 5 4 Movement detector actuator units Article number Product name Range Colour Sensor channels Actuator channels Switching load MSA F 1 1 1 212 Movement detector switch actuator 1gang Busch Duro 2000 SI White 1 1 1 x 2300 W MSA F 1 1 1 214 Movement detector switch actuator 1gang Reflex SI Alpine white 1 1 1 x 2300 W MSA F 1 1 1 81 Movement detector switch actuator 1g...

Страница 44: ...the switch off delay in seconds Buttons can be used to specify for example how long the light remains on after the actuator has deactivated the load 6 Behaviour during faults Selection of how the device is to respond in case of a fault Sensor settings movement detector settings 1 Changing the name 2 Deleting the channel via X 3 Switching of the actuator via the button 4 Switch on behavior Selectio...

Страница 45: ...settings Movement detector Sensor Sensor settings movement detector settings 1 Changing the name 2 Deleting the channel via X 3 Switching of the actuator via the button 4 Switch on behavior Selection of the brightness conditions at which the device is to respond ...

Страница 46: ...room is not being used for a lengthy period of time Behaviour of RTC The display indicates OFF The heating valves are closed antifreeze is ac tive Antifreeze mode Application Switches on automatically when a window contact has been connected and the window is being opened Behaviour of the RTC The display indicates antifreeze The heating valves close If the room temperature drops below 7 C the heat...

Страница 47: ...white Parameter settings of room temperature controller Actuator settings 1 Changing the name 2 Deleting the channel via X 3 Switching of the actuator via the button 4 Setting the Eco temperature reduction in C Specifying the value to which the temperature is reduced after the ECO mode is activated 5 Setting the temperature correction in C Manual increase reduction of the temperature value if the ...

Страница 48: ... in the Linking area with other sensors and actuators The Door call function offers 4 linking functions for each of the 4 possible Welcome outdoor stations This allows specific actions to be configured separately for each en trance of the house These are triggered as soon as the visitor rings the bell at one of the outdoor stations The Door opener function offers 5 connecting functions Either one ...

Страница 49: ...supply free home bus 03 Sensor Switch actuator Unit 04 Room temperature controller 05 Sensor Blind actuator Unit 06 Window contact 07 Panel 08 Outdoor station 09 Power supply Welcome bus 10 Tablet Smartphone Tab 5 7 Displays Article number Product name Colour Display diagonal DP7 S 6xx free home Touch 7 White 17 8 cm 7 DP7 S 6xx free home Touch 7 Black 17 8 cm 7 ...

Страница 50: ...f sensors available for selection Push button interface Integrates a conventional switch or push button Window contact When connected with a room temperature controller the heating is shut off when the window is open Rain alarm When connected with a blind actuator it retracts the blind awning at a rain alarm Frost alarm When connected with a blind actuator the blind awning is moved in out Wind ala...

Страница 51: ...ut 2gang Flush mounted pill 20 V 0 5 mA BI F 4 0 1 Binary input 4gang Flush mounted pill 20 V 0 5 mA BI M 4 0 1 Binary input 4gang MDRC 10 230V 1 mA Parameter settings The functions of the binary inputs can be fixed as follows Control element Dimming sensor Blind sensor Staircase light sensor Frost alarm Force position sensor On Off Force position blind Switchover heating cooling Wind alarm ...

Страница 52: ...The actuator can be programmed via the user interface either as individual switching contact or with a timer or a stair case light function Dimming actuators Fig 42 Dimming actuators receive the control commands from sensors and then dim their dimming outputs The dimmer can be programmed via the user interface either as indi vidual switch or with a timer or a staircase light function ...

Страница 53: ...16 A Tab 5 10 Dimming actuator Article number Product name Construction type Input channels Switching channels Switching load DA M 0 4 1 Dimming actuator 4gang MDRC Ø 0 4 4 x 315 W VA Parameter settings Switch actuator As switch actuators previously described only 4gang possible Dimming actuator As dimming actuators previously described only 4gang possible Channels can be bundled via the device co...

Страница 54: ...spond to the wind alarm can be deactivated via the user interface Position fixing calibrating Aside from the top bottom end positions a blind can also move to intermediate positions e g 50 top The position is fixed on the basis of the movement time of the blind Since this movement time varies individually it must be fixed separately for each blind If nothing has been programmed the visualization c...

Страница 55: ...ticle number Product name Construction type Sensor channels Switching channels HA M 0 6 1 Heating actuator 6gang MDRC 0 6 HA M 0 12 1 Heating actuator 12gang MDRC 0 12 Parameter settings Blind actuator As blind actuators previously described only 4gang possible Heating actuators The following settings are possible 1 Function Valve for heating Valve for cooling Valve for heating and cooling 2 Conta...

Страница 56: ...he device power adaptor LAN WLAN client mode If a router is already available it is recommended to con nect the System Access Point with this network via LAN or WLAN as client The following options are available to activate the client mode Connect the System Access Point via LAN with the router before commissioning When the cable is plugged in it is recognized automatical ly and the access point m...

Страница 57: ...access point mode On Off LED Status On Acces point mode On Off Access point mode Off Connection display Function button No function LED Status On Connection with LAN WLAN OFF No connection with LAN WLAN Flashing Attempting to connect Operating display Function button No function LED Status On 50 Voltage is applied device is booting On Device is ready for operation Off No voltage Flashing Fault ...

Страница 58: ...mmed Possible settings LAN client Used when the System Access Point is connected to the Internet router via network cable Note This mode is activated automatically when the access point mode is deactivated LED of the left but ton is off WLAN client Used when the System Access Point is connected to the Internet router via WLAN User Her additional users can be created or users deleted Also access ri...

Страница 59: ... an ongoing update process An update of the website F5 key rectifies the problem Firmware update of all free home devices connected 4 to the bus After confirming the update dialogue all free home devices connected to the bus are updated automatically The update is always carried out simul taneously on two devices and can be recognized by the mutual flashing of the LEDs The process takes approximat...

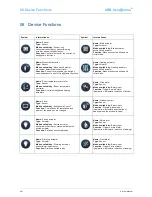
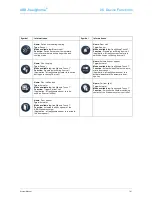
Страница 60: ...erature controller Function Controls free home heating actuators Name Wind alarm Type Sensor Made available by Binary input Function Triggers a wind alarm Application automatic retraction of blinds Name Panel Type Sensor Made available by free home Touch 7 Function The location for installation and name of the panel can be changed Name Window contact Type Sensor Made available by Binary input Func...

Страница 61: ...tor is to switch during an incoming floor call Name Automatic door opener Type Actuator Made available by free home Touch 7 Function Activates deactivates the auto matic door opener Application a free home sensor is to activate deactivate the automatic door opener Name Floor call button Type Actuator Made available by free home Touch 7 Function Triggers a floor call Application a free home sensor ...

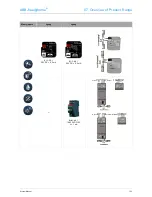
Страница 62: ...07 Overview of Product Range ABB free home 62 System Manual 07 Overview of Product Range System devices Power supply PS M 64 1 1 640 mA System Access Point SAP S 1 84 ...

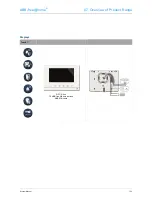
Страница 63: ...ABB free home 07 Overview of Product Range System Manual 63 Displays Touch 7 DP7 S 6xx 16 ABB free home buttons ABB Welcome ...

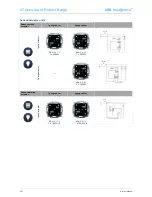
Страница 64: ... Overview of Product Range ABB free home 64 System Manual Sensors Sensor units 1gang 2gang SU F 1 0 1 SU F 2 0 1 Movement detector 1gang MD F 1 0 1 Temperature control Room temperature controller RTC F 1 ...

Страница 65: ...ABB free home 07 Overview of Product Range System Manual 65 Binary inputs 2gang 4gang BI F 2 0 1 20V DC 0 5 mA BI F 4 0 1 20V DC 0 5 mA BI M 4 0 1 10 230V DC AC 1 mA ...

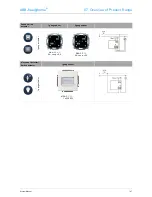
Страница 66: ...uator units Sensor switch actuator 1gang sensor 2gang sensor 1gang actuator SSA F 1 1 1 1 x 2300W SSA F 2 1 1 1 x 2300W 2gang actuator SSA F 2 2 1 2 x 1200W Sensor dimming actuator 1gang sensor 2gang sensor 1gang actuator SDA F 1 1 1 1 x 180 W VA SDA F 2 1 1 1 x 180 W VA ...

Страница 67: ...f Product Range System Manual 67 Sensor blind actuator 1gang sensor 2gang sensor 1gang actuator SBA F 1 1 1 4A cos φ 0 5 SBA F 2 1 1 4A cos φ 0 5 Movement detector Switch actuator 1gang sensor 1gang actuator MSA F 1 1 1 1 x 2300W ...

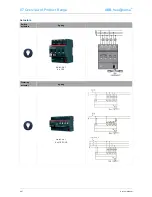
Страница 68: ...07 Overview of Product Range ABB free home 68 System Manual Actuators Switch actuators 4gang SA M 0 4 1 4 x 16 A Dimming actuator 4gang DA M 0 4 1 4 x 315 W VA ...

Страница 69: ...ABB free home 07 Overview of Product Range System Manual 69 Blind actuator 4gang BA M 0 4 1 4 x 6 A Heating actuator 6gang 12gang HA M 0 6 1 HA M 0 12 1 ...

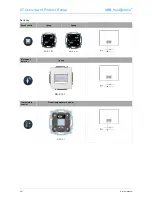
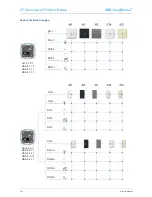
Страница 70: ...e home 70 System Manual Covers for switch ranges SU F 1 0 1 SSA F 1 1 1 SDA F 1 1 1 SBA F 1 1 1 SU F 2 0 1 SSA F 2 1 1 SSA F 2 2 1 SDA F 2 1 1 SBA F 2 1 1 SR 1 SR 1 SR 1 SR 1 SR 2 SRL 2 SRB 2 SRS 2 SRD 2 SR 1 SR 1 SRL 1 SRB 1 SRS 1 SRD 1 ...

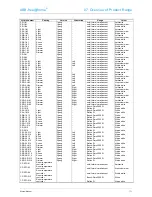
Страница 71: ... Anthracite SRL 2 R 83 Light 2gang Right solo future carat axcent Aluminium silver SRL 2 R 84 Light 2gang Right solo future carat axcent Studio white SRS 2 R 81 Scene 2gang Right solo future carat axcent Anthracite SRS 2 R 83 Scene 2gang Right solo future carat axcent Aluminium silver SRS 2 R 84 Scene 2gang Right solo future carat axcent Studio white SRD 2 R 81 Dimmer 2gang Right solo future carat...

Страница 72: ...s of the two installation boxes amounts to 80 mm Connection of the CAT wire CAT wires that are already patched can be connected directly via the RJ45 female connector of the System Access Point If an installation line is being used the adapter cable enclosed with the device is to be used On one end of this cable the installation cable can be installed via LSA tech nology On the other end is an RJ4...

Страница 73: ...ABB free home 08 FAQ und Tipps System Manual 73 Fig 47 Mounting the System Access Point 01 CAT wire inserted in rear side 02 CAT wire istalled surface mounted ...

Страница 74: ...08 FAQ und Tipps ABB free home 74 System Manual Device plan master Fig 48 device plan MOUNTING PLACE CHANNEL FUNCTION ROOM DEF 12345678 Schaltaktor ...

Страница 75: ...ABB free home 08 FAQ und Tipps System Manual 75 ...

Страница 76: ...terial from Busch Jaeger to the best of our knowledge informs it is however not legally binding All illustrations and photos of the displayed products are not binding with regard to chromatic ity dimensions and equipment The majority of Busch Jaeger products are regis tered trademarks All information in this catalogue is supplied without liability Changes and updates which serve the pur pose of pr...

Отзывы: