24
Art: 723085-00K Rev. Date: 30-OCT-2014
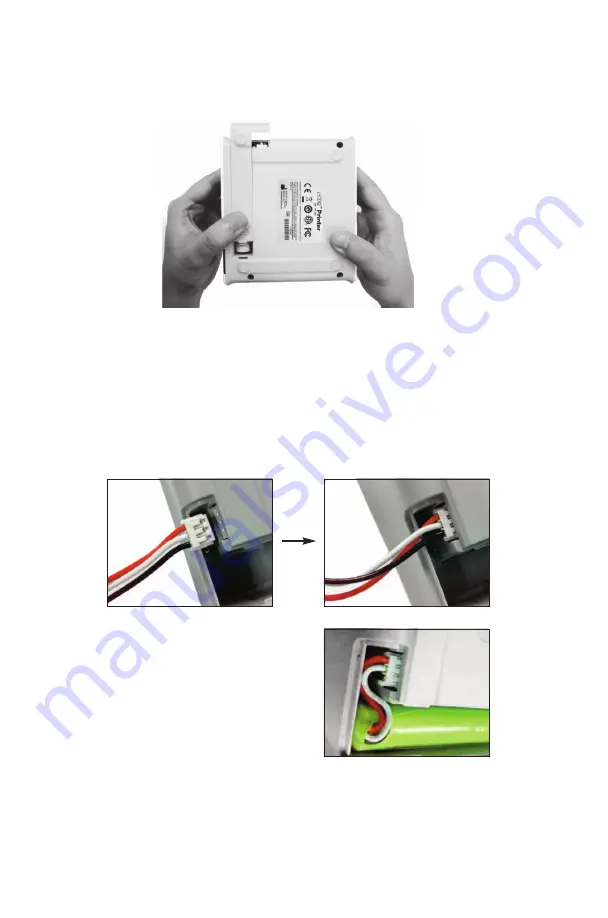
Installing or Replacing the Rechargeable Battery in the i-STAT Printer:
1. Disconnect the printer from the AC adapter.
2. Turn the i-STAT Printer upside down and place it on a flat surface. Remove the battery
door by sliding it off while pressing on the grooved section. Set the door aside.
3. If replacing an existing rechargeable battery in the printer, disconnect the existing
battery by gently pulling up on the red/white/black wires until the connector releases
from the three metal pins. Once the battery is disconnected, remove it completely from
the battery compartment.
4. Remove the new rechargeable battery from its packaging. With the thumb and index
finger of one hand, grasp the connector at the end of the red/white/black battery wires.
5. Assure proper connector alignment as shown, then slide the connector onto the three
metal connector pins.
6. Once the wires are connected, place the
battery portion of the pack into the
rectangular compartment. Make sure the
wires are not under the battery or projecting
out of the opening. The correct positioning
at right.
7. Slide the battery door back onto the compartment until it closes and locks into place.
8. Turn the printer over, plug it back into the AC power adapter, and charge the new
battery in the printer for a minimum of 3 hours before use.
Note: If the rechargeable battery is removed or becomes exhausted, it is still
possible to print at reduced speed using the AC power adapter.


