background image

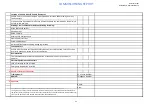
COMMISSIONING REPORT

Vehicle hoist or any part of the load is positioned no less than 600mm away from any 

fixed structure

Provisions have been made for effective clearances above the vehicle when the hoist is in 

its fully raised position.

Make & Model Number
Serial number
Rated Capacity
Reference to maintenance
Operation instructions
Screw and Nut Gaps
Hoist compliance plate showing design registration

Vehicle hoist has been tested and all safety devices, limit switches and control function 

interlocks have been tested for correct operation.  

The installer has demonstrated the operation of the vehicle hoist to the owner or 

operator

Lock off isolating switch installed
Emergency stop button installed

3. Details of Electrical Contractor

Trading Name:
Address:

4. Signature

I,  being the person responsible for completing the commissioning report have exercised reasonable skill and 

competency when completing the report and herby certify that the vehicle hoist has been commissioned fit for 

use as per the Australian / New Zealand Standard 1418.9:1996 Vehicle Hoists.

Name:
Date:

___________________________________________________________

Location of Vehicle Hoist & Vehicle Clearances

Markings

 - 

Hoist Checked for Relevant Marking Including:

Functional Test

Demonstration

Electrical Equipment and Controls

EC Licence Number:
Telephone Number:

AutoLift 167261

Installation & Operation Manual

23

Содержание AutoLift AL-167261

Страница 1: ...AY CAUSE INJURY OR DEATH Specifications subject to change without notice Note While all due care and attention has been taken in the preparation of this document Advance AutoQuip shall not be liable for any inaccuracies or omissions which may occur therein INSTALLATION MANUAL OPERATION INSTRUCTIONS READ FIRST DO NOT use the machine until you read and understand all the dangers warnings and caution...

Страница 2: ... LIFTING CAPACITY INDEX 1 Introduction 2 2 Concrete Foundation 3 3 Dimensions 4 4 Hoist Installation 7 5 Hoist operation 14 6 Parts Drawing 18 READ THIS MANUAL COMPLETELY BEFORE INSTALLING THE PARKING HOIST 7 Warranty 21 8 Commissioning report 22 AutoLift 167261 Installation Operation Manual 1 ...

Страница 3: ...egral part of the machine and must remain with it for its whole useful life Read every section of this manual carefully before operating the hoist and unpacking it since it gives helpful information about SAFETY OF PEOPLE SAFETY OF THE HOIST SAFETY OF LIFTED VEHICLES The supplier of the hoist is not liable for possible problems damages accidents etc resulting from failure to follow the instruction...

Страница 4: ...o provide appropriate electrical service to the garage shop and make sure he knows what the circuit requirements are 240 volt single phase 15 amp Seek his advice on receptacle and plug configurations that will work because there are several combinations Concrete Foundation FOUNDATION D MENSIONS IN 0M QUALITY OF CONCRETE MIN PRESSURE RESISTANCE OF SURFACE MAX REACTION ON EACH BEARING POINT Length W...

Страница 5: ...Fig 1 2 Dimensions AutoLift 167261 Installation Operation Manual 4 ...

Страница 6: ...hoose to go several people with a little equipment or a few people with a lot of equipment remember to take your time be careful and think through the steps carefully As with any activities involving big heavy materials safety must be uppermost in your mind This hoist is no more difficult to install than some of our other units because of its one post design but this very design makes it extremely...

Страница 7: ...oor Many common hoists have a mast that is about 2255mm high and most residential garage door openings are 2 2 metres high Smaller forklifts with adequate lifting capacity do exist but you may have to look around to find the right one to rent An alternative is to rent a standard forklift to unload the hoist and move the parts to the garage and do the actual assembly inside the garage with a rented...

Страница 8: ...part when they are cut and the heavy hoist parts may shift when freed from the bands Stand to the side of the bands when you cut them and use gloves when removing the cut bands because they have sharp edges 3 Moving pieces You can move the pieces to the garage with the forklift Some of the smaller pieces can be moved by two or more people carrying them If you have several people helping some of th...

Страница 9: ...ill you find the optimum point that will allow the top to move high enough and the column to come into a nearly vertical position Be careful if moving the column with an engine hoist that sudden weight shifts do not cause the hoist to tip over Set the column on the ground and maneuver it around to line up with the position The column is easier to maneuver when it is vertical on the ground If possi...

Страница 10: ...efore you lift the column upright Fig 10 11 F i g 1 0 F i g 1 1 Then slide the carriage to the bottom of the post by pulling the lock release cable at the same time Fig 12 13 After that up right the column and move it to the chosen position Fig 14 15 F i g 1 2 F i g 1 3 AutoLift 167261 Installation Operation Manual 9 ...

Страница 11: ...e a hammer drill with a new 19 05mm concrete bit to drill down into the garage floor Fig 17 18 The holes should be at least 14cm deep and it won t hurt if the holes go all the way through the floor The anchor bolts are long enough to protrude into the extensions and accept the washers and nuts that secure them to the concrete After that move back the column to its position with holes lined tap the...

Страница 12: ...he lift frame and bolt it to the carriage at the bottom of the lift column with two bolts supplied Move the lifting frame to the carriage then bolt it to the carriage Fig 22 23 24 25 F i g 2 2 F i g 2 3 F i g 2 4 F i g 2 5 AutoLift 167261 Installation Operation Manual 11 ...

Страница 13: ...off the red plug off the pump screw in the elbow oil connector Fig 28 29 Then connect one end of the oil hose to the elbow connector Fig 30 31 Connect another end to the cylinder on the column bottom at the back Fig 32 33 Make sure these fittings are tight Fig 28 Fig 29 Fig 30 Fig 31 Fig 32 Fig 33 AutoLift 167261 Installation Operation Manual 12 ...

Страница 14: ... 3 5 To fill the pump reservoir with hydraulic oil Note the hydraulic oil shall be 32 grade about 8 litres Have a qualified electrician connect the power supply 240V 50Hz single phase 15Amp shown with optional motorcycle attachment AutoLift 167261 Installation Operation Manual 13 ...

Страница 15: ...uired to lower the hoist but the safety latch must be disengaged to allow the hoist to lower past the stops Occasionally the hoist may be resting on a stop which prevents the safety latch from being disengaged When this happens simply press the up button momentarily to bump the hoist upwards slightly which takes the weight off of the safety latch Now you can pull the release cable and again depres...

Страница 16: ...t position it is useful to mark the position of the carriage relative to the column with two pieces of safety caution adhesive sticker provided When you make future lifts all you have to do is operate the hoist till the reference marks line up and you will know that the car is in the right position If you alternate vehicles that you will lift you will need a separate set of reference marks for eac...

Страница 17: ...rms a bright fluorescent color to help catch your eye and avoid head bumps You may also wish to repaint dings and scrapes in the hoist paint that occurred during shipping and installation The hydraulic oil should be replaced every two years and the inside corners of the hoist leg should be re greased with a general purpose axle grease every year or so as it becomes obvious that it needs it AutoLif...

Страница 18: ...MOBILE SINGLE PARKING LIFT 167261 PARTS DRAWING Column and power unit Fig 1 AutoLift 167261 Installation Operation Manual 18 ...

Страница 19: ...Lifting frame and platform Fig 2 AutoLift 167261 Installation Operation Manual 19 ...

Страница 20: ...0016 Rubber block 8 17 1672610017 Power unit 1 18 1672610018 Bolt 16 19 1672610019 Washer 20 20 1672610020 Elbow fitting 1 21 1672610021 Oil hose 1 22 1672610022 Nut 20 23 1672610023 Pin 1 24 1672610024 Bearing 2 25 1672610025 Chain sheave 1 26 1672610026 Nut 1 27 1672610027 Hydraulic cylinder 1 28 1672610028 Restrictor 1 29 1672610029 Elbow fitting 1 30 1672610030 Nut 2 31 1672610031 Adjust washe...

Страница 21: ...the capacity of the hoist compared to the weight of the vehicle If vehicle is too heavy do not proceed 4 Ensure the area is clean and clear of grease oil and objects that may be a slip trip hazard 5 Familiarise yourself with and check all machine operations and controls 6 Check all safety devices are in good condition 7 Ensure support arms are capable of being locked in position 8 Ensure rubber pa...

Страница 22: ...t the vehicle is evenly balanced on the hoist 4 Continue raising the hoist to the desired working height checking for any obstructions 5 Once the hoist has reached the desired working height lower the hoist onto the safety locks by means of pushing the lowering leaver on the hydraulic power unit Note Check for correct engagement on the locks TO LOWER THE HOIST 1 Raise the hoist 100mm or until the ...

Страница 23: ...ENTS ALL STRUCTURAL AND MECHANICAL COMPONENTS OF THIS UNIT ARE GUARANTEED FOR A PERIOD OF FIVE YEARS FROM THE DATE OF INVOICE AGAINST DEFECTS IN WORKMANSHIP AND OR MATERIALS WHEN LIFT IS INSTALLED AND USED ACCORDING TO RECOMMENDATIONS POWER UNIT POWER UNIT COMPONENTS PUMP AND RESERVOIR ARE GUARANTEED A PERIOD OF TWO YEARS FROM THE DATE OF INVOICE AGAINST DEFECTS IN WORKMANSHIP AND OR MATERIALS WHE...

Страница 24: ...rect operation Checked for good working order Supplied with the hoist and in good working order Checked for correct operation Hoist checked with load for correct operation and speed control tested Checked wire ropes for correct installation and tension Concrete floor is a suitable depth for installation Safety Devices Welds Hydraulic Equipment and Controls Pneumatic Equipment and Controls Safety L...

Страница 25: ...of the vehicle hoist to the owner or operator Lock off isolating switch installed Emergency stop button installed 3 Details of Electrical Contractor Trading Name Address 4 Signature I being the person responsible for completing the commissioning report have exercised reasonable skill and competency when completing the report and herby certify that the vehicle hoist has been commissioned fit for us...

Отзывы: