Manuale di installazione, Uso e Manutenzione -
Installation, Use and Maintenance Manual
pag. 25
PROGRAMMAZIONE FASCE ORARIE
Per programmare le fasce orarie procedere come segue:
•
Premere a lungo i tasti Giù/Su fino a che non appare la scritta “CLK”“
•
Rilasciare e premere brevemente il tasto “Sù” varie volte fino a quando
non appare la scritta WPR.
•
Premere il tasto On/Off, compare la scritta T.b con la cifra 1 lampeg-
giante; Premere il tasto Su o Giù per selezionare la fascia da modifica-
re e poi premere il tasto On/off per confermare: compare la schermata
con l’indicazione della fascia lampeggiante.
•
Premere il tasto Su o Giù per selezionare il giorno desiderato.
Premere il tasto On/Off: compare la schermata con l’indicazione del gior-
no, numero di fascia, e l’ora d’inizio (ON) della fascia lampeggiante.
•
Con i tasti Su o Giù, selezionare l’ora desiderata, premendo il tasto
On/Off si passa alla selezione dei minuti; sempre con Su e Giù, sele-
zionare i minuti desiderati e premere On/off per confermare: a questo
punto compare la schermata per impostare l’ora di spegnimento;ripete-
re la procedura appena descritta per impostare l’orario di spegnimento.
•
Dopo aver impostato i minuti, con la successiva pressione del tasto
Modo/Menù inizia a lampeggiare l’ora. Con il medesimo procedimento si
imposta l’ora di inizio della prima fascia oraria.
•
Alla successiva pressione del tasto On/off si torna all’area di selezione
del giorno della fascia.
•
Per tornare al menù di scelta fascia premere il tasto ventilazione.
•
Per tornare al menù principale premere il tasto ventilazione.
E’ possibile copiare le impostazioni di fasce orarie di un giorno in un
altro giorno singolo oppure in 5 giorni da lunedì al venerdìo in 2 gior-
ni da sabato a domenica.
•
Premere a lungo i tasti Giù/Su fino a che non appare la scritta “CLK”.
•
Rilasciare e premere brevemente il tasto “Sù” varie volte fino a quando
non appare la scritta CLK con sotto le scritte mo:mo (giorno da copiare:
giorno di destinazione.
•
Premendo On/off il giorno da copiare lampeggia: selezionare con Su e
Giu e confermare con On/Off; inizia a lampeggiare il giorno di destina-
zione.
•
Selezionare il giorno di destinazione e premere On/off per confermare,
o ventilazione per annullare.
NOTA:
- Impostando come destinazione il valore “MF“, verrà copiato il giorno
scelto sui giorni da lunedì a venerdì.
- Impostando come destinazione il valore “SS“ verrà copiato il giorno
scelto sui giorni sabato e domenica.
PARAMETRI INSTALLATORE
I parametri installatore sono protetti da password:
•
Premere a lungo i tasti Giù/Su fino a che non appare la scritta “CLK”
•
Rilasciare e premere brevemente il tasto “Sù” varie volte fino a quando
non appare la scritta “PAS”.
•
Premere il tasto On/Off e successivamente il tasto “Sù” finchè non si
visualizza il valore 11e poi premere nuovamente On/Off.
•
Premere i tasti Sù o Giù per scorrere i parametri.
•
Per modificare un parametro premere il tasto On/off e poi Su o Giù per
selezionarne il valore.
•
Premere il tasto On/Off per salvare il valore oppure il tasto ventilazione
per uscire senza salvare.
•
Per uscire dal menù premere il tasto ventilazione una o più volte, oppu-
re attendere 120 secondi circa.
TIME ZONE CONFIGURATION
To program the time bands as follows:
• Press and hold the Up / Down keys until it shows "CLK".
• Release and briefly press the "UP" button several times until it appears
the written WPR.
• Press the On / Off button, the request T.b with the number 1 flashing;
Press the Up or Down button to select the band to change, and then
press the On / Off button to confirm: screen appears indicating the flas-
hing strip.
• Press the Up or Down button to select the desired day.
Press the On / Off button: the screen will appear with information on the
date, number range, and the start time (ON) of the flashing strip.
• Use the Up or Down button, select the desired time by pressing the On
/ Off button switches the selection of minutes; Always up and down,
select the minute you want and press On / Off to confirm: at this point
the screen will appear to set the sleep time, repeat the above procedu-
re to set the switch-off time.
• After setting the minutes, with the next press of the Mode / Menu button
starts flashing forward. By the same process we set the start time of the
first time slot.
• The next time you press the On / Off button to return to the day of the
selection of the band.
• To return to the range chosen menu, press the ventilation button.
• To return to the main menu, press the ventilation button.
It’s possible to copy the time slots settings of one day to another sin-
gle day or five days from Monday to venerdìo in 2 days from Saturday
to Sunday.
• Press and hold the Up / Down keys until it shows "CLK".
• Release and briefly press the button "Sù" repeatedly until CLK appears
below with the written mo: mo (day to copy: target day.
• Pressing on / off on the day to be copied flashes: Select with Up and
Down and confirm with On / Off; starts flashing the target day.
• Select the target day and press On / Off to confirm, or to cancel ventila-
tion.
NOTE:
- By setting your destination as the "MF" value, it will be copied on the
day chosen on the days Monday through Friday.
- By setting your destination as the "SS" value will be copied to the day
chosen on the days Saturday and Sunday.
INSTALLER PARAMETERS
Installer parameters are protected by password:
• Press and hold the Up / Down keys until it shows "CLK".
• Release and briefly press the button "Sù" several times until the mes-
sage "PAS".
• Press the On/Off button and then the "Sù" key until you see the 11th
value then press On/Off.
• Press the Up or Down keys to scroll through the parameters.
• To change a parameter, press the On / off button and scroll up or down
to select the value.
• Press the On / off button to save the value, or the ventilation button to
exit without saving.
• To exit the menu, press the ventilation button one or more times, or wait
about 120 seconds.
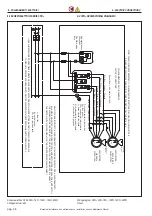
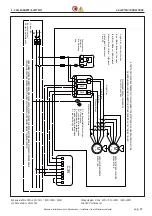
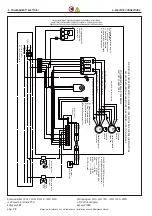
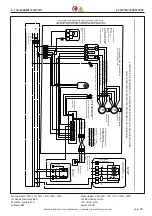
8 - COLLEGAMENTI ELETTRICI
8 - ELECTRIC CONNECTIONS


