12
WebGUI Control
WebGUI Control
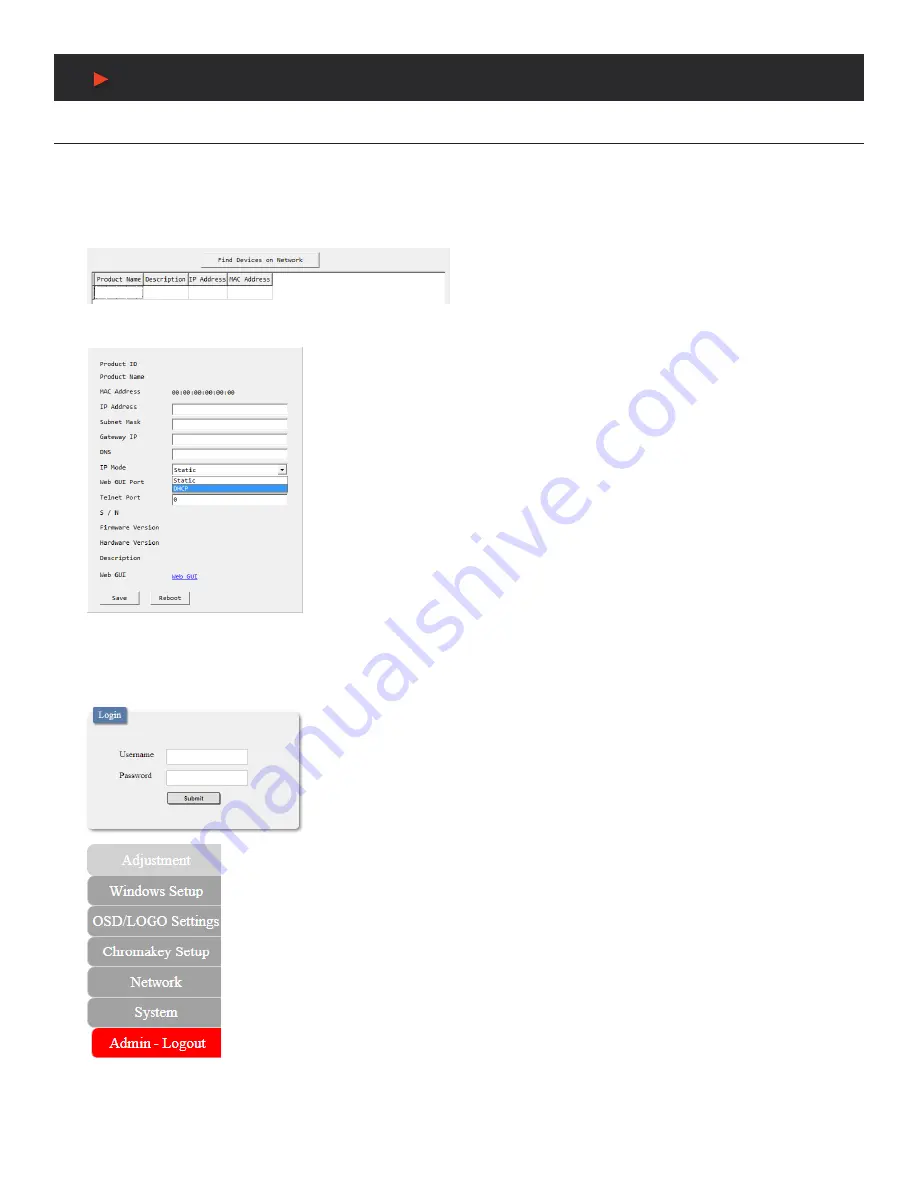
• DEVICE DISCOVERY APP:
Please obtain the
“Device Discovery”
software from your authorized dealer and save it in a directory
where you can easily find it. Connect the unit and your PC/Laptop to the same active network and execute the
“Device Discovery”
software. Click on
“Find Devices on Network”
and a list of devices connected to the local network will show up indicating their
current IP address.
NOTE:
The unit’s default IP address is 192.168.1.50.
By clicking on one of the listed devices you will be presented with the network details of that particular device.
• IP MODE:
If you choose, you can alter the static IP network settings for the device, or switch
the unit into DHCP mode to automatically obtain proper network settings from a local DHCP
server. To switch to DHCP mode, please select DHCP from the IP mode drop-down, then
click
“Save”
followed by
“Reboot”
.
• WEBGUI HOTKEY:
Once you are satisfied with the network settings, you may use them to
connect via Telnet or WebGUI. The network information window provides a convenient link
to launch the WebGUI directly.
• WEBGUI OVERVIEW:
After connecting to the WebGUI’s address in a web browser, the login screen will appear. Please enter the
appropriate user name and password then click
“Submit”
to log in.
NOTE:
The default user name and password is
“admin”
.
On the left side of the browser you will see the following menu tabs where all primary functions of the unit
are controllable via the built in WebGUI: Adjustment, Windows Setup, OSD/LOGO Settings, Chromakey
Setup, Network, and System. The individual functions will be introduced in the following sections.
Clicking the red
“Logout”
tab will automatically log the currently connected user out of the WebGUI and
return to login page.
A
NEU
VIDEO


