© 2008 4IPNET, INC.
18
4ipnet EAP100 User’s Manual
To extend its wireless coverage, EAP100’s WDS capability is capable of creating WDS links for connecting to other
WDS-capable APs (peer APs). EAP100 supports up to 4 WDS links. By default, all WDS profiles are disabled.
Click on the
WDS
button.
Select the
WDS Configuration
tab.
Select WDS link parameters:
(a)
Choose one WDS Profile
(b)
Enable WDS
(c)
Enter
MAC Address of Remote AP
(peer AP)
(d)
Select preferred
Security Type
To configure peer AP(s):
After completing the WDS settings at this EAP100 (functioning as a “primary WDS station”), you must also
configure the settings of its peer AP(s).
If you use another EAP100 as the peer AP, simply repeat the above-mentioned steps with the MAC Address
of the primary WDS station for setting WDS link parameters of the peer AP(s).
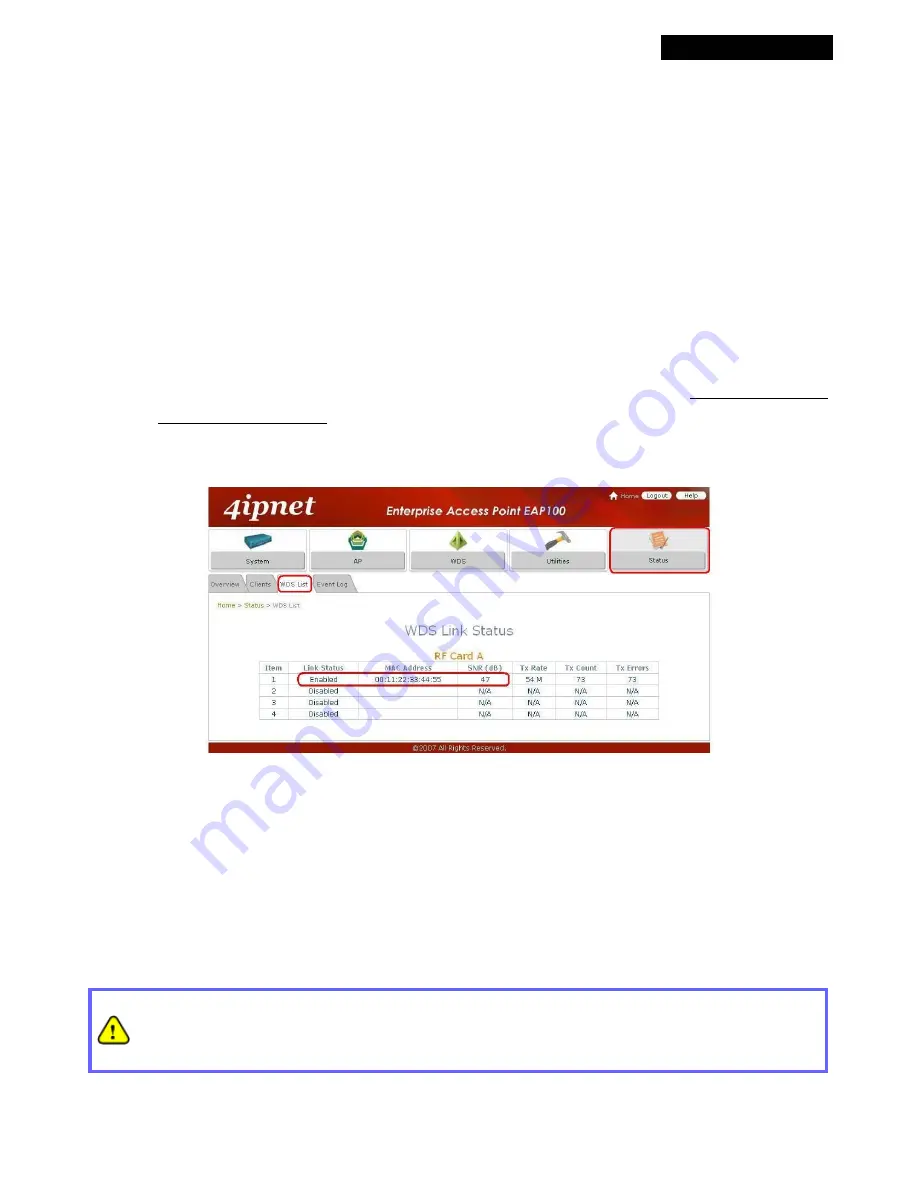
Step 5 (CONT). Check WDS Link Status
Click on the
Status
button.
Select the
WDS List
tab.
Check the signal strength of WDS link(s)
Κ
Upon the completion of Step 4, there shall be
SNR
displayed on the
WDS Link Overview
page. If the SNR
is shown as
N/A
, check if the wiring is properly connected and please ensure the accurate execution of Step
4 as described above.
Congratulation!
Now, 4ipnet EAP100 is installed and configured successfully.
•
It is strongly recommended to make a backup copy of configuration settings.
•
After EAP100's network configuration is completed, please remember to change the IP Address of your
PC Connection Properties back to its original settings in order to ensure that your PC functions properly
in its real network environments.


