3xLogic VX-4V28-OD-I Скачать руководство пользователя страница 10

V-Series Camera Quick Start Guide |


VX-2V28-OD-I 


10385 Westmoor Drive, Suite 210, Westminster, CO 80021 | www.3xlogic.com | (877) 3XLOGIC


10 

6.


If the test is successful, then VIGIL Client can successfully communicate with the Server. Click 

OK


at the bottom of the 

Add Server

 window after configuring all required fields to save the new 

Server to VIGIL Client. For more information on configuring VIGIL Servers, please see 

Section 5.1


of the VIGIL Client Users Guide. 

NOTE: 

The camera will be visible in the Client treeview and will be represented by a  

 icon. The 

camera video stream can be added to the VIGIL Client viewer in the same manner as VIGIL Server 

cameras; Simply extend the camera’s drop

-down menu and double click the icon to add it to the 

viewer. Alternatively, a user can drag-and-drop the camera stream icon into the desired frame of 
the VIGIL Client viewer. 


For more information on configuring VIGIL Servers/V-Series All-in-One camera in VIGIL Client, please see 

Section 5.1

 of the VIGIL Client Users Guide 


2.5


Remote Monitoring and Viewing - Adding a V-Series Camera to 3xLOGIC View Lite II 
Mobile (Android and iOS) 

Steps: 

1.


To interface a V-Series camera 

with 3xLOGIC’s View Lite II mobile app, launch the View Lite II app on 

your mobile device (Android OS is pictured in the below screenshot, however, the process is identical 
in the iOS version). 
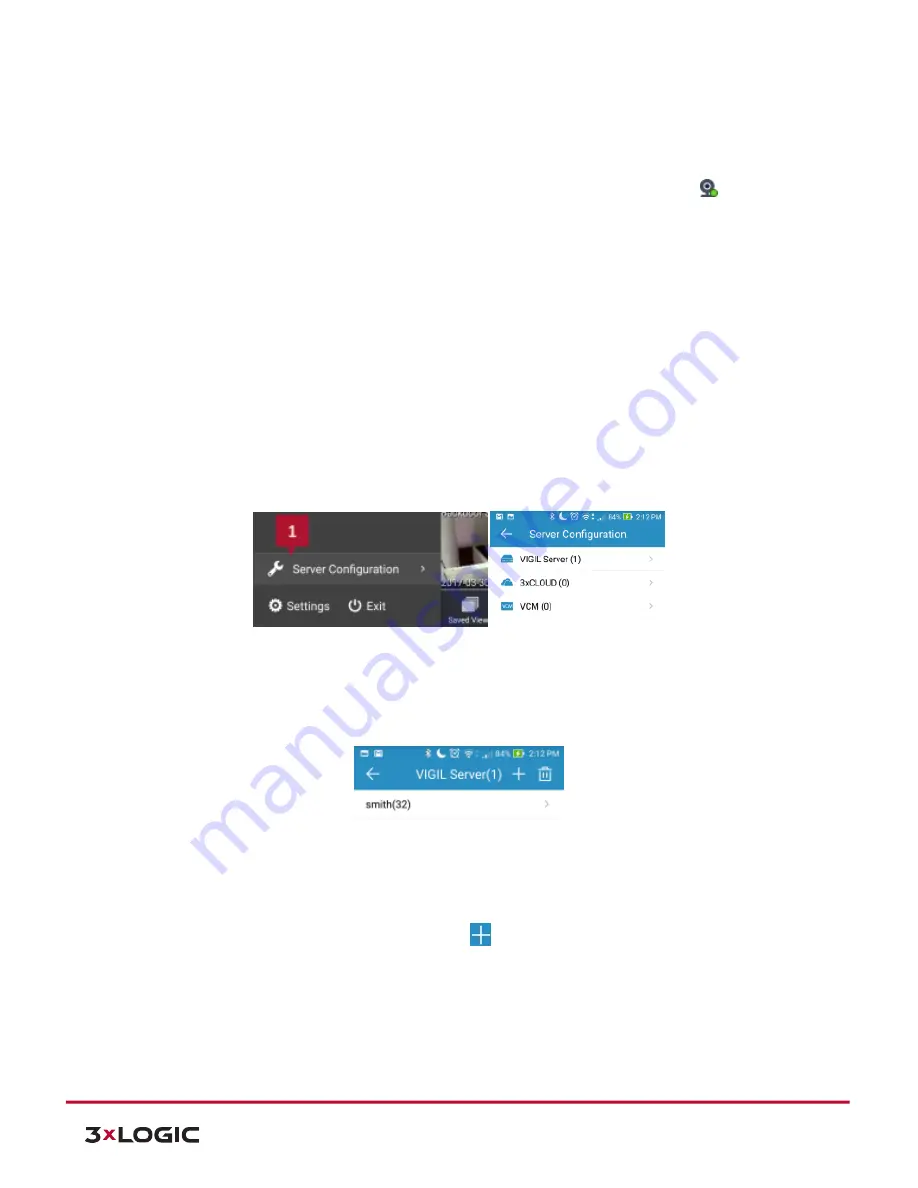
2.


Open the 

Options

 side menu and select 

Server Configuration

. The Video Source list will display.  


Figure 2-2


Opening Video Source Menu 

3.


Select VIGIL Server. VISIX V-Series devices are considered edge recording devices, and thus are 
recognized as their own VIGIL Server within View Lite II. The VIGIL Server window will now deploy. A 
menu of all VIGIL Servers already interfaced with View Lite II will deploy.  


Figure 2-3


Adding a Video Source - Add Video Source 

4.


To add a new instance of a video source, tap the 

 icon. 

5.


Enable 

VIGIL Connect

Alternatively, if you wish to use traditional network connection criteria, leave 

VIGIL Connect 

disabled and enter in an 

IP/DNS Name


and 

Port

 info (if using standard network 

connection criteria, also ignore step 6 of these instructions) for the device. 

6.


Enter in the VIGIL Connect alias for the desired VISIX V-Series camera (VSeriescam1 used in the above 
example).  

Содержание VX-4V28-OD-I

Страница 1: ...ries Camera Quick Start Guide VX 2V28 OD I 10385 Westmoor Drive Suite 210 Westminster CO 80021 www 3xlogic com 877 3XLOGIC 1 VISIX V Series All in One Camera Gen II VX 4V28 OD I Quick Start Guide v01...

Страница 2: ...Mounts 3 1 2 INSTALLATION 4 Installation Ceiling mount 4 Installation Micro sd card 6 2 CAMERA SETUP 8 2 1 AVAILABLE CAMERA SETUP TOOLS 8 2 2 CAMERA SETUP DHCP ENABLED NETWORKS 8 2 3 CAMERA SETUP NON...

Страница 3: ...ounting Base 2 Horizontal Stand 3 Vertical Stand 4 Bubble 5 Network Interface 6 Power Interface 7 IR LED 8 Lens 9 Black Liner 10 Safety Rope AVAILABLE MOUNTS OD Wall Mount 3xLOGIC Product VX WM OD OD...

Страница 4: ...tallation INSTALLATION CEILING MOUNT Steps 1 Drill the screw holes on the ceiling according to the drill template Figure 1 2 Drill Template 2 Loosen the set screws with a hex key supplied to remove th...

Страница 5: ...f the mounting base Figure 1 5 Side Opening 4 Loosen the tilt lock screws adjust the tilting position within the 65 degree range and tighten the tilt lock screws 5 Rotate the black liner to adjust the...

Страница 6: ...ite 210 Westminster CO 80021 www 3xlogic com 877 3XLOGIC 6 6 Reinstall the bubble and tighten the screws Figure 1 7 Bubble Reinstallation INSTALLATION MICRO SD CARD Steps 7 Loosen the lock screws on t...

Страница 7: ...O 80021 www 3xlogic com 877 3XLOGIC 7 Insert the Micro SD card to the card slot Optional Push the inserted Micro SD card inside and the Micro SD card will be sprung out Figure 1 9 Insert the Micro SD...

Страница 8: ...ected network provides a DHCP address and allows outbound access to the internet For installations where DHCP is not available or where the camera is being used with an appliance see Section 2 3 Camer...

Страница 9: ...cycling the camera 2 4 Remote Monitoring and Viewing Adding a V Series Camera to VIGIL Client Steps To interface a V Series Camera with VIGIL Client 1 Launch VIGIL Client Local Mode only VCM mode will...

Страница 10: ...Monitoring and Viewing Adding a V Series Camera to 3xLOGIC View Lite II Mobile Android and iOS Steps 1 To interface a V Series camera with 3xLOGIC s View Lite II mobile app launch the View Lite II app...

Страница 11: ...c com 877 3XLOGIC 11 Figure 2 4 View Lite II Add Edit Server Form Android 7 Fill in the remaining required fields and tap Save to save the V Seies camera to View Lite II A user may now add the camera...

Страница 12: ...77 3xLOGIC www 3xlogic com 2017 3xLOGIC Inc All rights reserved Information in this document is subject to change without notice 3xLOGIC and the 3xLOGIC logo are trademarks of 3xLOGIC Inc all other tr...

Отзывы: