8
(English)
Fig. 21
Fig. 22
Fig. 23
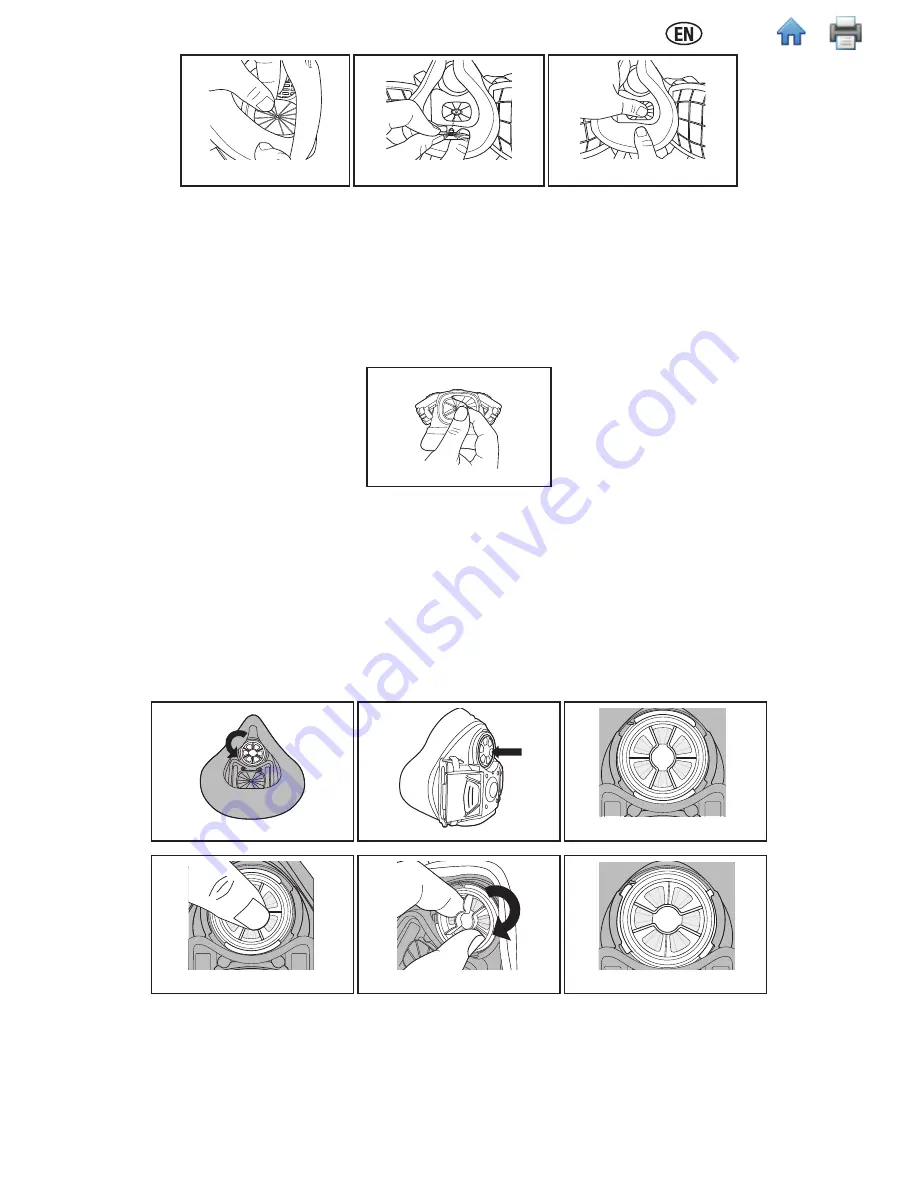
Exhalation Valve
The exhalation valve is located on the bottom of the facepiece. The head harness assembly must be removed to access the exhalation valve.
1. Remove head harness assembly per the head harness assembly replacement instructions.
2. Remove exhalation valve by grasping valve and pulling valve off the center post. (Fig. 24).
3. Inspect valve seat, making certain it is clean and in good condition.
4. Replace valve by aligning the valve stem with the hole in the center of the valve seat.
5. Press the valve post through the hole in the valve seat. Be certain valve is fully engaged through valve post and lays flat against the valve seat.
6. Replace head harness assembly per the head harness assembly replacement instructions.
NOTE:
Conduct a negative pressure user seal check to ensure exhalation valve is functioning properly.
Fig. 24
Speaking Diaphragm Removal/Replacement
1. Remove head harness assembly per the head harness assembly replacement instructions.
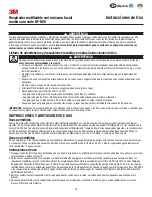
2. From the inside of the facepiece, turn the speaking diaphragm counter clockwise a quarter turn (Fig. 25).
3. Push the speaking diaphragm inward to remove (Fig. 26).
4. To replace the speaking diaphragm, insert it into the facepiece opening with the speaking diaphragm wings aligned vertically (Fig. 27).
5. Using your thumb, press down on the center of the speaking diaphragm, pushing it fully into the opening, to ensure it is evenly and fully seated
(Fig. 28).
6. With slight downward force, use the thumb and index finger to rotate the speaking diaphragm 90 degrees clockwise (Fig. 29).
7. The speaking diaphragm will stop turning when the stop guards engage. The wings should now be horizontal (Fig. 30).
Visually inspect the speaking diaphragm for signs of misalignment or incomplete placement. If there is any indication of incomplete placement,
remove the speaking diaphragm and repeat the installation procedure.
Fig. 25
Fig. 26
Fig. 27
Fig. 28
Fig. 29
Fig. 30


