


© 3M 2006
16
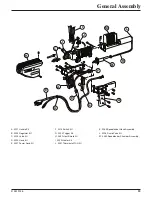
Repair Procedures
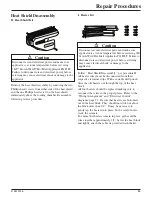
Heat Shield Disassembly
H. Heat Shield Kit
Caution
Disconnect air and electrical power and make sure
applicator is at room temperature before servicing
3M™ Scotch-Weld™ Hot Melt Applicator PG II LT.
Failure to disconnect air and electrical power before
servicing may cause electrical shock or damage to the
applicator.
Remove the heat shield assembly by removing the two
Phillips head screws from either side of the heat shield
and the one Phillips head screw on the heat shield
immediately above the loading chamber. Reassemble,
following reverse procedure.
!
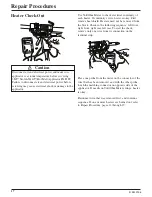
I. Heater Kit
Follow “Heat Shield Disassembly, “per procedure H.
All heater wires must be disconnected from their
respective terminal strips. With a suitable drift punch,
drive the old heaters out through the top of the heat
block.
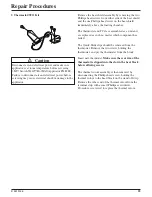
All four heaters should be replaced making sure to
reconnect the wires in the proper places. Refer to the
“Wiring Arrangement” and “Electrical Control”
diagrams, page 21. Be sure that heaters are bottomed
out in the heat block. They should not stick out above
the block more than 1/4’’. It may be necessary to
gently tap the heaters into place, but be careful not to
crack the ceramic.
To ensure that heaters remain in place, gather all the
wires together approximately 1/2’’ below the heat block
and tightly attach the cable tie provided with the kit.
Caution
Disconnect air and electrical power and make sure
applicator is at room temperature before servicing 3M
Scotch-Weld Hot Melt Applicator PG II LT. Failure to
disconnect air and electrical power before servicing
may cause electrical shock or damage to the
applicator.
!