background image

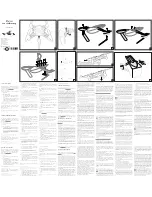
Prop nut

Motor

Propeller

Plastic ring

Spacer

Collet

Remove prop nuts and attach propellers

Your 3DR Y6 unboxing is complete! For pre-flight 

configuration and flying instructions, please visit: 

copter.ardupilot.com/apmcopter

.  Happy flying!

Safety Check! Ensure writing on props faces up.

COUNTERCLOCKWISE ROTATION:

USE NORMAL PROPELLER

CLOCKWISE ROTATION:

USE PUSHER PROPELLER

Your copter includes normal propellers (unmarked or marked “SF”) and 

pusher propellers (marked “SFP” or “P“). The direction of each motor is 

shown below: add pusher propellers to motors marked clockwise, add 

normal propellers to motors marked counterclockwise. Use 10-inch 

props for top motors and 11-inch props for bottom motors.

3

Add propellers

CCW

!

!

CW

CCW

!

!

CW

CCW

!

!

CW

CCW

!

!

CW

Y6 motor order

Blue arms

Remove plastic rings from propeller package, select the one with 

the larger internal diameter, and insert it into the back of the 

propeller hub.

Remove prop nut and metal spacer

from motor. Add propeller with writing 

facing up in relation to the sky. This 

means you’ll need to attach props to 

bottom motors upside down! Replace 

spacer and prop nut; tightly fasten 

prop nut to threaded collet.

We recommend inserting a hex wrench 

(2 mm) into the hole in the side of the 

prop nut to get better leverage when 

tightening prop nuts.

Содержание Y6

Страница 1: ...IDE This box contains a flight tested ready to use 3DR Y6 a fault tolerant high stability multicopter solution for flying fully autonomous pre programmable missions These instructions will guide you t...

Страница 2: ...oxing guide and your copter is ready to fly Micro USB cable 1 Unfold blue arms Your copter s blue arms indicate its front facing direction and arrive folded for ease of transport UNBOXING Locate the b...

Страница 3: ...with a metal nut Fasten arms in place Slide arms into Y position Secure with bolt To unpack your copter s legs simply slide leg into place and secure using provided 25 mm bolts and nuts Rotate leg ba...

Страница 4: ...otors marked clockwise add normal propellers to motors marked counterclockwise Use 10 inch props for top motors and 11 inch props for bottom motors 3 Add propellers CCW CW CCW CW CCW CW CCW CW Y6 moto...

Страница 5: ...ut signal pins Use the two wire cable to connect power and ground pins between APM and the receiver APM inputs wiring APM input pin numbers Connect six wire cable to signal pins top row S Connect red...

Страница 6: ...ing the most recent MSI read the safety information and select Download Download Open the downloaded file to run the Mission Planner Setup Wizard Select the option to proceed if prompted with a securi...

Страница 7: ...ilable please always run the most current version of Mission Planner Calibrate Radio Control Mission Planner s RC calibration utility teaches APM to work with your RC transmitter If you opted to recei...

Страница 8: ...mode switches to all available positions until the red bars are set at the extremes for each control Select Click when Done to complete RC calibration APM USB port Connect APM to Mission Planner 1 Se...

Отзывы: