


3D Prototyping X1
54
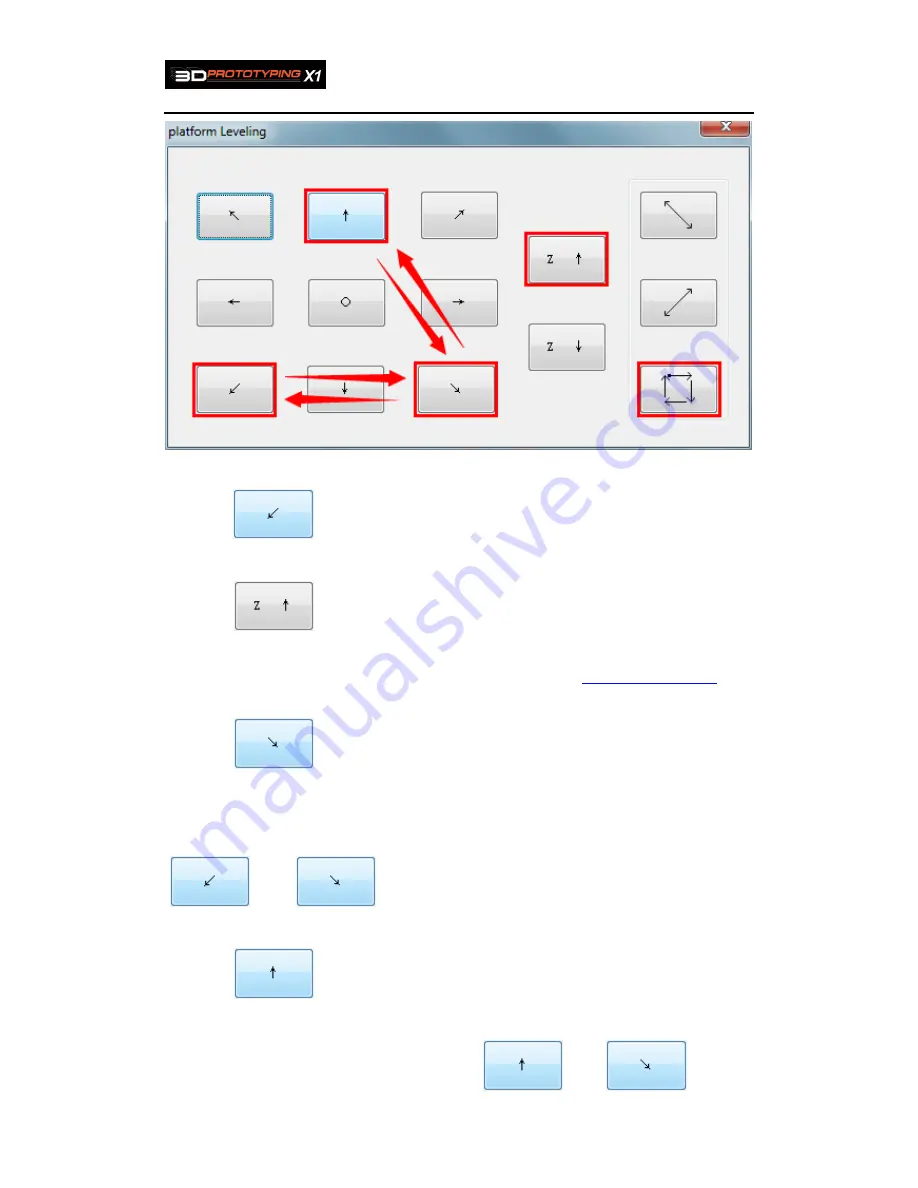
figure7.4.4
5. Click “
”from “platform Leveling” dialog box, and move the worktable to the
corner (“bottom left” corner) which corresponding
screw “
(
(
(
(
a
)
)
)
)
”
6. Click “
”from “platform Leveling” dialog box to rise the worktable to highest
point. If worktable is too near nozzle, please adjust a little from “Control Panel”. If the
worktable is too far from nozzle, don’t need to adjust, you can
set the Z axis height
after
the worktable leveling.
7. Click “
”from “platform Leveling” dialog box and move the worktable to the
corner (“bottom right ”corner) which corresponding
screw “(b)”
. Then compare the height
of “bottom left” corner (the height between nozzle and worktable, similarly hereinafter) ,
and adjust
screw “(b)”
to make sure the height is the same as “ bottom left corner”. Click
“
” and “
” to check the height difference and adjust to the same
height as nozzle. After finishing, don’t move this two screws any more.
8. Click “
”from “platform Leveling” dialog box and move the worktable to the
“center of Y axis” position and check the height to adjust
screw “(c)”
to make sure the
height is the same as we did in last step. Click “
” and “
” to check
Содержание X1
Страница 1: ...3D Prototyping X1 3D Printer User Manual V1 3 ...
Страница 9: ...3D Prototyping X1 7 figure3 1 1 3 figure3 1 1 4 ...
Страница 12: ...3D Prototyping X1 10 figure3 1 2 3 4 Click install starting installation figure3 1 2 4 ...
Страница 32: ...3D Prototyping X1 30 figure4 3 7 Mirror edit has the following ways It s mainly used to design text ...
Страница 33: ...3D Prototyping X1 31 figure4 3 8 ...
Страница 35: ...3D Prototyping X1 33 figure4 6 2 Ready figure4 6 3 Buiding ...
Страница 48: ...3D Prototyping X1 46 figure6 2 4 figure6 2 5 ...


