23
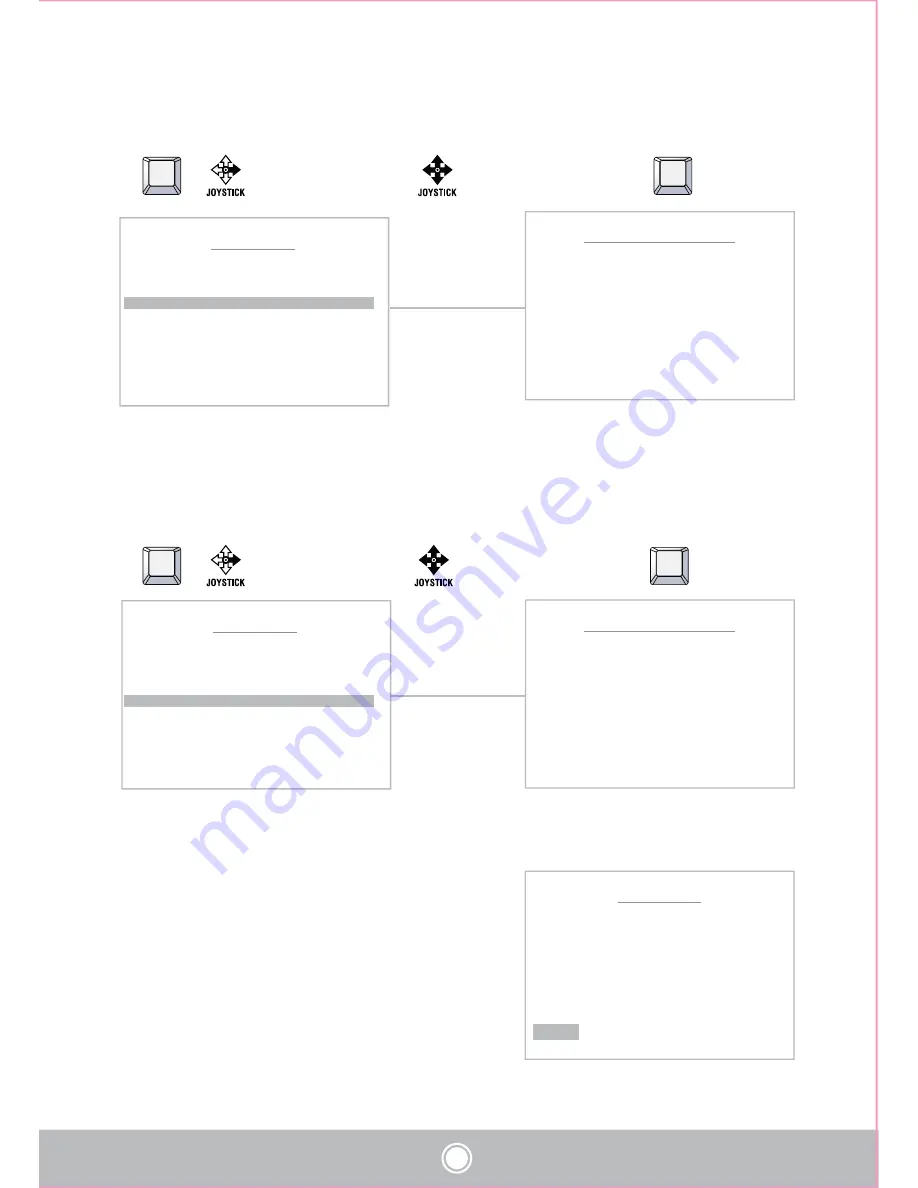
AREA MENU
< MOVE & NEAR / JOYSTICK >
AREA NO : 01 DEFINE
LABEL :
START PAN POS.: 000 . 0
STOP PAN POS.: 000 . 0
SAVE CLR BACK EXIT
AREA MENU
< MOVE & NEAR / JOYSTICK >
AREA NO : 01 DEFINE
LABEL :
START PAN POS.: 000 . 0
STOP PAN POS.: 000 . 0
SAVE CLR BACK EXIT
AREA MENU
< NEAR
ઔ
DATA SAVE >
AREA NO : 01 DEFINE
LABEL : AREA 01
START POS : 000 . 0 .
STOP POS : 000 . 0 .
SAVE CLR BACK EXIT
AREA START PAN POSITION
< EXIT
▷
FOCUS NEAR >
POSITION : 000.0
AREA STOP PAN POSITION
< EXIT
▷
FOCUS NEAR >
POSITION : 000.0
(3) Define the Start pan position
£
Select the “Start Pan Pos” menu
or
NEAR
¤
Move and set the position
¥
Set & Back
NEAR
(4) Define the Stop pan position
£
Select the “Start Pan Pos” Menu
or
NEAR
¤
Move and set the position
¥
Set & Back
NEAR
** Only pan position is adjustable, becaue tilt position is fixed when “Start Pan Position” is set.
(5) “Save” above setting Area data to the memory.
(6) “CLR” means above setting Area data will not be
saved and be cleared.
(7) “BACK” means it goes back to the previous
menu :Motion.
(8) “EXIT” means it goes out of MENU
Camera will move to clockwise direction only when START setting.
Содержание TPD-HD330NRW
Страница 39: ...39 6 DIMENSION 6 1 DIMENSION 157 9 Ø231 R82 5 160 6 206 18 384 6 1 1 2inch PF TAP Ø231 ...
Страница 40: ...40 446 452 Ø231 175 145 125 100 4 Ø8 5 ...
Страница 41: ...41 366 6 529 90 120 120 150 Ø 231 157 9 Ø231 R82 5 93 55 160 6 206 ...
Страница 42: ...42 7 CONFIGURATION 7 1 Connecting to Keyboard with DVR ...
Страница 43: ...P N 388067625 PRINTED IN KOREA Distributed by ...


