Checking the LEDs
13
5
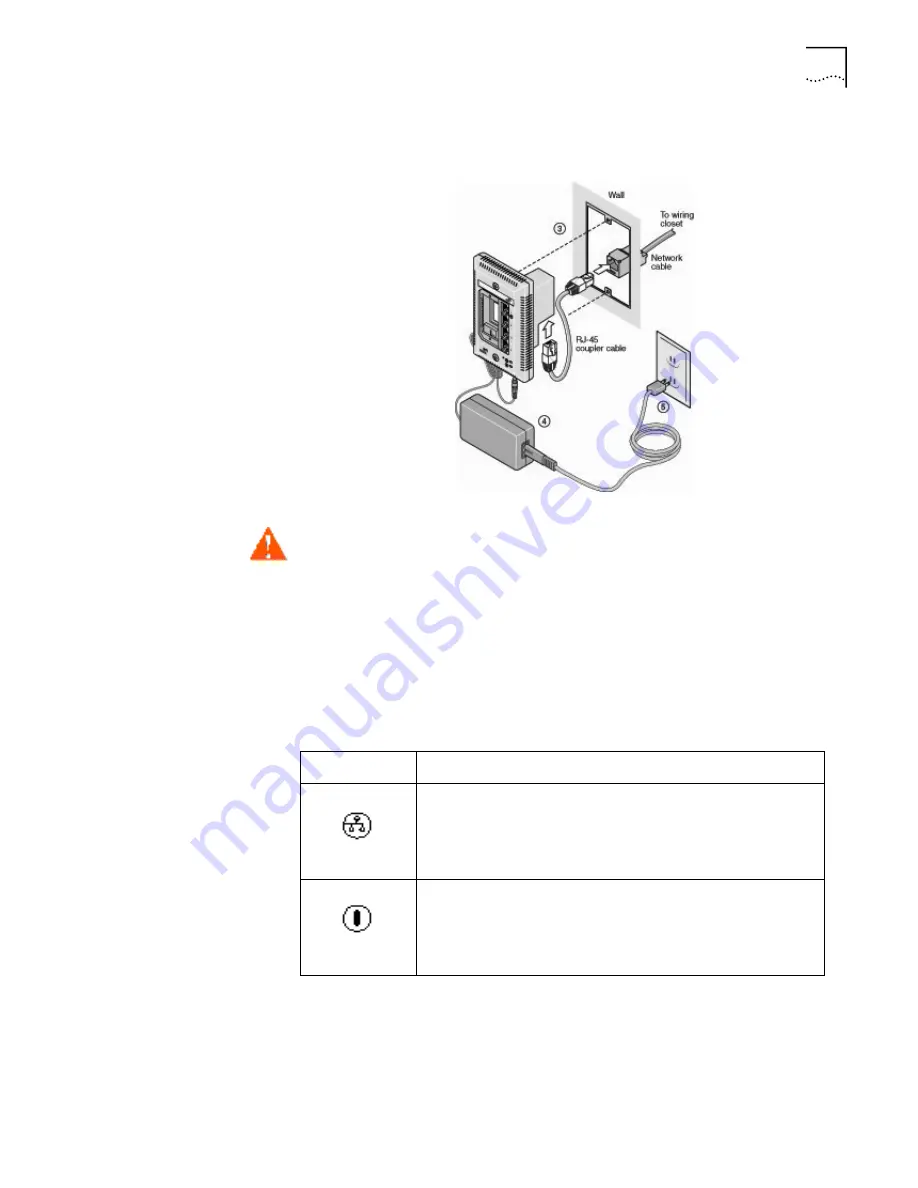
Plug the local power supply into the power source.
Connecting Devices to
the IntelliJack
After the IntelliJack is installed and mounted, connect your networking devices
(such as computers, printers, etc.) to any of the four switched ports on the front of
the IntelliJack.
If you installed the adapter plate with pass-through ports, connect the appropriate
device(s) to the port(s).
Checking the LEDs
You can verify the IntelliJack installation by checking the LEDs.
Additionally, each of the switched ports has a green LED which lights when a
device is connected. Port 1 also has an amber LED which lights when the
IntelliJack is forwarding power to a connected device.
WARNING: Use the local power supply available from 3Com. Failure to do so
may result in damage to the IntelliJack, or may result in a hazardous situation.
LED
Description
(LAN)
n
On—The IntelliJack is connected to the network and a link has
been established.
n
Off—There is no connection to the network.
(Power)
n
On—The IntelliJack is receiving power (local or via the network).
When you first connect power to the IntelliJack, there will be a
delay of approximately 5 seconds. The power LED light will blink
several times before remaining solid on.
n
Off—The IntelliJack is not receiving power.
Содержание 3CNJ220-CRM
Страница 18: ...14 CHAPTER 1 INSTALLING THE NJ220 INTELLIJACK ...
Страница 28: ...24 CHAPTER 2 INSTALLING THE CONFIGURATION MANAGERS ...
Страница 32: ...28 CHAPTER 3 USING THE LOCAL CONFIGURATION MANAGER ...
Страница 80: ...Product Specifications 76 ...


