background image

Luna G3 BPAP 25A (G3 B25A) User Manual                                                                                  MID-97/v1.0


31  / 48 

Option 

Range 

Description 

Time 

00:00 


23:59 

Set time by adjusting this option 

Time Format 

12-hour / 

24-hour 

Turn 

the Knob 

  to choose time format


Date Format 

yy mm dd / 

mm dd yy / 

dd mm yy 

Turn 

the Knob 

  to choose date formats 


Backlight 

Auto / On 

The backlight of the LCD screen can be set to 

“Auto”  or  “On.”  Turn 

the  Knob 

  to  choose 

between  the  two  modes.  If  it  is  set  to  “Auto,” 

the backlight will turn off automatically after 30 

seconds  of  inactivity.  If 

it  is  set  to  “On,”  the


backlight will always be on. 


Mask Fititing 

Test 

Start the 

Mask Fititing 

Test 

Test  whether  the  mask  is  worn  correctly,the 

screen  will  display  the  "great"  icon  if  it  passes 
the fit test, otherwise the screen will display the 
"need to adjust" icon. 

Brightness 

High / Low 

Set screen brightness by adjusting this option.   

Mask Type   

Full Face; 

Nasal; 

Pillow; Other 

There are three mask types available, Full Face 
(full-face mask), Nasal (nasal mask), and Pillow 
(nasal  pillow  mask).  The  default  mask  type  is 

Nasal

,”  but  the  patient  can  choose  other 

suitable  masks  as  well.  When  selecting  masks 

other  than  the  above  three  types  of  3B 
MEDICAL  masks,  the  patient  can  identify  the 
masks as other. 

iCode 

iCode, 

iCode QR, 

iCode QR + 

iCode  provides  access  to  the  patient's 

compliance data during a recent time period. 
The iCode mode displays data in sequences of 

numbers,  and  the  iCode  QR  /  iCode  QR  + 
mode displays data in two-dimensional codes. 

Consumables 

Reminder 

30 days/60 

days/180 

days/1 

year/off 

This  function  is  used  for  setting  filter  reminder, 

tube reminder and mask reminder. Patient can 
set the use time of filter, tube and mask. This is 
for replacement reminders. 

Language 

English   

The default setting is “

English

.


Use Time 

  50000 h 

Use  Time  displays  how  long  the  device  been 
used  by  the  patient.  The  use  time  can  be 
restored to factory settings. 

Consumables


Alert 

——


Reset the use time of the filter, tubing and mask. 

About 

——


Displays  related  information  of  the  device 

(Model,  SN,  Version,  ID).  This  is  read-only  and 
cannot be edited. 

Содержание G3 Series

Страница 1: ...User Manual G3 B25A Luna G3 BPAP 25A...

Страница 2: ...necting to Power Cord Locker 16 12 5 Assembling the Tubing Heated Tubing and Mask 17 12 6 Using Oxygen with the Device 18 12 7 Inserting the SD Card Only for the device that equipped with SD card 19 1...

Страница 3: ...d Corresponding Descriptions 30 17 Alert 32 18 Cleaning 33 18 1 Cleaning the Mask and Headgear 33 18 2 Cleaning the Water Chamber 33 18 3 Cleaning the Transfer Box 34 18 4 Cleaning the Enclosure 35 18...

Страница 4: ...y difficulties or problems during use please contact your homecare provider or physician 2 Symbols 2 1 Control Buttons Home Button Start Stop Button Knob 2 2 Device Symbols Follow Instructions for Use...

Страница 5: ...ot use the product if the package is damaged Disassembly is prohibited Maximum water level European CE Declaration of Conformity Product is intended for use by a single patient only Lot number Non Ion...

Страница 6: ...vel therapy or auto bi level therapy WARNINGS This device is intended for adult use only This device is not intended for life support The instructions in this manual are not intended to supersede esta...

Страница 7: ...rapy Acute sinusitis or otitis media Epistaxis causing a risk of pulmonary aspiration Conditions predisposing to a risk of aspiration of gastric contents Impaired ability to clear secretions Hypotensi...

Страница 8: ...ental Conditions Maximum airflow 35 C 15 relative humidity Maximum Operating Pressure 40 cmH2O Pressure Drop with Humidifier 0 4 cmH2O at 60 LPM flow Maximum Delivered Gas Temperature 43 C Mode of Ope...

Страница 9: ...when the device is working at the pressure of 10 cmH2O Sound Power Level 34 dB when the device is working at the pressure of 10 cmH2O Maximum Flow Test Pressures cmH2O 4 10 15 20 Measured Pressure at...

Страница 10: ...ncies Table 1 Transmitting and Receiving frequencies Parameter Min Max Unit Remarks Frequency range FDD Band 12 700 MHz Uplink 699 716 MHz Module transmit Downlink 729 746 MHz Module receive Frequency...

Страница 11: ...rway Pressure CPAP maintains a constant level of pressure throughout the breathing cycle AutoCPAP Delivers CPAP therapy and provides an air pressure no less than the prescribed pressure based on the p...

Страница 12: ...to the patient s respiratory events during a certain time period SmartA With this feature the device adjusts Ramp P and Min APAP according to the patient s respiratory events during a certain time pe...

Страница 13: ...vice to change from EPAP to IPAP You can adjust this time for your comfort Res Rate Respiratory Rate Number of breaths per minute Reslex A therapy feature that is enabled by your home care provider to...

Страница 14: ...and accessories manufactured or recommended by 3B MEDICAL or with those recommended by your prescribing physician The use of inappropriate masks and accessories may affect the performance of the devic...

Страница 15: ...Knob Display Screen Home Button Start Stop Button Fig 11 1 Name Function Start Stop Button Start Stop delivering air Display Screen Display menus for operation messages monitoring data etc Home Button...

Страница 16: ...nnected to the plug of the heated tubing DC Inlet An inlet for the DC power supply Filter Cap Air Inlet Cover and secure the air filter which is used to filter dust and pollen in the air entering the...

Страница 17: ...tures allow it to adjust to room temperature approximately 2 hours before beginning setup Make sure the device is away from any heating or cooling equipment e g forced air vents radiators air conditio...

Страница 18: ...the device is operating Device must be unplugged when installing the air filter and filter cap or PM2 5 filter 12 3 Connecting to Power 1 Insert the plug of the power adapter into the DC Inlet on the...

Страница 19: ...After interruption and restoration of the power supply the device will restore its pre interruption working status automatically To remove AC power disconnect the power cord from the power outlet 12...

Страница 20: ...Connect the heated tubing joint to the air outlet of the device and then insert the power plug into the heated tubing port on the back of the device as shown in Fig 12 8 Power Plug Heated Tubing Air O...

Страница 21: ...al accessories are in place If you are using a mask with a built in exhalation port connect the mask s connector to the tubing If you are using a mask with a separate exhalation port connect the tubin...

Страница 22: ...tem a Pressure Valve must be placed in line with the patient circuit between the device and the oxygen source The pressure valve helps prevent the backflow of oxygen from the patient circuit into the...

Страница 23: ...Connect the mask and headgear according to the user manual for the mask CAUTION Before each use examine the tubing for any damage or debris If necessary clean the tubing to remove the debris Replace...

Страница 24: ...en as you wish during sleep The ramp feature is not prescribed for all users 13 6 Accessing the iCode After the device is powered on move the cursor to the icon by turning the Knob as shown in the Fig...

Страница 25: ...ter Chamber 14 1 1 Removing the Water Chamber Press down the water chamber and then remove it as shown in Fig 14 1 Fig 14 1 WARNING Turn the device off and allow approximately 15 minutes for the heate...

Страница 26: ...use and do not surpass the MAX fill line CAUTIONS Empty the water chamber when the heated humidifier is not in use Distilled water is recommended IMPORTANT TIP It is not necessary to remove the water...

Страница 27: ...p as shown below and pour any remaining water out of the water chamber Fig 14 7 CAUTION Empty and air dry the water chamber when the device is not in use 3 Returning the Water Chamber according to ins...

Страница 28: ...wer Nasal dryness means that the humidity level is too low and should be set higher 15 Using the Cellular Module The Luna G3 BPAP 25A with Cellular Module can wirelessly communicate with iCodeConnect...

Страница 29: ...evice screen will not show the signal icon if the Cellular Module is connected to the device improperly or if the Module is not working properly WARNING To ensure successful data transmission through...

Страница 30: ...een as shown in Fig 16 3 Fig 16 3 The first icon on the upper part of the screen indicates the Preheat Function Icon the second icon indicates the Accessories the third icon indicates Mask Setup Icon...

Страница 31: ...ient Menu as shown in Fig 16 4 Fig 16 4 Note The Heated Tubing option can only be adjusted when the device is connected to the Heated Tubing as shown in Fig 16 5 Fig 16 5 16 1 3 Selecting Options As y...

Страница 32: ...kwise the numerals decrease indicating a lower humidity level as shown in Fig 16 7 Fig 16 7 16 1 5 Confirming Adjustments Confirm your adjustment to an option by pressing the Knob The option is then d...

Страница 33: ...creases the heat rises accordingly Off means the heat is turned off Note Heated Tubing is displayed in the patient menu only when it is connected Ramp Time Auto 0 Max Ramp In order to increase comfort...

Страница 34: ...Full Face full face mask Nasal nasal mask and Pillow nasal pillow mask The default mask type is Nasal but the patient can choose other suitable masks as well When selecting masks other than the above...

Страница 35: ...idifier is connected an audible alert will sound if the humidifier fails to work in 10 minutes the screen will display Humidifier Failure Please Change Filter When the Filter Alert feature is enabled...

Страница 36: ...the device There are no user serviceable parts inside Repairs and servicing should only be performed by an authorized service agent CAUTIONS Overheating of the materials could lead to early fatigue of...

Страница 37: ...ter enters the device After cleaning rinse the water chamber throughly in clean water to make sure that no soap residue is left then wipe it dry with a lint free cloth so as to prevent calcareous accu...

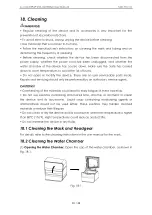
Страница 38: ...tubing from the device and mask before cleaning 2 Clean the tubing in warm water and mild soap and then rinse it in clean water thoroughly 3 After cleaning air dry the tubing in a cool well ventilated...

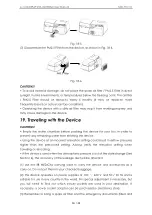
Страница 39: ...ny remaining water from entering the device Using the device at an incorrect elevation setting could result in airflow pressures higher than the prescribed setting Always verify the elevation setting...

Страница 40: ...notice any unexplained changes in the performance of the device if it is making unusual or harsh sounds if it has been dropped or mishandled if the enclosure is broken or if water has entered the enc...

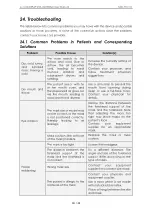
Страница 41: ...vent the mouth from opening during sleep or use a full face mask Contact your physician for details Eye irritation The mask size or model may not be correct or the mask is not positioned correctly the...

Страница 42: ...f the treatment pressure is set too low Patients may experience a variance in time to acclimate to their therapy If the problem persists contact your physician or home care company for assistance Obst...

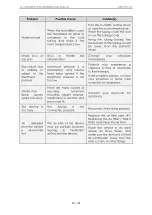
Страница 43: ...ay be holes in the mask or pressure sensing tubing Contact your equipment supplier It is a faulty device Contact your equipment supplier The device produces very low pressures The air inlet of the dev...

Страница 44: ...el of probability for loss of information within the network The data has little effects on treatment effectiveness These are key data and their integrity should be ensured but they do not involve rea...

Страница 45: ...dance RF emissions CISPR 11 Group 1 The device uses RF energy only for its internal function Therefore its RF emissions are very low and are not likely to cause any interference in nearby electronic e...

Страница 46: ...nment Surge IEC 61000 4 5 1 kV line s to line s 1 kV line s to line s Mains power quality should be that of a typical commercial or hospital environment Voltage dips short interruptions and voltage va...

Страница 47: ...turer and d is the recommended separation distance in meters m Field strengths from fixed RF transmitter as determined by an electromagnetic site survey a should be less than the compliance level in e...

Страница 48: ...ns equipment Rated maximum output of transmitter W 150 kHz 80 MHz p d 17 1 80 MHz 800 MHz p d 35 0 800 MHz 2 5 GHz p d 70 0 0 01 0 12 0 04 0 07 0 1 0 37 0 12 0 23 1 1 17 0 35 0 70 10 3 70 1 11 2 22 10...

Страница 49: ...closer to any part of the device including cables than the recommended separation distance calculated from the equation applicable to the frequency of the transmitter Recommended separation distance W...

Страница 50: ...should be observed to verify normal operation The use of accessories and power cord other than those specified with the exception of cables sold by the manufacturer of the equipment or system as repla...

Страница 51: ...he dealer location only This warranty does not cover damage caused by accident misuse abuse alteration and other defects not related to material or workmanship 3B MEDICAL Inc DISCLAIMS ALL LIABILITY F...

Отзывы: