background image

29

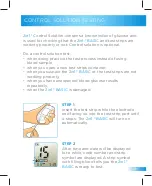
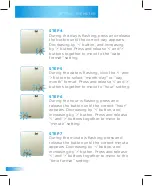
SETTING THE METER

STEP 1


Press both ‘<’ and ‘>’ buttons together 
for 3 seconds. “Set” is displayed on 
screen while the year is blinking.

STEP 2


Press and release the button until the 
correct year appears. Decreasing by ‘<’ 
button, and increasing by ‘>’ button. 
Press and release ‘<’ and ‘>’ buttons 
together to move to “month” setting.

STEP 3


During themonth is fl ashing, press and 
release the button until the correct 
month appears. Decreasing by ‘<’ button, 
and increasing by ‘>’ button. Press and 
release ‘<’ and ‘>’ buttons together to 
move to “day” setting.

Important:

• 

Click the ‘<’ button or ‘>’ button to adjust the 
parameter. 

• 

Press the ‘<’ and ‘>’ buttons together simultaneously to 
move to the next setting.

• 

Press the ‘<’ and ‘>’ buttons together for 3 seconds to 
exit the setting.

Содержание BASIC PG-300

Страница 1: ...ENG SLO DE 1 BLOOD GLUCOSE MONITORING SYSTEM SISTEM ZA NADZOR SLADKORJA V KRVI BLUTZUCKERMESSSYSTEM USER S GUIDE PRIROČNIK ZA UPORABNIKA GEBRAUCHSANWEISUNG ...

Страница 2: ...ORING SYSTEM Thank you for purchasing the 2in1 BASIC Please read this User s Guide thoroughly before using and ensuring correct operation Please keep this User s Guide in safe place for your future reference USER GUIDE ENG ...

Страница 3: ...ic use by people diabetes at home and by healthcare professionals in clinical setting 2in1 BASIC should not be used for the diagnosis of diabetes or the testing of newborn 2in1 BASIC meter has wheel button to eject the used strip easily and simply The small size with stylish design and ease operation allows you can bring everywhere Shows much useful information Requires very small volume 0 5 μL an...

Страница 4: ...ng Blood Drop About Alternate Site Testing Testing Your Blood Glucose Control Solution Testing Reviewing Results Setting the Meter Replacing the Battery Error Messages Troubleshooting Performance Characteristics Caring for System Specifications 5 6 8 11 14 17 19 23 26 29 33 34 36 37 39 41 ...

Страница 5: ...in1 BASIC Meter 2 Carrying Case 3 Lancing Device 4 Lithium Battery CR2032 5 2in1 Blood Glucose Test Strips 6 Lancets Documents in your system include this USER S GUIDE and QUICK GUIDE If any items are missing please contact to local distributor ...

Страница 6: ...te Serial number Lot number In vitro Diagnostic medical device Manufacturer Authorised representative Symbol for temperature limitation Consult instructions for use Biological risks Contains sufficient for n tests Direct current Separate disposal from other household waste Catalogue number ...

Страница 7: ...on of glucose in the blood sample with the reagents on the strip This currency is varied by the amount of glucose in the blood sample The currency variation is calculated to glucose concentration of sample Setting the time and date Your 2in1 BASIC comes with a preset time date and year Before your first using the meter or when you change battery you should check the setting of time and date for you...

Страница 8: ...an turn the meter off by pressing button and button at same time Eject Wheel Remove the tested strips by rolling Test Strip Port Insert the 2in1 Test Strip The meter will turn on automatically when inserting the test strip Electrodes Insert into test strip slot while facing up Sample Tip The fresh blood sample is drawn into Front View 2in1 Test Strip ...

Страница 9: ...9 NAMES AND FUNCTIONS Data Port Transfer test results to computer Cable is optional Battery Cover Slide cover off for replacing battery Side View Rear View ...

Страница 10: ...2 Displays current mode 3 Warning when the battery is low or need to be replaced 4 Display test results and messages 5 Indicate ready to test 6 Indicates abnormal temperature warning 7 Display measuring unit 8 Display current time 9 Indicates alarm 10 Display date and year Clear AST cap is an optional accessory Please contact your local distributor Display ...

Страница 11: ... Do not use the 2in1 BASIC for diagnosis of diabetes testing on newborns and with arterial blood The 2in1 BASIC contains small parts that may be dangerous if swallowed Check the packages when purchasing and before using the 2in1 BASIC Before operating be sure to read User s Guide and Insert found in test strip container carefully Do not make any of medical relevance decision without consulting you...

Страница 12: ...empt to severe shock drop or step on meter The 2in1 BASIC is not waterproof Do not wash by water or touch it with wet hands Do not wipe the meter with chemical solvent or abrasive cleaners Avoid the 2in1 BASIC being ex posed to high temperature high hu midity rain and or dust when using or storing Do not test instantly when the 2in1 BASIC moves to where sudden temperature changes Please wait 20 mi...

Страница 13: ...face of strip directly Do not press test strip against your finger It may affect bad aspiration of blood sample aspiration Do not use a test strip that looks damaged and or used Test strips are for single use only Store the test strips in their original container After you take a strip out of the container be sure to use it within three minutes Use test strips within 3 months 90 days after opening ...

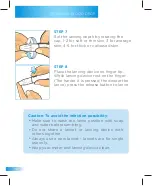
Страница 14: ...eaning your hands carefully with soap and warm water for increasing the blood circulation in finger vein Dry hands thoroughly until pricked skin is dried off STEP 2 Unscrew the lancing device cap by turning counter clockwise while holding firmly ...

Страница 15: ...erile lancet into the lancet holder STEP 4 Twist the lancet cap off STEP 5 Put the lancing device cap on and close by turning clockwise STEP 6 Hold the lance holder firmly and pull back and release the sliding barrel Now the lancing device is cocked ...

Страница 16: ...p While lancing device rest on the finger The harder it is pressed the deeper the lance press the release button to lance Caution To avoid the infection possibility Make sure to wash the lance position with soap and water before sampling Do not share a lancet or lancing device with others together Always use a new lancet lancets are for single use only Keep your meter and lancing device clean ...

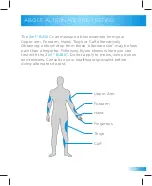
Страница 17: ...f alternatively Obtaining a blood drop from these alternate site may be less pain than a fingertip Following figure shows where you can test with the 2in1 BASIC Do not apply to moles veins bones and tendons Consult to your healthcare specialist before doing alternate site test Upper Arm Forearm Hand Fingertips Thigh Calf ...

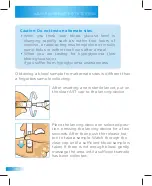
Страница 18: ...elease but ton to take a sample Watch through the clear cap until a sufficient blood sample is taken If there is not enough blood gently massage the area until a sufficient sample has been collected Caution Do not test on alternate sites when you think your blood glucose level is changing rapidly such as within two hours of exercise a rapid acting insulin injection or insulin pump bolus or within ...

Страница 19: ...tomatically STEP 2 After time and date is displayed for a while The code number and strip symbol are displayed A strip symbol with filling blood tells you 2in1 BASIC is ready to test STEP 3 Compare and ensure the displayed code number is same as printed code on test strip container If displayed code number is different please use another new strip ...

Страница 20: ...BASIC beeps Blood sample is drawn into test strip STEP 5 The screen shows counting progress during 5 seconds STEP 6 When the measuring complete there is beep sound The blood glucose test result display on screen Important The volume of blood sample must be over 0 5 microliter real size at least ...

Страница 21: ...rips and lancets may be considered biohazardous waste in your area Be sure to follow your local regulations for dispose properly When the test result is above 600 mg dL 33 3 mmol L HI is displayed When the test result is lower than 10 mg dL 0 6 mmol L Lo is displayed STEP 7 Roll the eject wheel to discard the used strip Test result will be stored in memory automatically ...

Страница 22: ...ing page 23 Range of expected results Blood glucose levels will vary depending on food intake medication dosages health condition stress or exercise status Consult your healthcare professional for the target value that is appropriate for you Expected blood glucose levels for non pregnant person without Diabetes Fasting Less than 110 mg dL 5 6 mmol L 2 hours after meals Less than 140 mg dL 7 8 mmol...

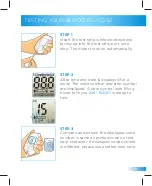
Страница 23: ...a new test strips container when you suspect the 2in1 BASIC or the test strips are not working properly when you have unexpected blood glucose results repeatedly when the 2in1 BASIC is damaged STEP 1 Insert the test strip while the electrode end facing up into the test strip port until it stops The 2in1 BASIC will turn on automatically STEP 2 After time and date will be displayed for a while code ...

Страница 24: ... of the test strip container If displayed code number is different please use another new strip STEP 4 Shake the control solution vial and open the cap Gently touch test strip tip to control solution drop and stay until beeps STEP 5 The 2in1 BASIC shows counting progress during 5 seconds sekund ...

Страница 25: ...wheel to discard the used strip Test result is stored in memory automatically Control Test Range 80 120 mg dL when you are not comply the instructions on this USER S GUIDE expired contaminated or watered down control solution expired or damaged test strip control solution test is done out of temperature range 20 C to 25 C or a problem on the 2in1 BASIC Out of range results may be caused by If your...

Страница 26: ... time and date are displayed After then a strip symbol is blinking STEP 2 To enter review mode When a strip symbol is blinking press the button The last test sequence number 1 is displayed Release the button the last test result is displayed Important If there is no result is displayed ...

Страница 27: ...yed backward Press and release the button you can see the backward test results and press and release the button for forward test result STEP 4 To review average To review your 30 day result average press and release button while a strip symbol is blinking Pressing and releasing the button al low you to scroll forward to 14 day and 7 day averages ...

Страница 28: ...ess and release the button at the last test result you can see the 30 day average Press and release the button at the 30 day average you can see the last test result STEP 6 Press both and buttons together to turn the 2in1 BASIC off ...

Страница 29: ...lease and buttons together to move to month setting STEP 3 During themonth is flashing press and release the button until the correct month appears Decreasing by button and increasing by button Press and release and buttons together to move to day setting Important Click the button or button to adjust the parameter Press the and buttons together simultaneously to move to the next setting Press the ...

Страница 30: ...y or day month format Press and release and buttons together to move to hour setting STEP 6 During the hour is flashing press and release the button until the correct hour appears Decreasing by button and increasing by button Press and release and buttons together to move to minute setting STEP 7 During the minute is flashing press and release the button until the correct minute appears Decreasing b...

Страница 31: ...press and release the button to select beeper on or beeper off Press and release and buttons together to move to the alarm setting STEP 10 During On or Off is flashing press and release the button to select the first alarm on or off Press and release and buttons together to move to the second alarm setting when the first alarm is off Press and release and buttons together to set the time of first alar...

Страница 32: ...utton to set the first alarm time when the first alarm is on by the same way of previous the hour and minute settings STEP 12 After totally settings of four alarms are completed press and release and buttons together to finish setup and turn off 2in1 BASIC ...

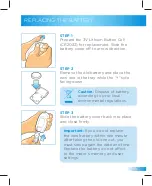
Страница 33: ...e in the tray while the side facing down STEP 3 Slide the battery cover back into place and close firmly Caution Dispose of battery according to your local environmental regulations Important If you do not replace the new battery within one minute after taking the old one out you must setup again the date and time Replace the battery do not affect to the meter s memory and user settings ...

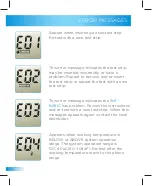
Страница 34: ... test strip or repeat the test with a new test strip This error message indicates the 2in1 BASIC has problem Review the instructions and re test with a new test strip When this messages appears again contact the local distributor Appears when working temperature is BELOW or ABOVE system operation range The system operation range is 10C 40oC 50 104oF Re test after the working temperature reach to t...

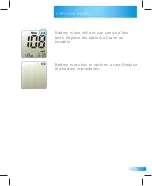
Страница 35: ...35 ERROR MESSAGES Battery is low still but you can do a few tests Replace the battery as soon as possible Battery is too low to perform a test Replace the battery immediately ...

Страница 36: ...nd the electrode end into the test strip port Defective meter or test strips Contact your local distributor Blood or foreign objects put into test strip slot Contact your local distributor Test does not start after applying the blood sample Probable cause What to do Blood sample is too small Re test with a new test strip and a larger blood sample Defective meter or test strips Re test with a new t...

Страница 37: ... for glucose concentrations 100 mg dL 5 5 mmol L System accuracy result for lucose concentrations 100 mg dL 5 5 mmol L Regression statistics 2in1 BASIC System within 5 94 within 10 100 within 15 100 within 20 100 2in1 BASIC System Slope 1 0184 Intercept 0 9642 mg dL R2 0 9981 No of samples 100 Range tested 31 5 448 mg dL 2in1 BASIC System within 5 mg dL 0 28 mmol L 95 within 10 mg dL 0 56 mmol L 1...

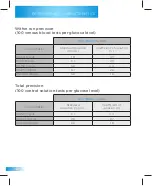
Страница 38: ...dL 3 1 2 9 111 150 mg dL 5 8 4 4 151 250 mg dL 6 1 2 6 251 400 mg dL 5 8 1 6 Within run precision 100 venous blood tests per glucose level Total precision 100 control solution tests per glucose level 2in1 BASIC System Concentration Standard deviation mg dL Coefficient of variation 30 50 mg dL 2 1 4 3 90 130 mg dL 2 8 2 7 280 420 mg dL 6 0 1 8 ...

Страница 39: ...r original container Checking for expiration to strips and control solution Test strips and control solution have expiration date which is printed on their containers When open a test strip or control solution vial first time you must write down the opening date on provided label Use all test strips within 3 months after opening Caution Do not use the strips or control solution after the expiration...

Страница 40: ...chemical solvent Do not remain any liquids dirt dust blood or control solution inside of the test slot Cleaning your lancing device and clear AST cap Clean and wipe the outside of the lancing device with a soft cloth dampened with mild detergent and water Clean the adjustable cap and clear AST cap with mild detergent Do not immerse the lancing device in any liquid ...

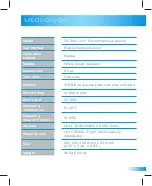
Страница 41: ...umidity Altitude Power Source Size Weight PG 300 2in1 Electrochemical sensor Electrochemical sensor Plasma Whole blood capillary 0 5 μL 5 seconds 500 Blood glucose tests with time and date 10 600 mg dL 20 60 10 40 C 10 90 Up to 3 048 meters 10 000 feets One CR2032 3 volt lithium battery replaceable 56 0 mm x 88 0 mm x 23 6 mm 2 20 x 3 46 x 0 93 46 5g 1 64oz ...

Страница 42: ... test levels specified in IEC 61000 4 3 The meter has been tested for electromagnetic emissions specified in IEC 61326 Warranty VPD Bled d o o warrants that your 2in1 BASIC meter will be free of defects in materials and workmanship for 5 years valid from the date of purchase The warranty extends only to the original purchaser and is not transferable First and Last name Address Telephone no Serial no...

Страница 43: ......

Страница 44: ...V KRVI Zahvaljujemo se vam za nakup 2in1 BASIC merilnika Prosimo da pred uporabo natančno preberete ta navodila in tako zagotovite varno delovanje Navodila za uporabo hranite na varnem za nadaljnjo uporabo NAVODILA ZA UPORABNIKA SLO ...

Страница 45: ...okolju 2in1 BASIC merilnika ni dovoljeno uporabljati za diagnosticiranje sladkorne bolezni ali za testiranje pri novorojenčkih 2in1 BASIC merilnik ima vrtljiv gumb s katerim je mogoče hitro in enostavno odstraniti uporabljeni testni listič Zaradi kompaktne oblike in privlačnega dizajna ga lahko vzamete s seboj prav povsod saj prikaže izredno uporabne podatke Za meritev je potrebna majhna količina ...

Страница 46: ...vzeti vzorec krvi O odvzemu krvi iz drugih vbodnih mest Merjenje glukoze v krvi Test s kontrolno raztopino Pregled rezultatov Nastavitve merilnika Zamenjava baterije Javljanje napak Odpravljanje napak Značilnosti delovanja Nega merilnika Specifikacije 47 48 50 53 56 59 61 65 68 71 75 76 78 79 81 83 ...

Страница 47: ...ilnik 2in1 BASIC 2 Prenosno torbico 3 Sprožilno napravo 4 Litijeva baterija CR2032 5 Testne lističe 6 Lancete Komplet vsebuje NAVODILA ZA UPORABNIKA in KRATKA NAVODILA Če vašemu kompletu niso bili priloženi vsi deli se obrnite na svojega lokalnega distributerja ...

Страница 48: ...Rok uporabnosti Serijska številka Lot Medicinski pripomoček za in vitro diagnosticiranje Proizvajalec Pooblaščeni zastopnik Simbol za omejitev temperature Glej navodila za uporabo Biološka tveganja Za n meritev Enosmerni tok Ločeno odstranjevanje od gospodinjskih odpadkov Kataloška številka ...

Страница 49: ...krivanje majhnega odstopanja v električnem toku kar ustvari reakcija glukoze iz vzorca krvi in reagentov na testnem lističu Ta tok varira glede na količino glukoze v vzorcu krvi To odstopanje se izračuna glede na raven glukoze v vzorcu krvi Nastavitve datuma in časa Merilnik 2in1 BASIC ima že tovarniško nastavljen čas datum in leto Pred prvo uporabo ali ob zamenjavi baterije preverite nastavitve č...

Страница 50: ...lahko izključite če hkrati pritisnete na gumba in Vrtljivi gumb za izmet lističa S premikom gumba odstranite listič Odprtina za testni listič Vstavite listič 2in1 BASIC Merilnik se samodejno vključi ko vstavite testni listič Elektrode Testni listič vstavite tako da so elektrode obrnjene navzgor Konica lističa Vsrka vzorec sveže krvi Sprednja stran 2in1 testni listič ...

Страница 51: ...51 DELI IN DELOVANJE Podatkovna vrata Prenesite rezultate meritev na računalnik kabel opcijsko Pokrov prostora za baterije Odstranite pokrov za zamenjavo baterije Pogled s strani Zadnja stran ...

Страница 52: ...nega načina delovanja 3 Opozorilo za prazno baterijo ali za zamenjavo baterije 4 Prikaz testnih rezultatov in obvestil 5 Pripravljenost za uporabo 6 Opozorilo za neobičajno temperaturo 7 Prikaz merilne enote 8 Prikaz trenutnega časa 9 Alarm 10 Datum in leto Prozorni pokrovček za odvzem krvi iz drugih vbodnih mest je na voljo kot dodatni pripomoček Obrnite se na svojega lokalnega distributerja Zasl...

Страница 53: ...nika ne uporabljajte za diagnosticiranje sladkorne bolezni testiranje pri novorojenčkih ne uporabljajte arterijske krvi Merilnik vsebuje majhne dele zato obstaja nevarnost zaužitja Ob nakupu in pred prvo uporabo preverite komplet Pred prvo uporabo skrbno preberite navodila za uporabo in navodila ki so priložena steklenički s testnimi lističi Ne sprejemajte medicinsko relevantnih odločitev preden s...

Страница 54: ...a ali da bi nanj stopili 2in1 BASIC merilnik ni vodoodporen zato ga ne čistite z vodo in ga ne prijemajte z mokrimi rokami Merilnika ne čistite s kemičnimi raztopinami ali sredstvi za poliranje Pri uporabi ali shranjevanju merilnika 2in1 BASIC ne izpostavljajte visokim temperaturam visoki vlažnosti dežju in ali prahu Pri prenosu meril merilnika 2in1 BASIC iz enega temperaturnega območja v drugo po...

Страница 55: ...kapnite neposredno na površino lističa Testnega lističa ne pritiskajte ob prst saj lahko preprečite vskranje vzorca krvi Testnega lističa ne uporabite če opazite da je poškodovan in ali uporabljen Testni lističi so namenjeni le za enkratno uporabo Testne lističe hranite v originalni embalaži Ko testni listič vzamete iz embalaže ga uporabite v treh minutah Testne lističe uporabite v 3 mesecih 90 dn...

Страница 56: ...I 1 KORAK Roke skrbno umijte z milom in toplo vodo da pospešite prekrvavitev na vbodnem mestu Roke dobro posušite 2 KORAK Odstranite pokrovček sprožilne naprave tako da ga odvijete v nasprotni smeri urinega kazalca ...

Страница 57: ...eto v držalo 4 KORAK Odvijte pokrovček lancete 5 KORAK Ponovno namestite pokrovček sprožilne naprave z vrtenjem v smeri urinega kazalca 6 KORAK Držalo sprožilne naprave močno držite ter potegnite za sprožilni mehanizem Sprožilna naprava je tako napeta ...

Страница 58: ...o položite na konico prsta tesneje kot pritiskate globlji bo vbod pritisnite na sprožilni gumb za sprožitev lancete OPOZORILO preprečevanje možnih okužb Pred odvzemom krvi vedno skrbno umijte vbodno mesto Lancete ali sprožilne naprave ne delite z drugimi Vedno uporabite novo lanceto lancete so namenjene zgolj za enkratno uporabo Merilnik in sprožilna naprava naj bosta vedno čista ...

Страница 59: ...adlakti podlakti roke stegna ali meč kar je lahko manj boleče kot s konice prsta Slika prikazuje kje lahko odvzemate kri Vzorca krvi pa ne smete jemati iz znamenj žil kosti in kit Preden se odločite za tovrstni odvzem krvi se posvetujte s strokovnjakom Nadlaket Podlaket Roka Konica prsta Stegno Meča ...

Страница 60: ... ob kožo Pritisnite na sprožilni gumb Skozi prozorni pokrovček opazujte da se napolni z zadostno količino krvi Če ni zadosti krvi nežno masirajte odvzemno mesto dokler ne zberete zadostnega vzorca OPOZORILO krvineodvzemajteizdrugihvbodnihmest če menite da se raven glukoze v vaši krvi hitro spreminja na primer v dveh urah po vadbi injiciranju hitro delujočega inzulina ali apliciranju inzulina oziro...

Страница 61: ...dejno vključi 2 KORAK Prikažejo se datum čas kodna številka in simbol za listič Ko se prikaže simbol testnega lističa z utripajočo kapljico to pomeni da je merilnik pripravljen na meritev 3 KORAK Pazite da je koda ki se prikaže na zaslonu enaka kodi ki je natisnjena na škatlici s testnimi lističi Če se kodi razlikujete vstavite nov testni listič ...

Страница 62: ... krvi in držite dokler ne zaslišite piska Testni listič vsrka kri 5 KORAK Rezultat se prikaže po 5 sekundnem odštevanju 6 KORAK Ko je meritev zaključena zaslišite pisk Rezultat meritve se prikaže na zaslonu POMEMBNO količina vzorca krvi mora biti večja od 0 5 mikrolitra dejanska velikost ...

Страница 63: ...ZORILO Uporabljeni testni lističi in lancete se lahko smatrajo kot nevarni biološki odpadki Te odpadke odlagajte skladno s pravili Če je rezultat meritve višji od 33 3 mmol L 600 mg dL se prikaže simbol HI Če je rezultat meritve nižji od 0 6 mmol L 10 mg dL ser prikaže simbol LO 7 KORAK Za odstranitev testnega lističa zavrtite vrtljivi gumb Rezultat meritve se samodejno shrani ...

Страница 64: ...li za test s kontrolno raztopino 65 stran Razpon pričakovanih rezultatov Ravni glukoze v krvi lahko variirajo glede na vnos hrane odmerke zdravil zdravje stres ali vadbo Za določanje ustrezne ravni glukoze v vašem primeru se posvetujte s strokovnjakom Pričakovane ravni glukoze v krvi ne velja za nosečnice brez sladkorne bolezni na tešče manj kot 5 6 mmol L 110 mg dL 2 uri po obroku manj kot 7 8mmo...

Страница 65: ...novo stekleničko s testnimi lističi ko mislite da merilnik ali testni lističi ne delujejo pravilno ko se ponavljajo nepričakovani rezultati ravni glukoze v krvi ko je merilnik 2in1 BASIC poškodovan 1 KORAK V odprtino za testni listič do konca vstavite testni listič z elektrodo obrnjeno navzgor 2in1 BASIC merilnik se samodejno vključi 2 KORAK Prikažejo se datum čas kodna številka in simbol za listi...

Страница 66: ...a na škatlici s testnimi lističi Če se kodi razlikujeta vstavite nov testni listič 4 KORAK Pretresite stekleničko s kontrolno raztopino in jo odprite S konico testnega lističa se nežno dotaknite kapljice kontrolne raztopine in počakajte da zaslišite pisk 5 KORAK Rezultat se prikaže po 5 sekundnem odštevanju ...

Страница 67: ...b da odstranite testni listič Rezultat testa se samodejno shrani Kontrolni razpon meritev 80 120 mg dL neupoštevanje navodil za uporabo kontrolna raztopina je lahko kontaminirana ji je potekel rok uporabnosti oziroma rok uporabe po odprtju stekleničke testni listič je poškodovan ali mu je potekel rok uporabnosti test s kontrolno raztopino je bil izveden izven temperaturnega razpona med 20 in 25 C ...

Страница 68: ...koli gumb prikažeta čas in datum Simbol za testni listič začne utripati 2 KORAK preklop v način pregleda Ko utripa simbol za testni listič pritisnite gumb Prikaže se zadnja številka testa 1 Ko spustite gumb se prikaže zadnji rezultat testa POMEMBNO Če rezultata ni se prikaže simbol ...

Страница 69: ...spustite gumb za prikaz rezultatov testov od zadnjega proti prvemu in pritisnite ter spustite gumb za prikaz rezultatov od prvega naprej 4 KORAK pregled povprečnih rezultatov Če si želite ogledati povprečje 30 dnevnih rezultatov meritev pritisnite in spustite gumb medtem ko utripa simbol za testni listič S pritiskanjem na gumb lahko preklopite v prikaz 14 in 7 dnevnega povprečja ...

Страница 70: ...ovprečje Ob prikazu 30 dnevnega povprečja pritisnite in spustite gumb da vidite zadnji rezultat testiranja Utripa simbol za testni listič 7 dnevno povprečje 14 dnevno povprečje 30 dnevno povprečje Zadnji rezultat Drugi rezultat Tretji rezultat 6 KORAK Hkrati pritisnite gumba in da izključite 2in1 BASIC merilnik ...

Страница 71: ...n spustite gumba in da se premaknete na nastavitve meseca 3 KORAK Medtem ko utripa simbol za mesec pritiskajte na gumb dokler se ne pojavi ustrezen mesec Številko znižate z gumbom zvišate pa z gumbom Hkrati pritisnite in spustite gumba in da se premaknete na nastavitve za dan POMEMBNO Kliknite na gumb ali da prilagodite parameter Hkrati kliknite na gumba in da se premaknete na naslednjo nastavitev...

Страница 72: ...c dan ali dan mesec Hkrati pritisnite in spustite gumba in da se premaknete na nastavitve ure 6 KORAK Medtem ko utripa simbol za dan pritiskajte na gumb dokler se ne pojavi ustrezna ura Številko znižate z gumbom zvišate pa z gumbom Hkrati pritisnite in spustite gumba in da se premaknete na nastavitve za minuto 7 KORAK Medtem ko utripa simbol za dan pritiskajte na gumb dokler se ne pojavi ustrezna ...

Страница 73: ...en pritisnite in sprostite gumb če želite vključiti ali izključiti opozarjanje s piskom Hkrati pritisnite in spustite gumba in da se premaknete na nastavitve alarma 10 KORAK Medtem ko utripa simbol On vključen ali Off izključen pritisnite in sprostite gumb da izberete vklop ali izklop prvega alarma Hkrati pritisnite in spustite gumba in da se premaknete na nastavitve drugega alarma ko je prvi alar...

Страница 74: ...tavite čas prvega alarma ko je ta vključen in sicer na enak način kot ste to storili z nastavitvami ure in minut 12 KORAK Ko zaključite z nastavljanjem vseh štirih alarmov hkrati pritisnite in spustite gumba in da zaključite z nastavitvami in izključite 2in1 BASIC merilnik ...

Страница 75: ... upoštevajte ustrezno polarnost znak mora biti na spodnjem delu 3 KORAK Ponovno namestite pokrov in ustrezno zaprite prostor za baterijo OPOZORILO odlaganje baterij opravite skladno z lokalnimi okoljskimi predpisi POMEMBNO če nove baterije ne vstavite v eni minuti po tem ko ste odstranili staro baterijo boste morali znova nastaviti datum in čas Zamenjava baterije ne vpliva na spomin merilnika in u...

Страница 76: ...te listič in vstavite novega ali ponovite test z novim testnim lističem To obvestilo kaže da ima 2in1 BASIC merilnik težavo Oglejte si navodila in ponovno opravite test z novim testnim lističem Če se napaka znova pojavi se obrnite na lokalnega distributerja Napaka se pojavi če je delovna temperature NIŽJA ali VIŠJA od delovne temperature sistema ki znaša 10 C 40 C Ponovno opravite test ko je delov...

Страница 77: ...77 OBVESTILA O NAPAKAH Baterija je skoraj prazna vendar še vedno lahko opravite nekaj meritev Čim prej zamenjajte baterijo Baterija je izpraznjena meritve ne morete opraviti Nemudoma zamenjajte baterijo ...

Страница 78: ...ik ali testni lističi so okvarjeni Obrnite se na lokalnega distributerja V odprtini za testni listič je kri ali tujek Obrnite se na lokalnega distributerja Meritev se ne začne po nanosu vzorca krvi Možen vzrok Kaj storiti Vzorec krvi je premajhen Ponovno opravite meritev z novim testnim lističem in večjim vzorcem krvi Merilnik ali testni listič je okvarjen Ponovno opravite meritev z novim testnim ...

Страница 79: ...Sistemska natančnost rezultatov za koncentracijo glukoze 5 5 mmol L 100 mg dL Sistemska natančnost rezultatov za koncentracijo glukoze 5 5 mmol L 100 mg dL Statistika regresije Sistem 2in1 BASIC znotraj 0 28 mmol L 5 mg dL 95 znotraj 0 56 mmol L 10 mg dL 100 znotraj 0 83 mmol L 15 mg dL 100 Sistem 2in1 BASIC znotraj 5 94 znotraj 10 100 znotraj 15 100 znotraj 20 100 Sistem 2in1 BASIC Naklon 1 01847...

Страница 80: ...mol L 0 32 4 4 8 4 13 9 mmol L 0 34 2 6 14 0 22 2 mmol L 0 32 1 6 Sistem 2in1 BASIC Koncentracija Standardni odklon mmol L Koeficient variacije 1 7 2 8 mmol L 0 12 4 3 5 0 7 2 mmol L 0 16 2 7 15 6 23 3 mmol L 0 33 1 8 Natančnost pri merjenju 100 meritev z venozno krvjo za vsako raven glukoze Skupna natančnost 100 meritev s kontrolno raztopino na raven glukoze ...

Страница 81: ...i embalaži Preverjanje roka uporabnosti testnih lističev in kontrolne raztopine Testni lističi in kontrolna raztopina imajo rok uporabnosti ki je naveden na stekleničkah Ko stekleničko s testnimi lističi ali kontrolno raztopino prvič odprete si datum odprtja zapišite na priloženo nalepko Vse testne lističe porabite v 3 mesecih po odprtju embalaže OPOZORILO Testnih lističev ali kontrolne raztopine ...

Страница 82: ...tni listič ne sme vdreti tekočina umazanija prah kri ali kontrolna raztopina Čiščenje sprožilne naprave in prozornega pokrovčka za odvzem krvi iz drugih vbodnih mest Zunanjost sprožilne naprave očistite z mehko rahlo navlaženo krpo in malo mila Prilagodljiv pokrovček in pokrovček za odvzem krvi iz drugih vbodnih mest očistite z blagim čistilom Sprožilne naprave ne potopite v tekočino ...

Страница 83: ...elovna temperatura Delovna relativna vlažnost Nadmorska višina Vir napajanja Velikost Teža 2in1 BASIC Elektromehanski senzor Plazma Polna kapilarna kri 0 5 μL 5 sekund 500 meritev s časom in datumom 0 6 33 3 mmol L 20 60 10 40 C 10 90 Do 3048 metrov Ena litijeva baterija CR2032 3 V zamenljiva 56 0 mm x 88 0 mm x 23 6 mm 46 5 g ...

Страница 84: ...kot je določeno s standardom IEC 61000 4 3 Merilnik je preizkušen za elektromagnetne emisije kot je določeno s standardom IEC 61326 Jamstvo Proizvajalec VPD Bled d o o zagotavlja brezhibnost delovanja in izdelave 2in1 BASIC merilnika za obdobje petih let od datuma nakupa Garancija velja samo za izvirnega kupca in ni prenosljiva Ime in Priimek Naslov Telefonska številka Serijska številka Datum naku...

Страница 85: ......

Страница 86: ... danken Ihnen für dem Kauf des Messgeräts 2in1 BASIC Lesen Sie bitte vor dem Gebrauch diese Anweisung und vergewissern sich der sicheren Funktion Bewahren Sie die Gebrauchsanweisung für weitere Benutzung auf GEBRAUCHSANWEISUNG DE ...

Страница 87: ...gebung Das Messgerät 2in1 BASIC darf nicht für die Diagnose von Zuckerkrankheit oder für das Testen von Neugeborenen benutzt werden Das Messgerät 2in1 BASIC hat einen Drehknopf mit dem man schnell und einfach den benutzten Teststreifen entfernen kann Wegen seiner kompakten Form in seinem attraktiven Design können Sie es überall mitnehmen denn es zeigt sehr brauchbare Angaben Für die Messung wird n...

Страница 88: ...utentnahme Blutentnahme aus anderen Einstichstellen Messen von Glukose im Blut Test mit Kontrolllösung Übersicht der Ergebnisse Einstellungen des Messgeräts Batteriewechsel Fehlermeldungen Fehlerbeseitigung Funktionsmerkmale Pflege des Messgeräts Spezifikationen 89 90 92 95 98 101 103 107 110 113 117 118 120 121 123 125 ...

Страница 89: ...rät 2in1 BASIC 2 Die Tragetasche 3 Das Auslösegerät 4 Die Lithium Batterie CR2032 5 Die Teststreifen 6 Die Lanzetten Im Lieferumfang inbegriffen sind DIE GEBRAUCHSANWEISUNG und DIEKURZANLEITUNG Wenn sich im Lieferumfang nicht alle Teile befinden kontaktieren Sie Ihren lokalen Händler ...

Страница 90: ...nmaligen Gebrauch Verfallsdatum Seriennummer Lotnummer Medizinisches Hilfsmittel für in vitro Diagnose Hersteller Vertreter Symbol für Temperaturbegrenzung Siehe die Gebrauchsanweisung Biologische Risiken Für n Messungen Gleichstrom Getrennte Entsorgung von anderem Hausmüll Katalognummer ...

Страница 91: ...en Strom zu entdecken die wegen der Reaktion von Glukose und der Reagentien auf dem Teststreifen entstehen Dieser Strom variiert abhängig von der Glukosemenge in der Blutprobe Aus dieser Abweichung wird der Glukosewert in der Blutprobe berechnet Einstellungen von Datum und Zeit Das Messgerät 2in1 BASIC hat werkseitig eingestellte Zeit Datum und Jahr Vor dem ersten Gebrauch oder beim Batteriewechse...

Страница 92: ...eitig die Knöpfe und drücken Drehknopf für den Auswurf von Teststreifen Mit dem Drehen des Drehknopfes entfernen Sie den Streifen Teststreifen Einsetzung Setzen Sie den Teststreifen 2in1 BASIC ein Das Messgerät schaltet automatisch ein wenn Sie den Teststreifen einsetzen Elektroden Setzen Sie den Teststreifen so ein dass die Elektroden oben sind Teststreifenspitze Nimmt die frische Blutprobe auf V...

Страница 93: ...EILE UND FUNKTION Datenport Übertragen Sie die Ergebnisse der Messungen auf den Computer das Kabel ist optional Batteriefachdeckel Entfernen Sie den Deckel für den Batteriewechsel Seitenansicht Hinterseite ...

Страница 94: ...unktionsweise 3 Warnung für eine leere Batterie oder für einen Batteriewechsel 4 Anzeige von Testergebnissen und Meldungen 5 Testbereitschaft 6 Warnung vor ungewöhnlicher Temperatur 7 Anzeige der Messeinheit 8 Anzeige der aktuellen Zeit 9 Alarm 10 Datum und Jahr Die durchsichtige Kappe für eine Blutprobenentnahme aus anderen Einstichstellen steht als Option zu Verfügung Kontaktieren Sie Ihren loka...

Страница 95: ...das Diagnostizieren der Zuckerkrankheit für das Testen bei Neugeborenen und benutzen Sie kein Arterienblut Das Messgerät beinhaltet kleine Teile deswegen besteht Gefahr des Verschluckens Beim Einkauf und vor dem ersten Gebrauch überprüfen Sie den Lieferumfang Vor dem ersten Gebrauch lesen Sie sorgfältig die Gebrauchsanweisungen und die beiliegende Anweisung des Fläschchens mit den Teststreifen Fäl...

Страница 96: ...n Sie nicht darauf Das Messgerät 2in1 BASIC ist nicht wasserdicht deswegen reinigen Sie es nicht mit Wasser und fassen Sie es nicht mit nassen Händen an Verwenden Sie zum Reinigen des Messgeräts keine chemischen Lösungsmittel oder Scheuermittel Bei Andwendung oder Lagerung setzen Sie das Messgerät 2in1 BASIC nicht hoher Hitze Luftfeuchtigkeit Regen und oder Staub aus Wenn das Messgerät an verschie...

Страница 97: ...ststreifen nicht direkt an den Finger drücken Dadurch könnte das Ansaugen der Blutprobe blockiert werden Beschädigte und oder gebrauchte Teststreifen dürfen nicht verwendet werden Bewahren Sie die Teststreifen nur im Originalbehälter auf Bringen Sie den Teststreifen innerhalb von drei Minuten zum Einsatz nachdem Sie ihn aus dem Behälter genommen haben Die Teststreifen müssen innerhalb von drei Mon...

Страница 98: ...T 1 Die Hände gründlich mit Seife und Warmwasser waschen damit die Einstichstelle besser durchblutet wird Die Hände gut trocknen SCHRITT 2 Öffnen Sie den Deckel des Auslösegeräts indem Sie ihn gegen den Uhrzeigersinn drehen ...

Страница 99: ...lter ein SCHRITT 4 Drehen Sie die Kappe der Lanzette ab SCHRITT 5 Bringen Sie erneut den Deckel des Auslösegeräts indem Sie es im Uhrzeigersinn drehen SCHRITT 6 Halten Sie den Halter des Auslösegeräts fest und ziehen Sie am Auslösemechenismus Das Auslösegerät ist so gespannt ...

Страница 100: ...pitze je mehr Sie drücken desto tiefer wird der Stich drücken Sie den Auslöseknopf für die Auslösung der Lanzette WARNUNG Verhindern von möglichen Infektionen Vor der Blutentnahme die Einstichstelle immer gründlich waschen Die Lanzette oder das Auslösegerät nicht mit Anderen teilen Immer eine neue Lanzette benutzen die Lanzetten sind nur für einmaligen Gebrauch bestimmt Das Messgerät und das Auslö...

Страница 101: ...Waden entnehmen was weniger schmerzhaft sein kann als aus der Fingerspitze Das Bild zeigt wo Sie das Blut entnehmen können Sie dürfen aber keine Blutprobe aus Muttermalen Adern Knochen und Sehnen entnehmen Bevor Sie sich für eine derartige Entnahme entscheiden beraten Sie sich mit einem Experten Oberarm Unterarm Hand Fingerspitze Oberschenkel Waden ...

Страница 102: ...öseknopf Durch die durchsichtige Kappe beobachten Sie wann genug Blut angesammel ist Wenn die Blutmenge nicht reicht reiben Sie leicht die Entnahmestelle bis sich genug Blut angesammelt hat WARNUNG entnehmen Sie kein Blut aus anderen Einstichstellen wenn Sie glauben dass der Glukosewert in Ihrem Blut sich schnell ändert zum Beispiel innerhalb von zwei Stunden nach einem Training nach Einspritzen v...

Страница 103: ...m die Uhrzeit die Kodenummer und das Streifensymbol werden angezeigt Wenn das Teststreifensymbol mit einem blinkendem Tropfen angezeigt wird bedeutet das dass das Messgerät bereit für das Messen ist SCHRITT 3 Achten Sie darauf dass der Kode der auf dem Bildschirm angezeigt wird und der Kode der auf dem Fläschchen aufgedruckt ist gleich sind Wenn sich die Kodes unterscheiden setzen Sie einen neuen ...

Страница 104: ...Pfeifton hören Der Teststreifen saugt das Blut an SCHRITT 5 Das Ergebnis wird nach 5 sekündiger Abzählung angezeigt SCHRITT 6 Wenn die Messung abgeschlossen ist hören Sie einen Pfeifton Das Ergebnis der Messung wird auf dem Bildschirm angezeigt Wichtig Die Blutmenge der Blutprobe muss mindestens 0 5 Mikroliter betragen tatsächliche Größe ...

Страница 105: ...tstreifen und Lanzetten werden als gefährliche biologische Abfälle betrachtet Entsorgen Sie diese Abfälle laut lokaler Gesetzgebung Wenn das Ergebnis höher als 600 mg dL ist wird das Symbol HI angezeigt Wenn das Ergebnis niedriger als 10 mg dL ist wird das Symbol LO angezeigt SCHRITT 7 Drehen Sie den Drehknopf wenn Sie den Teststreifen entfernen wollen Das Ergebnis dieser Messung wird automatisch ...

Страница 106: ... Spannbreite der erwarteten Ergebnisse Die Glukosewerte im Blut können in Abhängigkeit von der Nahrungsaufnahme der Medikamentendosis der Gesundheit dem Stress oder der Körperaktivität variieren Für die Bestimmung von entsprechenden Glukosewerten in Ihrem Fall beraten Sie sich mit einem Experten Die erwarteten Glukosewerte im Blut gilt nicht für Schwangere ohne Zuckerkrankheit auf leeren Magen wen...

Страница 107: ...fnen wenn Sie glauben dass das Messgerät oder die Teststreifen nicht korrekt funktionieren wenn sich unerwartete Ergebnisse der Glukosewerte im Blut wiederholen wenn das Messgerät 2in1 BASIC beschädigt ist SCHRITT 1 Setzen Sie den Teststreifen mit der Elektrode nach oben komplett in die Öffnung für den Teststreifen ein Das Messgerät 2in1 BASIC wird automatisch eingeschaltet SCHRITT 2 Es werden das...

Страница 108: ...behälter Wenn die Nummern nicht übereinstimmen setzen Sie einen neuen Teststreifen ein SCHRITT 4 Schütteln Sie das Kontrolllösungsfläschchen und öffnen Sie sie Bringen Sie die Spitze des Teststreifens zu der Probe der Kontrolllösung und warten Sie bis Sie einen Pfeifton hören SCHRITT 5 Das Ergebnis erscheint nach dem Herabzählen von 5 Sekunden ...

Страница 109: ... Drehknopf wenn Sie den Teststreifen entfernen wollen Das Ergebnis dieser Messung wird automatisch gespeichert Kontrollbereich 80 120 mg dL Nichtbeachtung der Gebrauchsanweisung Verfallene oder verunreinigte Kontrolllösung Beschädigte oder abgelaufene Teststreifen Kontrolllösungstest bei einer Temperatur außerhalb des zulässigen Betriebstemperaturbereichs von 20 C bis 25 C durchgeführt Funktionsst...

Страница 110: ...as Datum angezeigt Das Teststreifensymbol beginnt zu blinken SCHRITT 2 Umschalten in den Übersichtsmodus Wenn das Teststreifensymbol blinkt drücken Sie die Taste Es wird die letzte Nummer des Tests 1 angezeigt Wenn Sie die Taste loslassen wird das letzte Testergebnis angezeigt WICHTIG Wenn es kein Ergebnis gibt wird das Symbol angezeigt ...

Страница 111: ...ge der Testergebnisse vom letzten bis zum ersten und drücken Sie die Taste und lassen Sie sie los für die Anzeige der Testergebnisse vom ersten bis zum letzten SCHRITT 4 Übersicht der durchschnittlichen Ergebnisse Wenn Sie sich den Durchschnittswert der 30 tägigen Messergebnisse ansehen möchten drücken Sie die Taste und lassen Sie sie los während das Teststreifensymbol blinkt Mit dem Drücken der T...

Страница 112: ...des 30 tägigen Durchschnittswerts die Taste drücken und loslassen um das letzte Testergebnis anzuzeigen Das Teststreifensymbol blinkt 7 tägiger Durchschnitt swert 14 tägiger Durchschnitt swert 30 tägiger Durchschnitt swert Drittes Ergebnis Letztes Ergebnis Zweites Ergebnis SCHRITT 6 Drücken Sie die Tasten und gleichzeitig um das Messgerät 2in1 BASIC auszuschalten ...

Страница 113: ...en und loslassen um auf die Einstellung des Monats umzuschalten SCHRITT 3 Während das Symbol für den Monat blinkt drücken Sie die Taste bis der entsprechende Monat angezeigt wird Reduzieren Sie die Nummer mit der Taste und erhöhen mit der Taste Gleichzeitig die Tasten und drücken und loslassen um auf die Einstellung des Tages umzuschalten WICHTIG Die Taste oder klicken um den Parameter anzupassen ...

Страница 114: ...ig die Tasten und drücken und loslassen um auf die Einstellung der Stunde umzuschalten SCHRITT 6 Während das Symbol für die Stunde blinkt drücken Sie die Taste bis die entsprechende Stunde angezeigt wird Reduzieren Sie die Nummer mit der Taste und erhöhen mit der Taste Gleichzeitig die Tasten und drücken und loslassen um auf die Einstellung für Minuten umzuschalten SCHRITT 7 Während das Symbol für...

Страница 115: ...ie Pfeifton Warnungen ein oder auszuschalten Gleichzeitig die Tasten und drücken und loslassen um auf die Einstellungen für den Alarm umzuschalten SCHRITT 10 Während das Symbol On eingeschaltet oder Off ausgeschaltet blinkt die Taste drücken und loslassen um die Einschaltung oder Ausschaltung des ersten Alarms auszuwählen Gleichzeitig die Tasten und drücken und loslassen um auf die Einstellungen f...

Страница 116: ...zustellen wenn dieser eingeschaltet ist und zwar auf die gleiche Weise wie bei der Einstellungen von Stunde und Minuten SCHRITT 12 Wenn Sie die Einstellungen aller vier Alarme abschließen gleichzeitig die Tasten und drücken und loslassen um die Einstellungen abzuschließen und das Messgerät 2in1 BASIC auszuschalten ...

Страница 117: ...en Sie dabei die entsprechende Polarität SCHRITT 3 Bringen Sie den Deckel erneut an und schließen Sie das Batteriefach WARNUNG entsorgen Sie die Batterien gemäß der lokalen Umweltvorschriften WICHTIG wenn Sie der neuen Batterie nicht innerhalb einer Minute einsetzen nachdem Sie die alte Batterie entfernt haben müssen Sie das Datum und die Uhrzeit neu einstellen Das Batteriewechsel hat keinen Einflu...

Страница 118: ...n oder wiederholen Sie den Test mit einem neuen Streifen Diese Fehlermeldung zeigt dass es eine Schwierigkeit mit dem Messgerät 2in1 BASIC gibt Sehen Sie sich die Gebrauchsanweisung an und wiederholen Sie den Test mit einem neuen Streifen Falls der Fehler erneut auftritt kontaktieren Sie den lokalen Händler Der Fehler tritt auf wenn die Arbeitstemperatur NIEDRIGER oder HÖHER als die Arbeitstempera...

Страница 119: ...N Die Batterie ist fast leer aber Sie können immer noch einige Messungen ausführen Wechseln Sie so bald wie möglich die Batterie Die Batterie ist leer Sie können keine Messung ausführen Wechseln Sie umgehend die Batterie ...

Страница 120: ...der die Test streifen sind beschädigt Kontaktieren Sie den lokalen Händler In der Öffnung für den Teststreifen ist Blut oder ein Fremdkörper Kontaktieren Sie den lokalen Händler Die Messung startet nicht nach dem Auftragen der Blutprobe Mögliche Ursache Maßnahme Die Blutprobe ist zu klein Wiederholen Sie die Messung mit ei nem neuen Teststreifen und größerer Blutprobe Das Messgerät oder der Test s...

Страница 121: ...empräzision der Ergebnisse für die Glukosekonzentration 100 mg dL 5 5 mmol L System präzision der Ergebnisse für die Glukosekonzentration 100 mg dL 5 5 mmol L Regressionsstatistik System 2in1 BASIC innerhalb 5 mg dL 0 28 mmol L 95 innerhalb 10 mg dL 0 56 mmol L 100 innerhalb 15 mg dL 0 83 mmol L 100 System 2in1 BASIC innerhalb 5 94 innerhalb 10 100 innerhalb 15 100 innerhalb 20 100 System 2in1 BAS...

Страница 122: ... mg dL 5 8 4 4 151 250 mg dL 6 1 2 6 251 400 mg dL 5 8 1 6 System 2in1 BASIC Konzentration Standardabweichung mg dL Variationskoeffizient 30 50 mg dL 2 1 4 3 90 130 mg dL 2 8 2 7 280 420 mg dL 6 0 1 8 Präzision beim Messen 100 Messungen mit venösem Blut für jeden Glukosewert Gemeinsame Genauigkeit 100 Messungen mit der Kontrolllösung für Glukosewert ...

Страница 123: ... Originalverpackung auf Prüfen Sie das Verfallsdatum der Teststreifen und der Kontrolllösung Die Teststreifen und die Kontrolllösung haben ein Verfallsda tum angeführt auf den Fläschchen Wenn Sie das Fläschchen mit den Teststreifen oder der Kontrolllösung zum ersten Mal öffnen schreiben Sie dieses Datum auf den beigelegten Aufkleber Verbrauchen Sie alle Teststreifen innerhalb von 3 Monaten nach de...

Страница 124: ...keine Flüssigkeit Schmutz Staub Blut oder Kontrolllösung eindringen Das Reinigen des Auslösegeräts und der durchsichtigen Kappe für die Blutentnahme aus anderen Einstichstellen Reinigen Sie das Äußere des Auslösegeräts mit einem weichen leicht angefeuchteten Tuch und ein wenig Seife Den flexiblen Deckel und die Kappe für die Blutentnahme aus anderen Einstichstellen reinigen Sie mit milder Seife Tau...

Страница 125: ...öhenlage Energiequelle Abmessungen Gewicht PG 300 2in1 Elektrochemischer Sensor Slektrochemischer Sensor Plasma Frisches Vollblut kapillar 0 5 Mikroliter μL 5 Sekunden 500 Blutzuckertests mit Zeit und Datum 10 bis 600 mg dL 0 6 bis 33 3 mmol L 20 60 10 bis 40 C 10 bis 90 Bis zu 3048 Metern eine 3 0 Volt CR2032 Lithium Batterie 56 00 mm x 88 00 mm x 23 60 mm 46 5 g ...

Страница 126: ...bestimmten Spannbreite getestet Das Messgerät wurde gemäß der Norm IEC 61326 auf elektromagnetische Emmissionen getestet Garantie Der Hersteller VPD garantiert fehlerfreie Funktion und Herstellung der Messgeräts 2in1 BASIC für die Zeit von fünf Jahren vom Einkaufsdatum Die Garantie gilt nur für den Originalkäufer und ist nicht übertragbar Name und Famili enname Adresse Telefonnummer Seriennummer G...

Страница 127: ......

Страница 128: ...128 PRINTED IN SLOVENIA Rev date 2in1 Basic_MANUAL_REV03_2016 11_EN SLO DE VPD Bled d o o Pot na Lisice 4 4260 Bled Slovenia EU tel 386 4 574 50 70 fax 386 4 574 50 71 email info 3in1 si web www 3in1 si ...

Отзывы: