P O Box 159 • Crestwood, KY 40014 • (877) 243-0042 • (502) 243-0039 fax
Setting up sensors
1.
Plug the wired sensor into the TV2, or if you are using wireless sensor, place a 9vdc battery in
the transmitter that is attached to the actual sensor.
2.
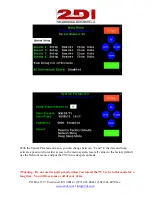
After a few seconds, the TV2 will recognize the sensor and change the display to the Sensor
Setup menu. The “Show Max/Min on Main Status” will be highlighted. Leave it as yes and
touch Enter
3.
The hour area of the log data field will be highlighted.
Note: If the TV2 does not 'see' your sensor you will need to link it or
plug it into the TV2. The linking procedure is found in FAQ- pg 33.
4.
This determines how often the sensor will log or store a temperature. You may scroll to any
value between 1 min and 24 hrs with 'Up' or 'Down', touching 'Enter' to move to the next field,
or accept the default by touching 'Enter'. The default value is ten minutes (00:10:00).
5.
Select the type of averaging with 'UP', or 'Down' and touch 'Enter'. There are three possible
selections.
a.
Fast – no averaging occurs. The exact measurement at the time of sampling will be stored
and displayed. (Not normally used except during calibration)
b.
Medium- some averaging will take place so that minor temperature fluctuations will be
filtered out.
(This is the default value).
c.
Slow – additional averaging will occur. (Not normally used).
5.
Set the chart max & min temperatures (Y axis) with ‘Up’ and ‘Down’
. This does not set the
alarm
. Setting these values has no effect on the alarm, what data is collected, or what is
stored. It simply sets the upper and lower point of the Y-axis of the temperature chart shown
on the TV2. Any temperature that falls outside these limits will show as a point at the top or

