background image

Model 202 Ozone Monitor Manual  Rev. J-4 

i


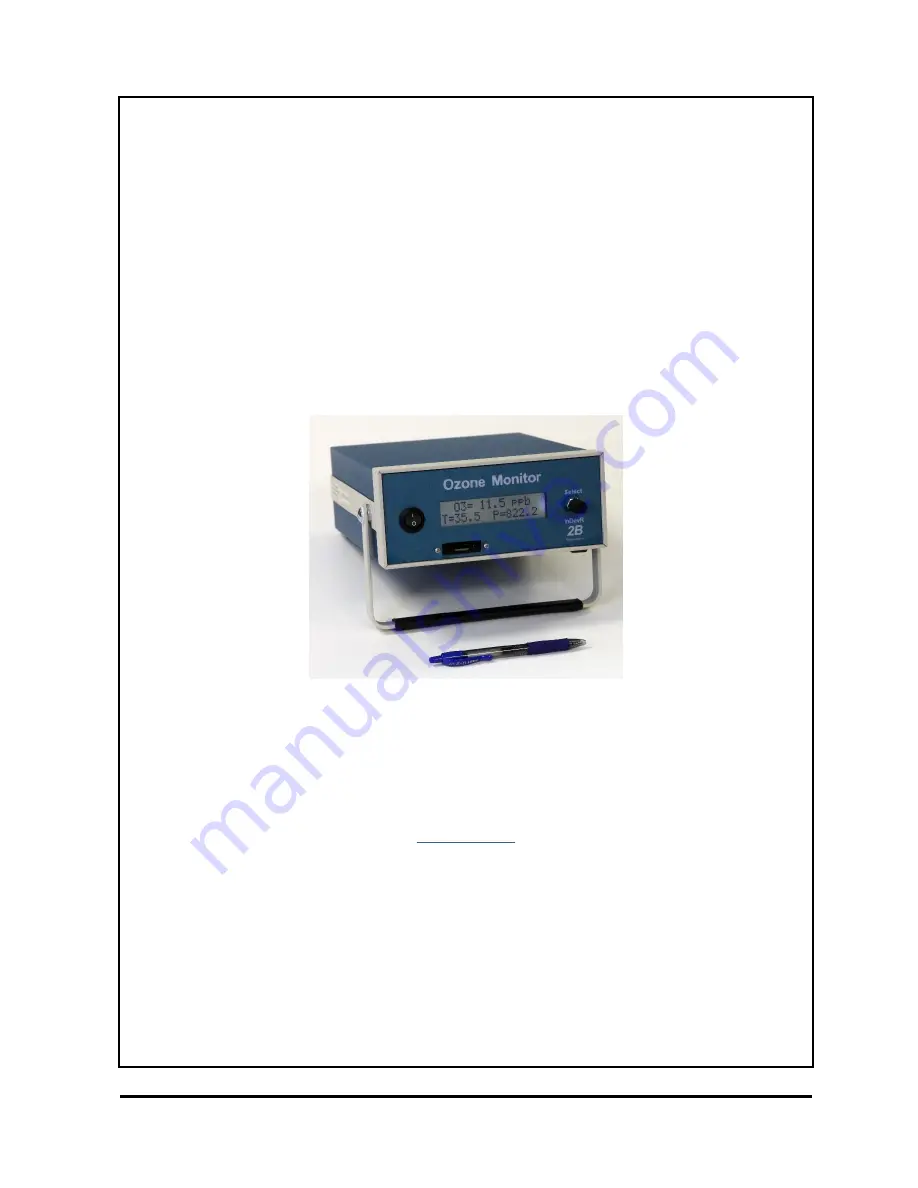
Ozone Monitor


2

B


Technologies


OPERATION MANUAL 


Model 202


© Copyright 2001-2018, 2B Technologies 

All rights reserved. 


Technical Support:  

https://twobtech.com/tech-support.html 

 [email protected] 

+1(303)273-0559 


Содержание 202

Страница 1: ... Manual Rev J 4 i Ozone Monitor 2B Technologies OPERATION MANUAL Model 202 Copyright 2001 2018 2B Technologies All rights reserved Technical Support https twobtech com tech support html techsupport twobtech com 1 303 273 0559 ...

Страница 2: ...nternal Data Logger 11 3 10 To Stop Logging Data Using the Internal Data Logger 12 3 11 To Transmit Logged Data to a Computer Using the Serial Port 12 3 12 To Log Data Using the SD Card 13 3 13 To Average Data 14 3 14 To Set the Calibration Parameters 14 3 15 To Set the Time and Date 16 3 16 To Change the Output Baud Rate 16 3 17 To Turn the Analog Inputs On and Off and Change the Analog Output Sc...

Страница 3: ...arison Test 24 6 6 Calibration Procedure 24 6 6 1 Instrument Preparation 24 6 6 2 Measurement of Zero Air 24 6 6 3 Measurement of Ozone Standards 24 6 6 4 Calibration Curve 25 7 PERIODIC ZERO AND SPAN CHECKS 26 8 TROUBLESHOOTING 27 9 LABELED INSTRUMENT PHOTOS 30 10 PARTS LIST 35 11 SERVICE LOG 36 Appendix A Using the 2B Technologies Display and Graphing Software 38 ...

Страница 4: ...anual Rev J 4 iv IDENTIFICATION RECORDS Record the following information for future reference Unit serial number ______________________________________ Warranty start date _______________________________________ date of receipt ...

Страница 5: ...nuary 2017 Revision J 2 April 2018 Minor revision Update Section 2 Specifications table to give GPS detail Revision J 3 November 2018 Minor revision Update schematic in Section 1 update several links other minor edits Revision J 4 November 2018 Minor revision Add Section 3 23 and modify Section 3 7 to describe flow rate readout function other minor edits TRADEMARKS PATENTS 2B Technologies 2B Tech ...

Страница 6: ... click on the Ticket link provided to continue to communicate with us directly over the internet The web ticket approach to customer service allows us to better track your problem and be certain that you get a timely response We at 2B Tech pride ourselves on the excellent customer service we provide You may also contact us by email at techsupport twobtech com or by phone at 1 303 273 0559 In eithe...

Страница 7: ...edies provided herein are the Customer s sole and exclusive remedies In no event shall 2B Technologies be liable for direct indirect special incidental or consequential damages including loss of profits whether based on contract tort or any other legal theory The Ozone Monitor manual is believed to be accurate at the time of publication and no responsibility is taken for any errors that may be pre...

Страница 8: ...EIS Vor dem Öffnen des Gerätes Netzstecker ziehen WARNHINWEIS Dieses auf dem Gerät weist darauf hin dab der Anwender zuerst das entsprechende Kapitel in der Bedienungsanleitung lesen sollte WARNHINWEIS Wenn das Gerät nicht wie durch die Firma 2B Technologies USA vorgeschrieben und im Handbuch beschrieben betrieben wird können die im Gerät eingebauten Schutzvorrichtungen beeinträchtigt werden ITALI...

Страница 9: ...ry lamp Fortunately few molecules found at significant concentrations in the atmosphere absorb at this wavelength However interferences such as organic compounds containing aromatic rings can occur in highly polluted air Mercury vapor can be a significant interference inside buildings where mercury spills have occurred in the past and in the vicinity of certain mining operations Figure 1 1 is a sc...

Страница 10: ...h length of the 2B Tech Model 202 Ozone Monitor also contributes to the wide dynamic range which is limited at the high end by the absorption beginning to become optically thick base 10 optical absorbance 0 2 The pressure and temperature within the absorption cell are measured so that the ozone concentration can be expressed as a volume mixing ratio in ppbv ppmv or pphmv The mixing ratio can also ...

Страница 11: ...and Section 7 an accurate offset correction can be measured from time to time using the ozone scrubber supplied with the instrument It is recommended that the instrument be recalibrated at least once annually and preferably more frequently The calibration procedure is described in detail in Section 6 1 3 Use of DewLine to Remove Humidity Interference Shown on Figure 1 1 is the DewLine which serves...

Страница 12: ...f reading NIST Traceable Calibration Yes Measurement Interval 10 s Data averaging options 1 min 5 min 1 hr Flow Rate nominal 1 Liter min Flow Rate Requirement 0 6 L min Baseline Drift 2 ppb day 5 ppb year Sensitivity Drift 1 day 3 year Measurement Time Frequency 10 s 0 1 Hz Response Time 100 of Step Change 20 s 2 points Averaging Times 1 min 5 min 1 hr Ozone Units ppb pphm ppm µg m 3 mg m 3 Pressu...

Страница 13: ...D Card Logger Capacity Minimum 2 GB 5 year capacity for 10 s measurement mode Analog Inputs for Internal Logging of Other Instruments 3 Analog Inputs 0 2 5 V for example could log external T P and RH Data Outputs RS232 0 2 5 V Analog LCD Display External USB Converter Optional 4 20 mA current request quote Data Transfer Baud Rates 2400 4800 19200 Output Ranges User Defined Scaling Factor in Menu D...

Страница 14: ...using a battery be certain to attach the positive red and negative black wires correctly A circuit breaker and diode are installed on the circuit board in case of an electrical short or incorrect battery attachment If activated the breaker will reset itself after a few minutes Lead acid batteries are available from numerous manufacturers in a wide range of sizes and amp hour ratings The larger of ...

Страница 15: ... instrument may be measured by attaching an ozone destruction cartridge to the air inlet for a period of 5 10 minutes see Section 7 of this manual For an accurate measurement the instrument must have been turned on long enough for the internal temperature to stabilize The observed offset which can amount to a few ppbv can be corrected by changing this calibration parameter from the front panel as ...

Страница 16: ...ber 15 2018 Time 6 31 27 pm The three external inputs are omitted from the data line if they are turned off using the menu as described in Section 3 17 below The analog inputs allow measurements made by other instruments to be transmitted to a computer simultaneously with those of ozone and the time and date stamp these inputs may also be logged in the instrument s internal memory as described bel...

Страница 17: ... Menu Definitions and Menu Tree The Menu is accessible from the LCD display of the Model 202 Ozone Monitor Menu options are defined in the table below and shown in the drawing on the next page Dat Data Menu Xmt Transmit stored logged data End End data logging Log Start data logging and write over existing logged data SD Transmit data to SD data logger Avg Averaging Menu 10s 10 seconds 1m 1 minute ...

Страница 18: ...he Menu The Main Menu is accessed using the Select button on the front panel of the instrument To reach the menu hold in the Select button until the display shows Menu Then release the button The panel will now display Menu Dat Avg Cfg Lmp where Dat Avg Cfg and Lmp are submenus that may be selected A blinking cursor will show across the D of the Dat submenu The Select button may be rotated ...

Страница 19: ...will be irretrievably lost Caution If you have data in the logger that you want to keep be sure to download it before starting logging If you are ready to start logging then select Yes by moving the cursor under Yes and clicking Either selection will return you to the Main Menu To start data acquisition select and click The Ozone Monitor will then alternately display every five seconds 1 the ozone...

Страница 20: ...Internal Data Logger Hold the Select button down to obtain the Menu Go to the Dat submenu by clicking on Dat Choose and click on the End function This will end data logging You may now transmit the data to a computer by clicking on Xmt see below Alternatively you may return to the Menu by clicking on The stored data will reside in memory even when new measurements are being made and can be transmi...

Страница 21: ...s started 3 12 To Log Data Using the SD Card 2B Technologies provides a SD card logger with the Model 202 Ozone Monitor along with an SD card and an SD card reader When inserted into the instrument bottom left of the Ozone Monitor s front panel the SD card automatically begins to collect and store data The internal data logger described in Section 3 9 will also be logging data if logging has been ...

Страница 22: ...ation about logging and reading data via the SD card 3 13 To Average Data The Model 202 Ozone Monitor has several options for obtaining and averaging measurements Hold down the Select button to obtain the Menu Select and click on Avg to obtain the Avg menu Avg Menu 10s 1m 5m 1h Use single clicks to move the cursor to 10s 1m 5m or 1h for averaging times of 10 s no averaging 1 min 5 min or 1 hr aver...

Страница 23: ...o select and click on Cal The following submenu will appear Cal Menu Fm O3 Selecting Fm will display the Flow meter calibration factor as in the following example Fm Cal Menu Fm 0 87 The internal flow meter is calibrated at the factory during the production of the ozone monitor This is a multiplicative factor that will increase the flow rate if you increase the value Adjust this value to correct t...

Страница 24: ...ct switch to turn off the blinking cursor You may now rotate the Select switch to choose another numeral to change Once the time and date is correct clicking on will set the internal clock to that time and return the display to the Cfg menu As in setting a digital watch the seconds should be set in advance of the real time since the clock starts to run again only when the set time is entered in th...

Страница 25: ...mV You can use the select switch to change the scaling factor to the value of your choice by selecting and changing the individual digits in the scaling factor 3 18 To Turn the Display Light On and Off Selecting LCD from the Cfg I O submenu allows you to turn the light of the front panel display on and off To conserve power use the Select switch to set the LCD submenu to OFF 3 19 To Change the Uni...

Страница 26: ...s a diagnostic test of lamp fluctuations The lamp test also measures and outputs the voltage level of the detector For best performance the voltage should be in the range 0 7 2 0 volts For a detector voltage less than about 0 7 volts the data may be noisy due to insufficient light intensity to make precise measurements If the voltage is zero the lamp is not ignited and may have burned out For volt...

Страница 27: ... entered The following is the list of menu items accessible from this point l Start logging and write over existing logged data t Transmit logged data e End logging h Output the serial header b Ends current file being written to external data logger avoids losing data that are still in the buffer a Display list of possible averaging times and the number that must be entered to change to the desire...

Страница 28: ...ions of the Model 202 serial no 1899 and below This pump consumes less power but is louder and has a lower lifetime 5 000 hours With the Low Power Option the SD data logger is also disabled to save power The Model 202 with the Low Power Option consumes about 2 watts less than the standard Model 202 A wide range of Technical Notes are provided on the 2B Tech website The complete list with links may...

Страница 29: ...over time When ozone concentration standards are required the ozone must be generated and certified on site Ozone standards can be classified into two basic types 1 A Primary Ozone Standard is the combination of an ozone generator and an ozone monitor based on UV absorbance a UV photometer that has been setup in accordance with the procedures prescribed by the U S Environmental Protection Agency E...

Страница 30: ...rocedures for generating zero air are in the EPA s Technical Assistance Document for the Calibration of Ambient Ozone Monitors 6 4 Instrument Preparation Prior to calibration follow the steps below 1 Turn on the Model 202 Ozone Monitor and allow it to stabilize for a minimum of one hour 2 Connect the instrument to the manifold on the ozone calibration setup If a particle filter will be used in nor...

Страница 31: ...ity can be checked by comparison to an ozone standard see Calibration Procedure Calibration Curve or by dilution of an ozone measurement To check the instrument linearity by dilution of an ozone measurement generate and measure a concentration of ozone near the upper range of ozone monitor 80 of full scale is recommended Additional ozone concentrations should be generated by accurately diluting th...

Страница 32: ...up in the calibration setup Connection of the Model 202 directly to a pressurized output of any device can damage the ozone monitor 4 Verify that the flow rate into the manifold is greater than the total flow required by the ozone monitor plus any other flow demand drawing from the manifold such as a UV photometer or ozone transfer standard 6 6 2 Measurement of Zero Air 1 Verify that the zero air ...

Страница 33: ...ination in the optical setup See the Troubleshooting section of the manual Section 8 4 The inverse of the slope of the line 1 m is the gain factor S and the negative of the intercept b is the offset Z that need to be applied to the ozone monitor response to calibrate it to the primary ozone standard If the intercept is outside of the range from 10 to 10 or the slope is outside of the range from 0 ...

Страница 34: ...entration at the high end of the concentration range of interest following the Measurement of Ozone Standards Section 6 6 3 above 3 Average measurements from the zero check or span check should be within the instrument specifications If the measurements are not within specifications this is an indication of problem in the calibration setup or the ozone monitor being checked The most likely problem...

Страница 35: ...and connectors may be easily identified A list of serviceable parts is provided in Section 10 of this manual Table 8 1 Troubleshooting the Ozone Monitor for performance problems Problem symptom Likely cause Corrective action Instrument does not turn on Power not connected properly or circuit breaker open Power cable not connected to circuit board Check external power connection for reverse polarit...

Страница 36: ...ot track front display Cable not properly connected between analog output BNC and circuit board Wrong scaling factor selected in Menu Remove top cover and reconnect cable between analog output and circuit board see Figure 9 3 Check and reset analog output scaling factor in the Menu Select switch does not work Cable not properly connected between select switch and circuit board Remove top cover and...

Страница 37: ...re to use an inlet filter to remove particulate matter Clean flow path with methanol following the Cleaning Procedure Tech Note 018 Remove solenoid valve rinse with methanol dry with zero air and replace As a first check hold your finger over the air inlet to determine whether air is being drawn in If there is flow measure the flow rate by removing the bottom cover and attaching a high conductance...

Страница 38: ...202 Ozone Monitor Manual Rev J 4 30 9 LABELED INSTRUMENT PHOTOS FIGURE 9 1 Top view of Model 202 Ozone Monitor with cover removed Ozone Scrubber Printed Circuit Board Scrubber Filter Solenoid Valve Air Inlet ...

Страница 39: ...removed standard version SN 1900 and above This view shows the quiet pump and SD data logger which are standard on Model 202 instruments with serial number 1900 and above DewLine for Humidity Control Photodiode Housing Optical Bench Flow Meter Ozone Scrubber to Protect Pump SD Logger Air Pump Lamp Housing ...

Страница 40: ...This pump consumes 1 to 2 watts less power than the pump shown in Figure 9 2a but is louder and has a lower lifetime 5000 hours each If power is the main concern a Model 202 Ozone Monitor may be purchased with a Low Power Option that uses the pump configuration shown in this figure Lamp Housing Backup Air Pump DewLine for Humidity Control Photodiode Housing Optical Bench Flow Meter Main Air Pump O...

Страница 41: ...o Board Display Lamp Power Solenoid Valve Voltage Output 0 2 5 V Temperature Sensor Detector Photodiode Microprocessor 5 V Regulator Select Switch Power Switch External Analog Inputs Air Pump Clock Battery Heater Flow Meter Current Output 4 20 mA optional 4 20 mA socket optional SW1 Reset SD Logger SW2 Program Enable ...

Страница 42: ...Ozone Monitor Manual Rev J 4 34 FIGURE 9 4 Back of instrument BNC Analog Output 0 2 5 V RS 232 Serial Port 12 V Power In External Analog Inputs 0 2 5 V e g T P RH Air Inlet Use PTFE PFA or Other Inert Tubing Only ...

Страница 43: ...ion OZPUMP202QUIET Internal air pump for Model 202 serial no 1900 and above OZCELL Absorption cell FLOWMETER Flow meter assembly DEW DewLine two Nafion tubes in parallel SELECTSWITCH Select switch assembly including external knob SERCABL Serial port cable to computer SDCARD SD card thin profile recommended for the Model 205 and Model 202 Ozone Monitors SDREADER SD card reader PWRPK 1 25A Power pac...

Страница 44: ...Model 202 Ozone Monitor Manual Rev J 4 36 11 SERVICE LOG 2B Tech Model 202 Serial ________________ Date Calibrated Cleaned New O3 Scrubber New Pump New Lamp Other ...

Страница 45: ...Model 202 Ozone Monitor Manual Rev J 4 37 Date Calibrated Cleaned New O3 Scrubber New Pump New Lamp Other ...

Страница 46: ...re Follow the instructions doing the two installations if needed and choosing to save the setup exe file Double click the setup exe download to launch the 2B Data Display application Connecting Devices Connect to a Monitor 1 Select the device you are connecting to from Settings Select Device 2 Click OK 3 Select the Connection you will be using from Settings Connection Choose the settings as follow...

Страница 47: ...ather Link menu A window will appear and the software will try to retrieve the weather station data If the connection is good weather data will be displayed in the window If not an error message will appear Try a different com port if the error message appears You may move this window so it is out of the way or you may close it The weather data is updated every 5 seconds Since the Monitor and the ...

Страница 48: ...ata Grid or the Charts click on the Buffer tab to view the serial data If the correct device is not selected no data will be displayed in the Data Grid or the Charts but data will be displayed in the Buffer window Saving Data Saving Data to a txt File 1 Click the Start button in the Instrument Data Section to begin collecting data from the instrument 2 A window will pop up to prompt for the name a...

Страница 49: ...you must open the corresponding CSV file 4 Choose the correct device associated with the file a If you are unsure open the file in a text editor or Excel to determine which device Serial and USB Commands The menu commands are the same as given in Section 4 of this manual ...

Отзывы: