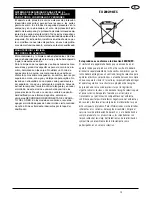
background image

EU 2002/96/EC

This product complies with EU Directive 2002/06/EC

The  crossed  bin  symbol  on  the  appliance  indicates  that  the 

product,  at  the  end  of  its  life  span,  must  be  disposed  of 

separately  from  domestic  waste,  either  by  taking  it  to  a 

separate  waste  disposal  site  for  electric  and  electronic 

appliances  or  by  returning  it  to  your  dealer  when  you  buy 

another  similar  appliance.  The  user  is  responsible  for  taking 

the appliance to a special waste disposal site at the end of its 

life span; failure to do so will incur penalties under the waste 

disposal  regulations  in  force.  If  the  disused  appliance  is 

collected  correctly  as  separate  waste,  it  can  be  recycled, 

treated  and  disposed  of  ecologically;  this  avoids  a  negative 

impact on both the environment and the health and contributes 

towards  the  recycling  of  the  product’s  materials.  For  further 

information  regarding  the  waste  disposal  services  available, 

contact  your  local  waste  disposal  agency  or  the  shop  where 

you bought the appliance. The manufactures and importers do 

not  take  the  responsibility  for  recycling,  treatment  and 

ecological disposal, either directly or through a public system. 

MAINTENANCE AND CLEANING

OF ALL THE APPLIANCES

Any maintenance or clearing must be performed only after 
the machine is unplugged and has cooled down. To avoid 
dragging or scratch on the body, never use cloth, sponge or 
detersive with abrasive action. To clean the appliance use 
a well-wrung damp cloth and specific products for stainless 
steel, aluminium, paint, chrome. Do not use direct water 
stream on the appliance.
Components that come into contact with food can be 
cleaned separately by hand with water and washing-up 
liquid.
Do not put them in the dish washer.
The empty container may be washed separately with water 

and suitable detergent.
Before removing the container, remember to close the shut-
ter and switch on the coffee grinder; this will remove any 
beans left in the grinding area.
From time to time check the inside of the doser to make 
sure there are no deposits and if you have to remove any, 
REMEMBER TO DISCONNECT THE MACHINE FROM 
THE MAINS. On ECONOMY models, remember to switch 
off the grinder after you have ground a certain amount of 
coffee, to prevent the ground coffee from overflowing from 
the cover of the doser.

SECURITY SYSTEM TO AVOID THE ACCESS 

TO THE MOVING PARTS 

(VALID FOR ALL THE MODELS AND VERSIONS)


There 

There 

are many protection systems (already described) to 

avoid the access to the rotary parts as the safe screw on 
the beans container and the metal ring, the fixed cone of 
protection inside of the beans container and the protection 
in metal placed in front of the milled coffee exit. All these 
devices are conceived in order to protect who use the ap-
paratus. For this reason, we underline that you don’t have 
absolutely remove or modify them and, for any problem of 
malfunctioning, you have to contact technical staff which 
will know how to help you.

GB

31

Содержание Q50

Страница 1: ...50 M80 Q13 T48 MANUAL DE INSTRUCCIONES MULINILLO Q50 M80 Q13 T48 MANUAL DE INSTRU ES MOEDOR Q50 M80 Q13 T48 MODE D EMPLOI MOLIN Q50 M80 Q13 T48 INSTRUCTIONS COFFEE GRINDER Q50 M80 Q13 T48 ANWEISUNGEN...

Страница 2: ...1 2 3 4 5 7 6 9 8 2 3 4 5 7 10 11 12 8 13 14 9 FIG ABB 1 2...

Страница 3: ...X LEUCHTENDER HAUPTSCHALTER FORCELLA HORQUILLA GARFO FORK FOURCHE COPERCHIO CONTENITORE CAFFE TAPA RECIPIENTE CAF TAMPA DO RECIPIENTE DO CAF COFFEE CONTAINER COVER COUVERCLE R CIPIENT CAF KAFFEEBEH LT...

Страница 4: ...COARSER PUSH HERE FINER FIG ABB 4 COARSER FINER FIG ABB 5 4...

Страница 5: ...COARSER FINER FIG ABB 6 ON DEMAND KEY FIG ABB 7 5...

Страница 6: ...SET THE TIME PUSH FIG ABB 8 1 2 6...

Страница 7: ...3 x 18 AWG PVC 5 x 1 mm2 H07 RN F 3 x 0 75 mm2 H05 RN F 3 x 18 AWG PVC 5 x 1 mm2 H07 RN F 3 x 0 75 mm2 H05 RN F 3 x 0 75 mm2 H05 RN F 3 x 18 AWG PVC 5 x 1 mm2 H07 RN F 3 x 0 75 mm2 H05 RN F 3 x 18 AW...

Страница 8: ...pparecchio non schiacci il cavo di alimentazione Verificare che la tensione e la frequenza della rete di alimentazione elettrica corrispondano a quelli riportati sull etichetta applicata su ogni appar...

Страница 9: ...ni in movimento INTERVALLO DI FUNZIONAMENTO DELL APPARECCHIO Rispettare il seguente ciclo di utilizzo dell apparecchio 30s ON 6 min OFF 20s ON 6 min OFF mod Q50 Se il cavo di alimentazione danneggiato...

Страница 10: ...tituzione delle macine Questa voce modi cabile Premere per 3 secondi il tasto MENU per accedere al men programmazione Premere il pulsante o o per scorrere il men selezionare usura macina premendo il t...

Страница 11: ...gazione premere nuovamente il tasto MAN comunque il macinadosatore si arresta da solo dopo 4 minuti 2 Programmazione PER UNA TAZZA Premere per 3 secondi il tasto MENU per accedere al men programmazion...

Страница 12: ...o desiderato Premere il tasto MENU per spostarsi alla cifra successiva Una volta definita la password premere il tasto OK per confermare e uscire Per uscire dal menu premere ESC OPTION PASSWORD Abilit...

Страница 13: ...per apparecchiature elettriche ed elettroniche oppure riconsegnato al rivenditore al momento dell acquisto di una nuova apparecchiatura equivalente L utente responsabile del conferimento dell apparecc...

Страница 14: ...poye sobre el cable de alimentaci n Comprobar que los valores de tensi n y de frequencia de la red de alimentaci n corresponden a los indicados en la etiqueta de los datos t cnicos Verificar que la ca...

Страница 15: ...O Antes de introducior el enchufe en la toma de corriente o de activar el interruptor general amonte comprube que el interruptor del aparato est puesto en la posicion 0 Intro duzca la lengueta de cier...

Страница 16: ...la escrita DESGASTADAS MUELAS desaparece Para salir del menu programacion pulse ESC PARA INCLUIR UNA PALABRA EN LA MODALIDAD PRONTO listo Pulse durante 3 segundos el interruptor MENU para acceder al m...

Страница 17: ...iempo de molienda expres en segundos 3 cifras y centecimas de gundo 2 cifras respectivamente para establecer y a nar la dosis entregada Una vez programado el tiempo pulse nuevamente el interruptor OK...

Страница 18: ...grano mas grueso Dentro de la campana est colocada una cubierta de pro teccion que no debe extraerse en ningun caso Q50 VERSI N MANUAL BAJO PEDIDO Coloque el portafiltro en la horquilla y con este pu...

Страница 19: ...modo se vaciar el deposito de los granos residuos De vez en cuando controle que dentro del dosi cador no se formen dep sitos ental caso eliminelos RECORDANDO DESCONECTAR EL APARA TO DE LA RED En los...

Страница 20: ...n o esmague o cabo de alimenta o Certifica se de que a tens o e a frequ ncia da rede de alimenta o el trica correspondem s indicadas na etiqueta aplicada em cada um dos aparelhos Certifica se de que...

Страница 21: ...LO DE FUNCIONAMENTO DO APARELHO Respeitar o seguinte ciclo de utiliza o do aparelho 30s ON 6 min OFF 20s ON 6 min OFF mod Q50 Se o cabo de alimenta o estiver danificado este deve ser substitu do pelo...

Страница 22: ...nar ou Para con rmar e sair pressionar OK Para sair do menu pressionar ESC Ao alcan ar as doses m ximas que podem ser fornecidas com o con junto de 2 Programa o moedores em uso aparecer na tela a mens...

Страница 23: ...o fazendo corresponder o furo presente na camp nula com o da bra adeira Assim depois de ter versado o caf em gr os na espec ca camp nula o moedor dosador estar pronto para funcio nar Abrir a trava e c...

Страница 24: ...nar OK Para sair do menu de programa o pressionar ESC CONTAGEM TOTAL DAS DOSES FORNECIDAS Fornece indica es sobre o total de doses fornecidas pelo moedor dosador pressionar durante 3 segundos a tecla...

Страница 25: ...e na bra adeira o cone de prote o fixado no interior da camp nula e a prote o em metal posicionada em frente sa da do caf mo do Todos esses dispositivos foram criados para assegurar a seguran a de que...

Страница 26: ...pliance must be placed on a stable flat surface Not installed outside Make sure that the appliance is not resting on the power supply cable Make sure the voltage and frequency values of the supply mai...

Страница 27: ...h your ngers until it is rmly in place Then x it to the ring nut of milling regulation with the appropriate screw supplied with the apparatus match the hole on the beans container with the one on the...

Страница 28: ...K then using or it s possible to increase or decrease the brightness from 0 to 100 To con rm and exit press OK To exit from programme menu press ESC SET TIME AND DATE Keep touched for 3 seconds key ME...

Страница 29: ...seconds key MENU to get access to programme menu Press the key or to slide the menu options select total count pressing key OK PARTIAL COUNT OF EROGATED DOSES Provides in formation on the quantity of...

Страница 30: ...set for medium fine grain If you re not satisfied with this re sult you must proceed as follows Turn the ring nut to the LETF for finer grain or to the RIGHT for coarser grain Note the coffee grinder...

Страница 31: ...tersive with abrasive action To clean the appliance use a well wrung damp cloth and specific products for stainless steel aluminium paint chrome Do not use direct water stream on the appliance Compone...

Страница 32: ...tension et la fr quence du filetd alimentation lectrique correspondent celles report es sur l etiquette appliqu e sur chaque appareil v rifier que la port e lectrique de l installation soit dimension...

Страница 33: ...de la cloche et v rifier le glisse ment dans son si ge INSTRUCTIONS G N RALES Lire et s en tenir avec attention aux avertissements et aux instructions Toujours d tacher la fiche de la prise de courant...

Страница 34: ...pour acc der au menu programmation Appuyer sur les touches ou pour faire d filer le menu s lectionner usure meule en appuyant sur la touche OK Pour augmenter ou diminuer les doses appuyer sur les touc...

Страница 35: ...a fourniture de caf appuyez sur une des 5 touches de affi hage Fonctionnement et programmation 1 Fonctionnement avant d ins rir la fiche au r seau lec trique v rifier que l interrupteur soit positionn...

Страница 36: ...r l inscription luminosit La s lectionner en appuyant sur la touche OK ensuite avec ou on peut augmenter ou diminuer la luminosit de 0 100 Pour confirmer et sortir appuyer sur OK Pour sortir du menu p...

Страница 37: ...pri es sous peine de sanctions pr vues par la l gislation en vigueur sur les d chets Une collecte s lective ad quate vivant envoyer l appareil que l on n utilise plus au recyclage au traitement et l l...

Страница 38: ...quetscht berpr fen Sie ob die Spannung und die Frequenz des Stromversorgungsnetzes mit der auf jedem Ger t angebrachten Etikett angegebenen Spannung und Frequenz bereinstimmen berpr fen Sie ob die ele...

Страница 39: ...itten Sie das Gewicht einer einzigen Portion GENERAL ANWEISUNGEN Die Hinweise und Anleitungen m ssen sorgf ltig durchge lesen und strikt werden Vor jeder Wartung und Reinigung des Ger tes den Stecker...

Страница 40: ...schl ssel display Betrieb und Programmierung 1 Betrieb Bevor der Stecker mit dem Stromnetz verbunden wird pr fen Sie ob der Schalter auf 0 gestellt ist F hren Sie die Verschlusslasche des Bohnenbeh lt...

Страница 41: ...DERN CHANGE LANGUAGE CAM BIO LINGUA MENU ber hren und 3 s halten um ins Programmmen zu gelangen oder zum Vorw rts oder R ckw rtsbl ttern durch das Men bis zur Anzeige Sprache ndern CHANGE LANGUAGE Cam...

Страница 42: ...en s so lange dr cken bis der Eintrag SETUP PASSWORD erscheint durch Dr cken der Taste OK ausw hlen Zum Einstellen des Passworts mit Hilfe der Tasten und bis zur gew nschten Ziffer durchbl ttern Zum b...

Страница 43: ...in Be r hrung kommen konnen hingegen getrennt von Hand mit Wasser und Geschirrspulmittel abgewashen werden vom Spulen in Geschirrsp lmaschinen wird abgeraten Reinigung nicht verwendt Wasserstrahl dir...

Страница 44: ...SCHALTER M MOTORE MONOFASE CON TERMICO INTERNO MOTOR MONOF SICO CON T RMICO INTERNO MOTOR MONOF SICO COM T RMICA INTERNA SINGLE PHASE MOTOR WITH INTERNAL CIRCUIT BREAKER MOTEUR MONOPHAS AVEC RELAIS TH...

Страница 45: ...BOBINA DO TELERRUPTOR REMOTE SWITCH COIL BOBINE DU T L RUPTEUR SPULE FERNSCHALTER M MOTORE TRIFASE CON TERMICO INTERNO MOTOR TRIF SICO CON T RMICO INTERNO MOTOR TRIF SICO COM T RMICA INTERNA THREE PHA...

Страница 46: ...H INTERRUPTEUR SCHALTER C CONDENSATORE CONDENSADOR CONDENSADOR CONDENSER CONDENSATEUR VERDAMPFER IG INTERRUTTORE GENERALE INTERRUPTOR GENERAL INTERRUPTOR GERAL MAIN SWITCH INTERRUPTEUR G N RAL HAUPTSC...

Страница 47: ...BOBINA DE TELERRUPTOR BOBINA DO TELERRUPTOR REMOTE SWITCH COIL BOBINE DU T L RUPTEUR SPULE FERNSCHALTER M MOTORE TRIFASE CON TERMICO INTERNO MOTOR TRIF SICO CON T RMICO INTERNO MOTOR TRIF SICO COM T...

Страница 48: ...SCHALTER M MOTORE MONOFASE CON TERMICO INTERNO MOTOR MONOF SICO CON T RMICO INTERNO MOTOR MONOF SICO COM T RMICA INTERNA SINGLE PHASE MOTOR WITH INTERNAL CIRCUIT BREAKER MOTEUR MONOPHAS AVEC RELAIS TH...

Страница 49: ...BOBINA DO TELERRUPTOR REMOTE SWITCH COIL BOBINE DU T L RUPTEUR SPULE FERNSCHALTER M MOTORE TRIFASE CON TERMICO INTERNO MOTOR TRIF SICO CON T RMICO INTERNO MOTOR TRIF SICO COM T RMICA INTERNA THREE PHA...

Страница 50: ...CH INTERRUPTEUR SCHALTER C CONDENSATORE CONDENSADOR CONDENSADOR CONDENSER CONDENSATEUR VERDAMPFER IG INTERRUTTORE GENERALE INTERRUPTOR GENERAL INTERRUPTOR GERAL MAIN SWITCH INTERRUPTEUR G N RAL HAUPTS...

Страница 51: ...INE DU T L RUPTEUR SPULE FERNSCHALTER M MOTORE TRIFASE CON TERMICO INTERNO MOTOR TRIF SICO CON T RMICO INTERNO MOTOR TRIF SICO COM T RMICA INTERNA THREE PHASE MOTOR WITH INTERNAL CIRCUIT BREAKER MOTEU...

Страница 52: ...GERAL MAIN SWITCH INTERRUPTEUR G N RAL HAUPTSCHALTER M MOTORE MONOFASE CON TERMICO INTERNO MOTOR MONOF SICO CON T RMICO INTERNO MOTOR MONOF SICO COM T RMICA INTERNA SINGLE PHASE MOTOR WITH INTERNAL C...

Страница 53: ...ASE CON TERMICO INTERNO MOTOR TRIF SICO CON T RMICO INTERNO MOTOR TRIF SICO COM T RMICA INTERNA THREE PHASE MOTOR WITH INTERNAL CIRCUIT BREAKER MOTEUR TRIPHAS AVEC RELAIS THERMIQUE INTERNE DREIPHASENM...

Страница 54: ...y Directive Directive Machines Maschinenrichtlinie 2006 95 CE Direttiva Bassa Tensione Directiva Baja tensi n Directiva Baixa Low voltage Directive Directive Basse tension Niederspannungsrichtlinie 20...

Страница 55: ...ognome Ragione Sociale Indirizzo Citt Telefono Prov Firma La garanzia copre i 12 mesi successivi alla data di installazione dell apparec chio La copertura in garanzia cessa comunque nei casi di manomi...

Страница 56: ...CERTIFICATO DI GARANZIA COMPILARE E SPEDIRE ENTRO 30 GIORNI DALLA DATA DI ACQUISTO DA AFFRANCARE...

Отзывы: