


Reviews:
No comments
Related manuals for EMBY-BTF-MB

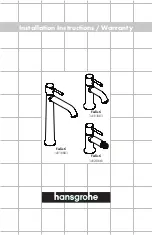
Designer
Brand: Felton Pages: 2
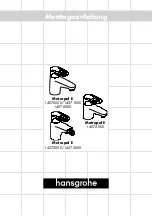
Metropol E 14070 Series
Brand: Hans Grohe Pages: 16

ShowerSelect 15738400
Brand: Hans Grohe Pages: 72

Verso Fox Set 27088000
Brand: Hans Grohe Pages: 44

Talis M51 200 2jet 72813 Series
Brand: Hans Grohe Pages: 44
Talis C
Brand: Hans Grohe Pages: 20

Vivenis 75420 Series
Brand: Hans Grohe Pages: 48

Zimi 1-116-8500-00
Brand: ADF Pages: 4

HANSAFIT 6509 2203
Brand: Hansa Pages: 28

ClassicLine
Brand: B-Safety Pages: 3

T3291
Brand: Moen Pages: 6

Panel 06
Brand: MCBATH Pages: 4

AXCES METIZ AX-MET-150-CP
Brand: VADO Pages: 6

Esta KVF-1210
Brand: Kraus Pages: 14

KCV-127
Brand: Kraus Pages: 26

Magna DX EP-914
Brand: Helvex Pages: 6

UTH-062
Brand: Helvex Pages: 2

LV FUTURA1
Brand: Helvex Pages: 2


