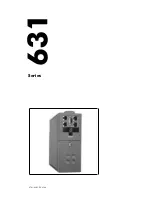
background image

 VICON

INSTRUCTIONS FOR
INSTALLATION AND OPERATION

MODEL 

 WEATHERPROOF HEAVY-DUN PAN-AND-TILT DRIVE

1. INTRODUCTION

The information in this instruction manual covers the
installation, operation, and maintenance of the

 Pan-and-Tilt Drives. Throughout this man-

ual, the term 

 and 

 refers to both

models unless stated otherwise.

This unit should be installed by a 

 technician

using approved materials and wiring practices in con-
formance with national, state and local electrical codes.

Model 

 Pan-and-Tilt Drive is a weatherproof,

heavy-duty unit capable of operating with loads up to

80 

pounds (36 kg). When mounted in an inverted posi-

tion, it will operate with loads up to 75 pounds (34 kg).
The heavy-duty motors are constructed with 
steel gears that never require lubrication. All-weather

protection is provided by 

 rings and gasket seals with

Teflon* wear surfaces. Solenoid operated brakes pro-
vide excellent operating stability with minimum coast.

Counterbalanced tilt arms provide smooth, reliable tilt

operation.

CONTROL

PAN/TILT

CONTROL

 BOX

Figure 1

Operating Distances With

and Without Relay Box

PAN/TILT

This 120 

VAC 

unit may be operated directly by a control

or by a combination of a control and a relay box when
greater operating distances are required. Refer to Figure

1 and Table 1 for maximum operating distances.   a

preset position option is required, use Model 
Preset Position Control or the 

 or 

systems.

The 

 is UL listed under Standard 1409.

CAUTION: Mounting the unit outdoors in an

A

inverted position voids the product warranty.

TABLE 1

MAXIMUM OPERATING DISTANCES

Control

Model

Relay Box

Cable Slze

(AWG)

Annealed

Covver

Maxlmum

Distance


20

18

1 6

14

22

20

18


part 

number 8006-8433-02-00

Product specifications subject to change without notice.

 kademark of DuPont 


   Co., Inc.

 INDUSTRIES INC. 

525 BROAD HOLLOW ROAD, MELVILLE, N.Y. 11747 TEL: (516) 293-2200 FAX: 516-293-2627


TOLL FREE: l-800-645-9116 

(OUTSIDE OF NEW YORK)

Summary of Contents for 8006-8433-02-00

Page 1: ...h minimum coast Counterbalanced tilt arms provide smooth reliable tilt operation CONTROL PAN TILT CONTROL RELAY BOX Figure 1 Operating Distances With and Without Relay Box PAN TILT This 120 VAC unit may be operated directly by a control or by a combination of a control and a relay box when greater operating distances are required Refer to Figure 1 and Table 1 for maximum operating distances If a p...

Page 2: ...onvenience receptacles an CP particular attention to cords at plugs aroduct the point where they exit from the video 13 Outdoor Cable Grounding If an outside cable system is con lected to the video product be sure the cable system is grounded so as to providesome protection against voltage surgesand built up static CAUTION TO REDUCE THE RISK OF ELECTRICAL SHOCK DO NOT REMOVE COVER OR BACK NO USER ...

Page 3: ...es according to the mounting pattern shown in Figure 2 Screws should be long enough to accommodate lock washers and nuts In concrete use lead anchors or expansion bolts with at least 150 pound 69 kg pullout strength installed according to manufacturer s instructions CAUTION If installing the unit outdoors use Astainless steel hardware 2 2 Inverted Mounting CAUTION To reduce the risk of fire or ele...

Page 4: ...ing Plate 5 stop Posts Figure 3 Removing Counterbalance Springs for Inverted Operation 2 3 Mounting the Camera Before mounting the camera to the pan and tilt drive note the label FRONT on the top mounting plate The camera should be mounted with the lens on this side Three center mounting h s Figure 5 Legend 5 are provided for mounting lighter cameras To obtain opti mum balance the screw used to mo...

Page 5: ...ull the interconnecting cable through the bush ing clamp assembly Strip back the cable jacket no more than one 1 inch 2 5 cm and separate the individual conductors Prepare the individual conductors for soldering or crimping If crimping use AMP tool part number 90277 1 90066 90067 or an equivalent tool NOTE The contact cannot be removedfrom a con nector after it is inserted unless an AMP extraction...

Page 6: ...Wth both limit stops in place pan to both stop positions and recheck for exact trim of limit stops Tighten both stops securely 6 7 8 9 Limit Stops Looking at the front of the unit remove the two 2 screws Legend 7 from the left end plate Remove the plate Loosen screws Legend 3 and 4 and move the joystick UP to rotate the tilt drive to the desired up limit Move the uplimit stop Legend 3 toward the b...

Page 7: ... unit and no maintenance is required under normal operating conditions The V39OAPT pan motor is im pedance protected The tilt drive motor is protected by a thermal overload switch If the tilt drive fails to function after operating for an extended period check that the pilot light on the control unit is on If the pilot light is on the thermal overload switch may have opened after continuous operat...

Page 8: ...fice 3010 Business Park Dr Suite B Norcross GA 30071 4044494499 l 800 824 8479 2 Attach a sheet of paper to the unit with the following information a Name and address of the company returning the unit b Name of the Vicon employee who issued the R A c R A number d Brief description of the installation e Complete description of the problem and circumstances uncler which it occurs f Unit s original d...

Page 9: ...74 U S E A 5 REQUIRED l0 75 FREVENT BINDING OF flEM 78 Figure 9 Exploded View X433 893 ...

Page 10: ...PAKTOF I EM I6 Figure 9 Exploded View continued 10 X433 893 ...

Page 11: ...93 i 94 A Figure 9 Exploded View continued X433 893 11 ...

Page 12: ...75 01 SWITCH AND CABLE ASSEMBLY 24 V with autopan 1117 3286 01 CABLE ASSEMBLY pedestal 1802 0052 01 CAPACITOR included with motor 4 uf I I 1117 3251 02 MOTOR AND CLUTCH ASSEMBLY pan 1 I I 1117 3250 02 BRAKE ASSEMBLY size 8 1 __ _ _ __ 1117 3251 04 MOTOR AND CLUTCH ASSEMBLY tilt 800 9842 00 CONNECTOR PCB female 15 pin mounting ears 8000 9846 00 CONNECTOR cable male Q pin AMP i 350235 9 when exhaust...

Page 13: ...TENTIOMETER I I I 1117 5353 00 SHAFT POTENTIOMETER gear 1 I 8002 7571 00 POTENTIOMETER 5 kohm 5 turn servo mount Spsctrol model 535 I I 8002 8785 00 RESISTOR 1 kohm 1 8 W I RN55D 1 I 8002 7572 00 1 POTENTIOMETER 5 kohm 3 turn servo mount Spectral model 533 I REPLACEMENT PARTS LIST PCB ASSEMBLY Reference Designation Psrt Number Description I I 1117 5619 01 PCB pan and tilt control I 1 R5 R6 or R7 R...

Page 14: ... 210 PARKER 2 345C147 70 OR 2 345C673 70 1 6 1117 3234 01 15 SUPPORT ASSY DRIVE END 1 8 1117 5061 00 00 WASHER THRUST 1 9 8003 811 O 00 00 SCR 2 0 8005 6140 00 00 WASHER FLAT 8 318 x 042 CAD 21 I 1117 5536 01 00 STOP TILT I 2 2 I 8003 7270 00 00 SCR 1 O 32 x 314 SOC HD CAP SS I 2 3 I 8005 623 FOO 00 WASHER LOCK IO SS SPL I 2 4 I 1117 3253 01 02 END CAP SUB ASSY SPRING SIDE I 2 5 I 8003 727 00 00 S...

Page 15: ...I 1117 3316 02 01 1CABLE ASSY PAN 115V I 59 I 1117 3147 00 14 ASSY PCB I 1 60 I 8003 7836 00 00 I SCR1032x21 4SOCHDCAP I 61 I 8005 623 00 00 WASHER LOCK 10 SS SPL I 1 62 I 8005 6144 00 00 1 WASHER FLAT 143 x 044 SS PHX 7 63 I 1117 325 02 07 1 MOTOR BRAKE ASSY SIZE 8 115V PAN I 6 4 1117 3267 02 06 6 5 8003 727CbOO 00 6 6 8005 6230 00 00 6 7 8002 6248 01 00 6 8 1117 581 O 01 00 6 9 1117 3275 01 00 7...

Page 16: ...WASHER LOCK 6 CAD SPL 9 0 1117 3351 01 04 ASSY SUB END CAP DRIVE SIDE V353 V355 9 0 1117 3281 01 01 M O T O R P L A T E I 91 I 1117 3317 02 01 1 CABLE ASSY TILT 115V 7 92 I 8004 9870 00 00 WASHER FLAT 10 l 2 x 048 CAD 1 I 93 I 8004 9860 00 00 1 WASHER LOCK 10 CAD SPL 1 94 I 8002 622 00 00 NUT 1 O 32 HEX ST CAD 1 9 5 I 1802 0053 01 00 CAPAC INCL W MOTOR 6MF I Copyright Q 1993 Vicon Industries Inc A...

Reviews: