

Quick Start Guide
Security Analytics J5300 40T Direct-Attached Storage
Page 1
Date of Publication: 15 August 2017
SA-J5300-DAS-40T
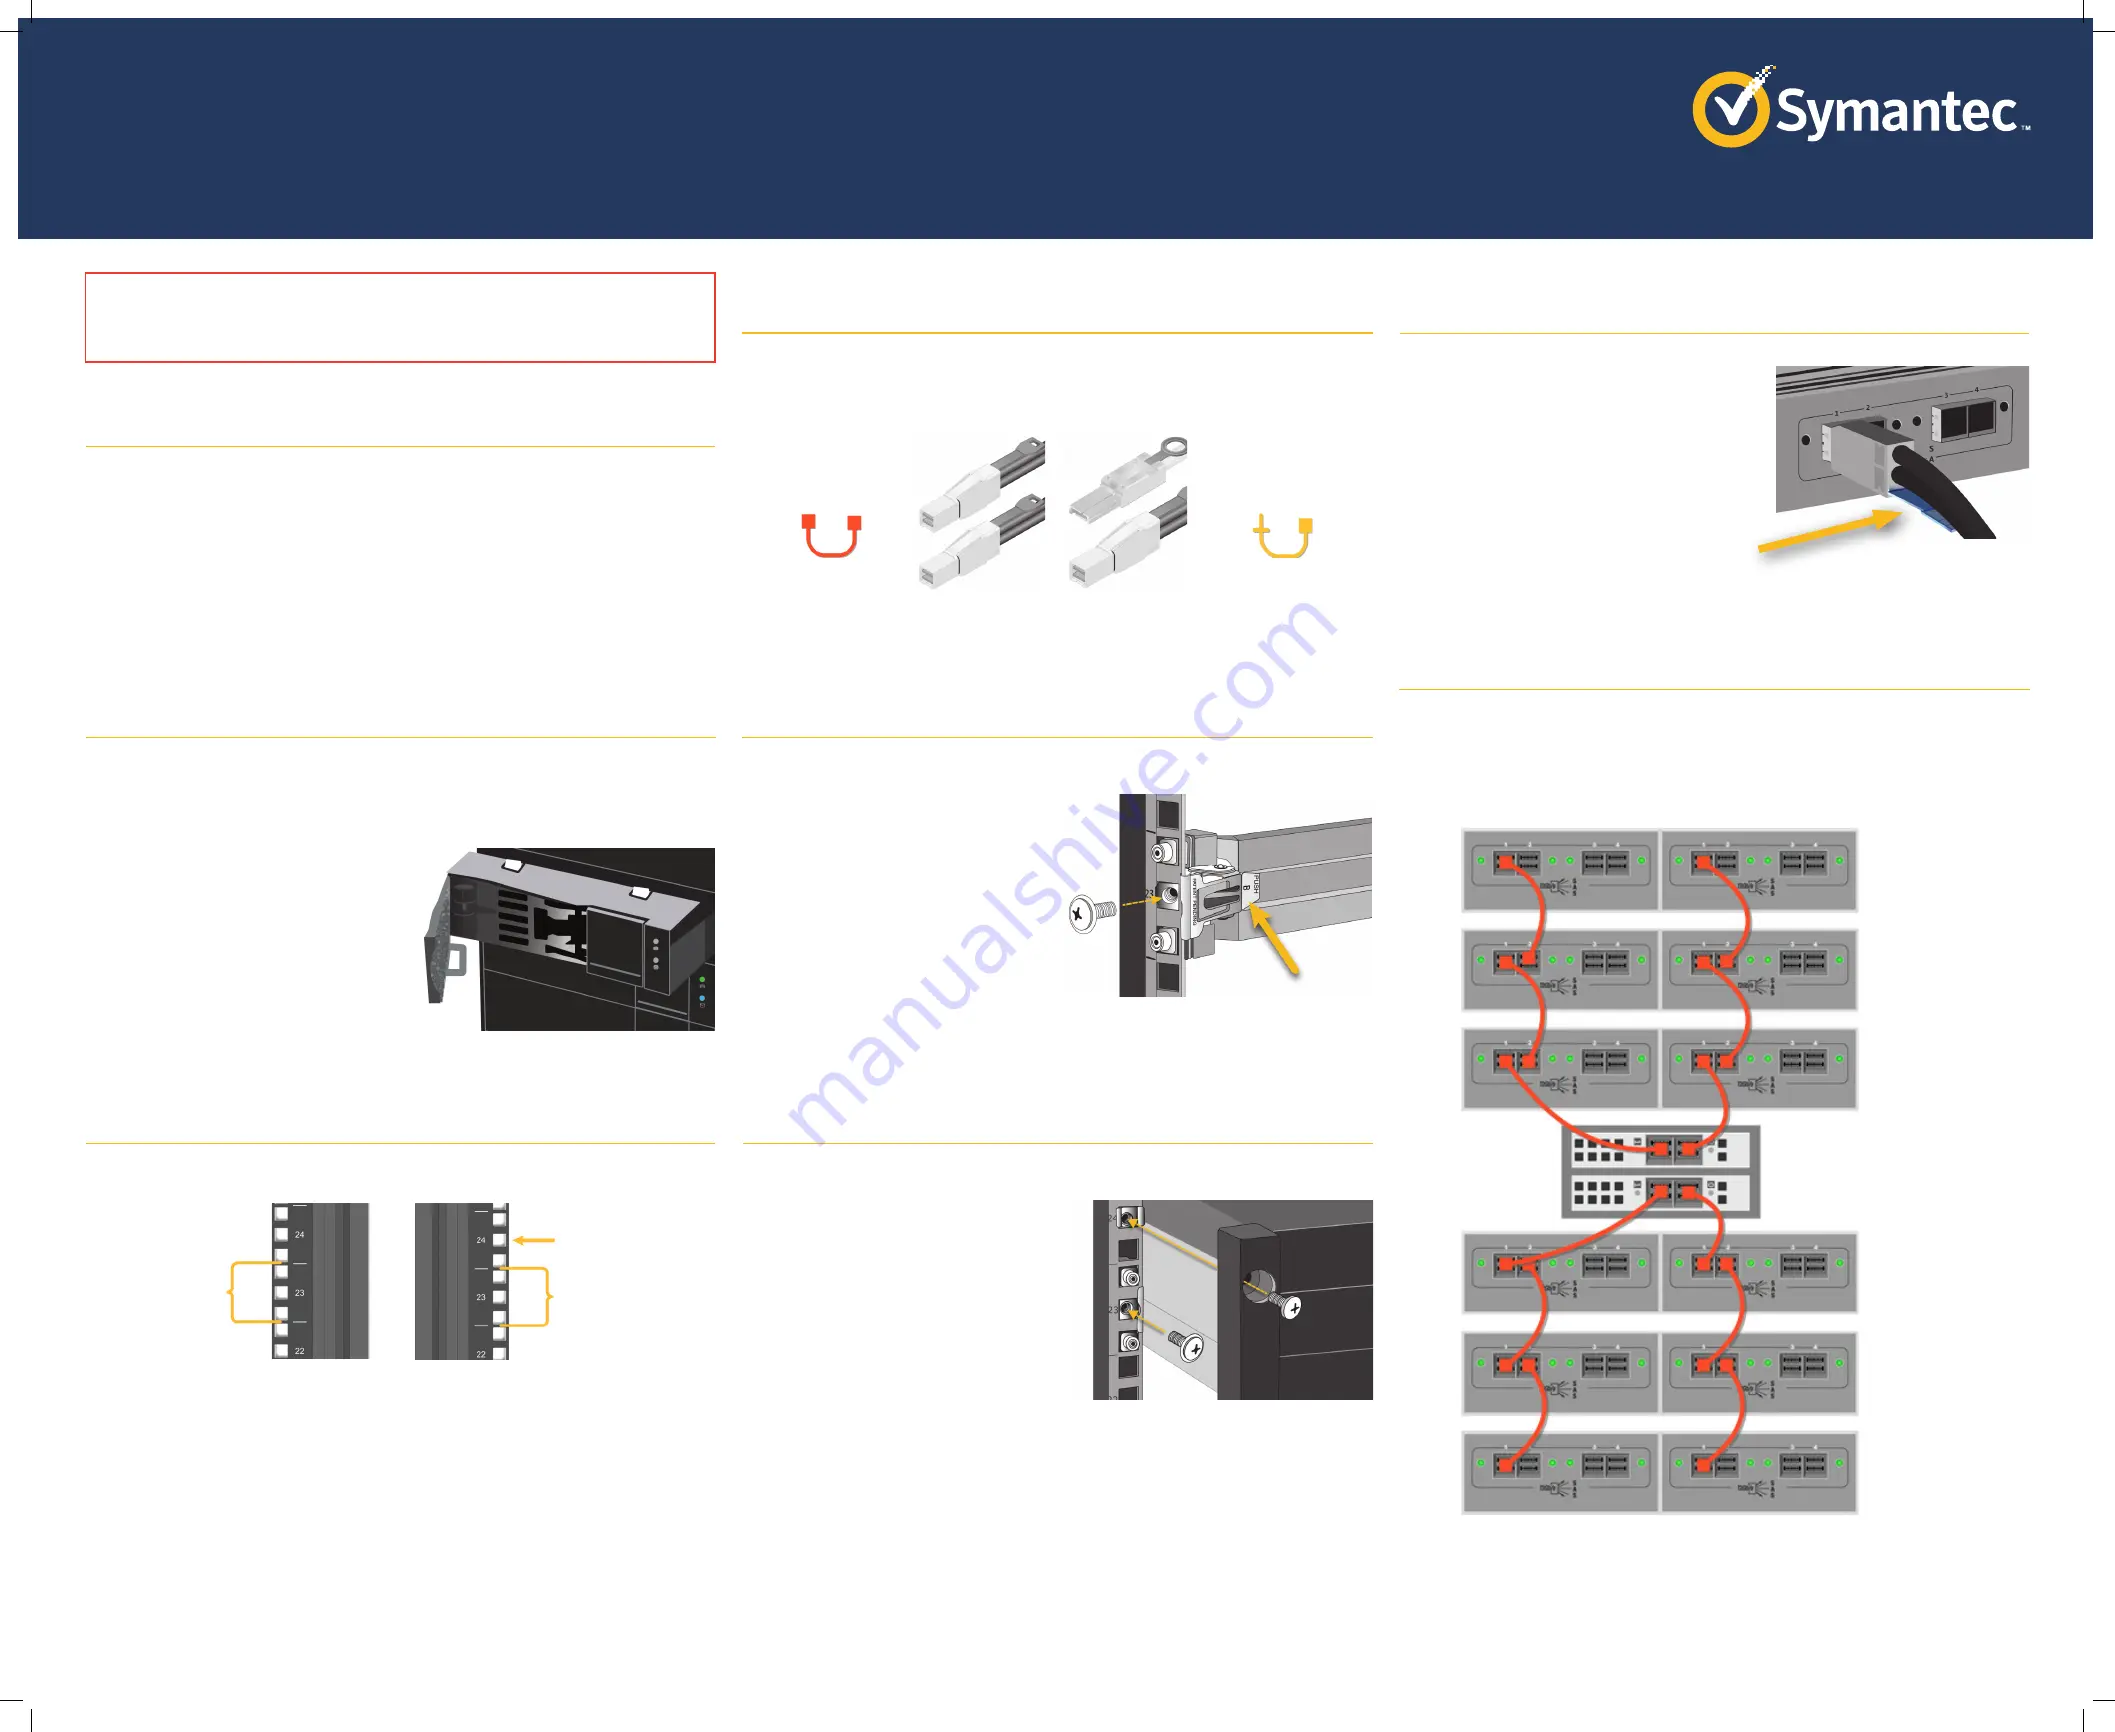
Security Analytics appliances that have two RAID controllers can support up to three storage
modules per RAID controller. Attach the storage modules to the head unit in the order shown
below, using SAS-3 to SAS-3 cables:
Extend the rail to the front post and insert the studs into the corresponding mounting posts.
a.
Use the rail screws to anchor the rail to the
front post.
b.
After verifying that the rails are aligned,
secure, and stable, place the enclosure on
the rails.
c.
Insert the screws through the mounting holes
on either side of the enclosure and then
secure them with the cage nuts.
d.
Replace the drives in the enclosure.
Two sets of cables are included with the J5300: one set for a SAS-3 environment and another for a
mixed SAS-2 and SAS-3 environment.
Orient each rail so that the L-shaped shelf is at the bottom and toward the front of the rack.
a.
Press the spring lock on the other end of the
rail, insert the studs into the holes on the
rear post, and release the lock so that it grips
the rail.
b.
Use the rail screws to anchor the rail to the
rear post.
01
Unpack the shipment container and verify the contents of the box. Security Analytics J5300 40T
Direct-Attached Storage ships with the following components:
Before installing the J5300 enclosure in the rack, perform these steps:
a.
Peel off the protective plastic sheet from the top and the bottom of the enclosure.
b.
Remove the drives from the enclosure to reduce the weight:
o
Press the release button on each drive to
unlock the drive carrier. The drive-carrier
handle swings out.
o
Grasp the handle and gently pull the
drive carrier out of the J5300 and place it
on a static-free surface.
To install the J5300 enclosure into a rack with the supplied mounting rails:
a.
Determine where to install the enclosure—Three holes are required for the rear posts and five
for the front.
b.
For square holes, insert a cage nut into the top mounting hole of the front posts.
Insert Cage Nut
Front Rail Mount
Rear Rail Mount
Module 5
Module 3
Module 1
Module 2
Module 4
Module 6
SAS-3 RAID Controller 2
SAS-3 RAID Controller 1
CAUTION:
Adding storage modules is a destructive process, because all of the capture and
indexing drive arrays must be reconfigured. Do not begin to add new storage to an existing
system until after you have backed up all capture and indexing data.
SAS-3 to SAS-3
SFF-8644 to
SFF-8644
SAS-2 to SAS-3
SFF-8088 to
SFF-8644
Diagram
Symbol
Diagram
Symbol
o
When attaching a SAS-3 cable to the J5300, the
release pull-tab must be on the underside of the
plug. You should hear a distinct click when it is
seated properly.
o
When attaching SAS-2 or SAS-3 cables to the head
unit, the release pull-tab should be on the top side of
the plug.
Unpack the Storage Module
o
J5300 Storage Module
o
Two AC Power Cords
o
Two SFF-8644 to SFF-8644 cables
o
Two SFF-8644 to SFF-8088 cables
o
Adjustable rack-mounting rail assembly
o
Lift/carry reminder insert
o
Quick Start Guide
(this document)
o
Safety and regulatory compliance inserts
02
Prepare the Enclosure for Rack-Mounting
03
Prepare to Install the Rails
Identify the SAS Cables
04
Properly Orient the Connectors
Attach the Rail to the Rear Post
05
06
Connecting the J5300 to SAS-3 RAID Controllers
08a
07
Attach the Rail to the Front Post; Secure the Enclosure


