background image

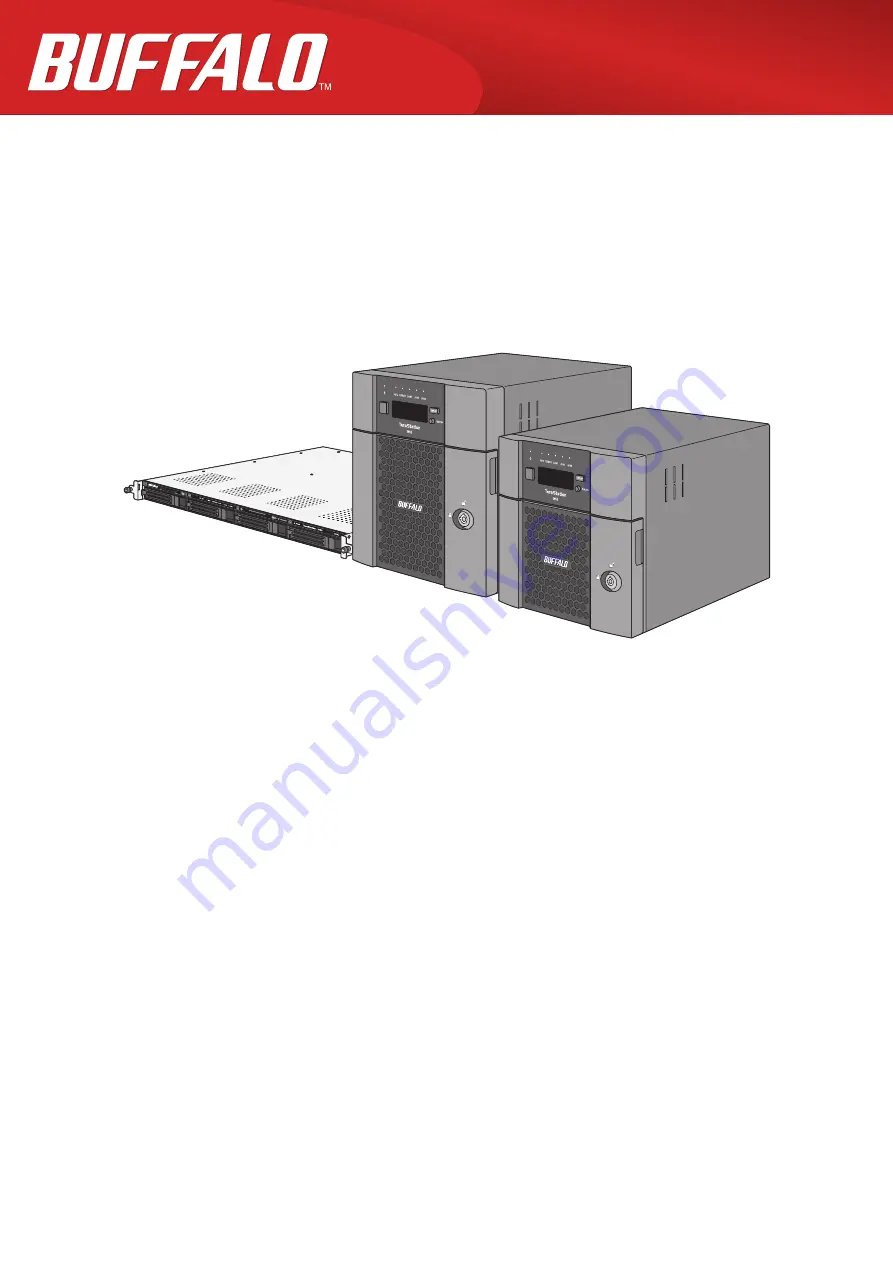
Network Attached Storage

TeraStation WSS WS5020N6

User Manual

Please make sure to read this manual before using and follow the procedures. If you have any inquiries about 
the product, contact the number on the warranty statement or the packing box. Do not discard this manual, the 
warranty statement, or the packing box.

Americas: www.buffaloamericas.com

Europe: www.buffalo-technology.com

Asia Pacific: www.buffalo-asia.com

35021477-01

April, 2018

Summary of Contents for TeraStation WSS WS5020N6

Page 1: ...llow the procedures If you have any inquiries about the product contact the number on the warranty statement or the packing box Do not discard this manual the warranty statement or the packing box Americas www buffaloamericas com Europe www buffalo technology com Asia Pacific www buffalo asia com 35021477 01 April 2018 ...

Page 2: ...use radio interference in which case the user may be required to take adequate measures Environmental Information The equipment that you have purchased has required the extraction and use of natural resources for its production The equipment may contain hazardous substances that could impact health and the environment In order to avoid the dissemination of those substances in our environment and t...

Page 3: ...t Label Warning symbols are used on the product label for the safety operation and prevention of injury to you and damage to the unit This explains the meanings of symbols and icons used on the product label Indicates a potentially hazardous situation which could result in death or serious injury if not careful Indicates a potentially hazardous situation which could result in minor or moderate inj...

Page 4: ...s 5 Opening Windows Storage Server 8 Changing Settings 8 Configuring Date and Time 8 Creating a Shared Folder 9 Turning the TeraStation On and Off 14 Installing Antivirus Software 14 Chapter 2 Preinstalled Software 15 RAID Builder 15 Buffalo Dashboard 16 Email Notification 18 Buffalo Replication 19 TeraStation Backup Replication Folder Settings 20 Display Settings 21 1 ...

Page 5: ...Server 33 Preparing a Backup Destination 33 Recovering Backup Data 38 Configuring Replication 42 Differences Between Buffalo Replication and DFS Replication 42 Before Using Replication 43 Buffalo Replication 43 DFS Replication 46 Chapter 5 Additional Settings 63 Changing Server Name Workgroups and Domains 63 Changing the Password 65 Administrator s Password 65 Passwords for Other Users 66 Adding a...

Page 6: ...Enabling Wake on LAN 83 Chapter 6 Drive Replacement 87 LEDs 87 Notice Before Drive Replacement 87 Example of Drives 1 and 2 88 Example of Drives 3 and 4 93 Chapter 7 Utilities 98 NAS Navigator2 for Windows 98 Changing the IP Address 100 NAS Navigator2 for Mac 101 Changing the IP Address 103 NovaBACKUP 103 Chapter 8 Troubleshooting 104 The TeraStation Becomes Unaccessible 104 Shared Folders Suddenl...

Page 7: ...Message Appears Despite No Drive Errors 105 TeraStation Does Not Boot 107 Notice Before Recovery 107 Recovering Windows Storage Server 107 Additional Information 108 Chapter 9 Appendix 109 LCD Panel 109 Modes 109 Errors and Status 109 Default Settings 110 Specifications 111 4 ...

Page 8: ...Chapter 1 Getting Started Diagrams WS5220DN6 11 14 20 21 16 17 18 19 12 13 15 1 2 3 4 5 6 7 8 9 10 27 25 26 24 WS5420DN6 11 14 20 21 16 17 18 19 12 13 15 1 2 3 4 5 6 7 8 9 10 27 25 26 24 5 ...

Page 9: ...hen LAN port 1 is connected this LED glows green It blinks when the connection is active 6 LAN2 LED When LAN port 2 is connected this LED glows green It blinks when the connection is active 7 LAN3 LED When LAN port 3 is connected this LED glows blue It blinks when the connection is active 8 LCD Panel This display shows the status of many TeraStation settings It also displays errors and messages if...

Page 10: ...It is available for communicating at max 10 Gbps if using the included Ethernet cable or category 6A cable 20Power Connector Use the included power cable to connect to a UPS surge protector or outlet 21Anti Theft Security Slot Use this slot to secure your TeraStation with a cable lock not included 22Serial Number This sticker shows the TeraStation s serial number 23UID Button Press the UID button ...

Page 11: ...the TeraStation s icon while holding down the control key then select Open Remote Desktop If the message The identity of the remote computer cannot be verified Do you want to connect anyway is displayed click Yes or Continue 3 Enter the admin username and password and press the Enter key The default username and password are Administrator and password Windows Storage Server will open in the remote...

Page 12: ...rnet time server The date and time can be obtained automatically Creating a Shared Folder No shared folders are configured by default Before using the TeraStation follow the procedure below to create one or more shared folders This is an example to create a shared folder named Share in drive D which anyone can access 1 From Server Manager click Tools Computer Management 2 Click Shared Folders 9 ...

Page 13: ...er the path of an existing folder or a new folder then click Next Notes Enter D Share into the folder path to create the shared folder for the first time If the message The system cannot find the specified path Do you want to create it is displayed click Yes 10 ...

Page 14: ...6 Enter a name for the share and a description optional then click Next 7 Select Customize permissions then click Custom 11 ...

Page 15: ...8 Choose Everyone and select the Allow checkbox for Change 9 From the Security tab click Edit Add 12 ...

Page 16: ...he Allow checkbox for Modify 12Click OK OK Finish Finish Notes Enable a guest account 1 From Server Manager click Tools Computer Management 2 Click Local Users and Groups 3 Double click Users Guest 4 From the General tab clear the Account is disabled checkbox then click OK Enable access permissions 13 ...

Page 17: ... button on the TeraStation to turn it on and off Or you can turn off your TeraStation by following the procedure below 1 Click the Start button 2 Click the icon then Shut down 3 Select the reason why you want to shut down then click Continue When the power LED on the front of the TeraStation turns off the shutdown process is complete Note Always shut down the TeraStation before unplugging it The T...

Page 18: ...er Settings Display Settings RAID Builder RAID Builder is used to create RAID volumes See the Storage Management chapter for more details To launch RAID Builder you must be logged in as a member of the Administrators group in Windows Storage Server Note This software cannot be accessed by multiple users at the same time Before launching it make sure that it is not being used by another user 15 ...

Page 19: ...formation and dismounts hard drives To launch it double click the Buffalo Dashboard icon in the system tray Note This software cannot be accessed by multiple users at the same time Before launching it make sure that it is not being used by another user 16 ...

Page 20: ...the OS Firmware Displays the firmware version of the TeraStation Check for updates Enables or disables checking for new firmware releases When a new firmware version is available you will be notified here Manufacturer Displays Buffalo Inc Temperature Displays the temperature of the system Fan Displays the fan rpm Backup Displays the status of backup and replication Network Information Displays IP ...

Page 21: ...Return to last state before power failure The TeraStation will be restored to the state before the power failure If the TeraStation was turned off it will remain powered off even if power is restored If the TeraStation was on it will be powered on when power is restored Power on Turns the TeraStation on after power is restored Power off The TeraStation will remain off after power is restored Note ...

Page 22: ...ring Replication section in chapter 4 for more details To launch Buffalo Replication you must be logged in as a member of the Administrators group in Windows Storage Server Note This software cannot be accessed by multiple users at the same time Before launching it make sure that it is not being used by another user 19 ...

Page 23: ...ministrators group in Windows Storage Server Note This software cannot be accessed by multiple users at the same time Before launching it make sure that it is not being used by another user Items Descriptions Label Enter a name for the backup or replication destination When you search for backup devices on the network this name will appear Folder Specify a shared folder where backup data will be s...

Page 24: ...n destination or backup source or destination when configuring a backup job on another Buffalo device unless it s entered To remove a folder from the list of available backup targets select the folder and click this button Save Saves the settings Close Exits TeraStation Backup Replication Folder Settings Display Settings TeraStation s LCD panel settings can be changed using this software See the C...

Page 25: ...e space is equal to the sum of the capacity of the drives minus the capacity of one drive If one drive in a RAID 5 volume fails data on the volume can be recovered after the failed drive is replaced However if two or more drives fail all data is lost Mirrored Volumes The unallocated areas of two drives are combined into a single volume The usable space is equal to the capacity of a single drive Be...

Page 26: ...Volume To create a volume follow the procedure below Successfully following the procedure will erase all data stored on the volumes 1 From Server Manager click Tools Computer Management 2 Click Disk Management 23 ...

Page 27: ...ght click the volume that you want to delete and then select Delete Volume 4 Read the warning message carefully about the data that will be erased and click Yes 5 Click the Start button then RAID Builder 24 ...

Page 28: ...ll run automatically File transfers and system performance will be slower while resynchronization is running which will take about 23 hours for a RAID 5 volume and about 2 3 hours for a mirrored volume per a 4 TB TeraStation model Resynchronization cannot be canceled After creating a volume is completed refer to chapter 7 to create a shared folder Deleting Volumes If the volume shows the status Fa...

Page 29: ...1 From Server Manager click Tools Computer Management 2 Click Disk Management 26 ...

Page 30: ...3 Right click the volume labeled Failed and click Delete Volume Formatting Volumes 1 From Server Manager click Tools Computer Management 27 ...

Page 31: ...2 Click Disk Management 3 Right click the volume that you want to format and select Format 28 ...

Page 32: ...Enabling Data Deduplication Installing Deduplication Role 1 From Server Manager click Dashboard Add roles and features 2 Click Next 3 Select Role based or feature based installation 29 ...

Page 33: ...n 5 Select Data Deduplication under File and Storage Services File and iSCSI Services 6 Click Next twice then click Install 7 Click Close to finish Configuring Data Deduplication 1 From Server Manager click File and Storage Services 30 ...

Page 34: ...2 Click Volumes Right click the drive which will be used to configure data duplication and click Configure Data Deduplication 31 ...

Page 35: ...3 Select General purpose file server to the right of Data deduplication and click OK 32 ...

Page 36: ...up your data regularly You can back up data using the following functions Windows Server Backup Buffalo Replication DFS Replication Backing Up in Windows Storage Server Preparing a Backup Destination Follow the procedure below to set your backup schedule 1 From Server Manager click Tools Windows Server Backup The Windows Server Backup wizard will start 33 ...

Page 37: ...k Local Backup If Reading data please wait is displayed please wait until any messages disappear 3 Right click on Local Backup and select Backup Schedule The Backup Schedule Wizard will start 4 Click Next 34 ...

Page 38: ...5 Select Custom and click Next 6 Click Add Items 35 ...

Page 39: ...7 Select the backup source folders or drives and click OK 8 Click Next 36 ...

Page 40: ...9 Specify the schedule to run the backup and click Next 37 ...

Page 41: ...10Select the backup destination and click Next 11Step through the wizard to finish Recovering Backup Data Follow the procedure below to recover the backup data to the TeraStation 38 ...

Page 42: ...From Server Manager click Tools Windows Server Backup The Windows Server Backup wizard will start 2 Click Local Backup If Reading data please wait is displayed please wait until any messages disappear 39 ...

Page 43: ...l Backup and click Recover The recovery wizard will start 4 Select where the backup data is saved and click Next When A backup stored on another location is selected specify the folder of the backup data in the next page 40 ...

Page 44: ...5 Select the date when a data backup occurred and click Next 41 ...

Page 45: ...cation operation may not proceed properly if a large number of files or a large capacity file have been replicated continually for a long time causing too large of a data load Before starting replication check if there are any possible pauses for operational issues Differences Between Buffalo Replication and DFS Replication Buffalo Replication One way replication from the TeraStation to another de...

Page 46: ...enames that are longer than 170 characters may not be copied correctly Buffalo Replication If using Buffalo Windows Storage Server installed TeraStations as both the replication source and destination start from step 1 If using a different TeraStation as the replication destination refer to that TeraStation s user manual to configure it as a replication destination After you finish configuring on ...

Page 47: ...access key to the replication destination folder click Set Backup Device Access Key If you didn t skip to step 7 6 Enter the configured backup device access key of the replication destination folder and click OK 7 Click the blank space under Replication Target and select the folder then click Select from a folder list If no shared folders appear click Refresh and try again 44 ...

Page 48: ... is located on another network click Add and enter the IP address of the device then click Save After the IP address is added to the list click Refresh again to add the folder to the list of folders 8 When finished configuring click Apply 45 ...

Page 49: ...LAN port or changing the IP address of the replication source or destination TeraStation If the network settings are changed refresh the list of TeraStations and LinkStations as follows 1 Click Buffalo Replication in the Start menu on Windows Storage Server 2 Click Refresh and refresh the detected TeraStations and LinkStations list 3 When the TeraStation that the network settings were changed is d...

Page 50: ...Joining an Active Directory 1 From Server Manager click Local Server 2 Click the hostname of your TeraStation 3 From the Computer Name tab click Change 47 ...

Page 51: ...domain name and click OK 5 Enter an administrator username and password for the Active Directory domain controller 6 Click OK then click OK again 7 Click Close 8 Click Restart Now and restart your computer to apply settings 48 ...

Page 52: ...Installing DFS 1 From Server Manager click Dashboard Add roles and features 2 Click Next 3 Select Role based or feature based installation and click Next 4 Click Next 49 ...

Page 53: ...ect DFS Namespaces and DFS Replication under File and Storage Services File and iSCSI Services 6 Select Include management tools if applicable and click Add Features 7 Click Next twice then click Install 50 ...

Page 54: ...8 Click Close to finish Creating Namespaces 1 From Server Manager click Tools DFS Management 2 Right click Namespaces then click New Namespace 51 ...

Page 55: ...3 Enter a hostname for the namespace server and click Next 52 ...

Page 56: ...4 Enter a name for the namespace and click Next 53 ...

Page 57: ...5 Select Domain based namespace and click Next 6 Click Create 7 Click Close when the New Namespace Wizard finishes 54 ...

Page 58: ...8 From DFS Management right click the name you created through the wizard and click New Folder 9 Enter a folder name and click Add 55 ...

Page 59: ... from the list by clicking Browse Click OK You may be asked to create a new folder if the selected path doesn t exist In such a case click Yes 11Click OK again Configuring DFS Replication 1 From Server Manager click Tools DFS Management 56 ...

Page 60: ...2 Right click Replication then click New Replication Group 3 Select Replication group for data collection as the replication group type and click Next 57 ...

Page 61: ...4 Enter a name for the replication group and click Next 58 ...

Page 62: ...5 Enter the hostname of the file server for the replication source and click Next 6 Click Add 59 ...

Page 63: ...7 Enter the path or select the replication source folder and click OK 8 Click Next 60 ...

Page 64: ...9 Enter the hostname of the file server for the replication destination and click Next 61 ...

Page 65: ...igure bandwidth select Replicate continuously using the specified bandwidth and the bit rate from the drop down list To configure the schedule time select Replicate during the specified days and times and click Edit Schedule You can select the date and time in the displayed window 12Click Create 13Click Close when finished DFS Replication is now configured Note It may take some time before actual ...

Page 66: ...Chapter 5 Additional Settings Changing Server Name Workgroups and Domains 1 From Server Manager click Local Server 2 Click the hostname of your TeraStation 63 ...

Page 67: ...ick Change 4 Enter the computer name choose domain or workgroup and click OK Note The computer name should contain 16 characters or less If more than 16 characters are entered all characters from the 17th character on are ignored 64 ...

Page 68: ... so for security you should change it immediately Follow the procedure below to change the password Administrator s Password 1 Log on to Windows Storage Server using Administrator 2 Press Ctrl Alt End 3 Click Change a password 4 Enter the current administrator s password and a new password twice then press the Enter key 65 ...

Page 69: ...Other Users 1 From Server Manager click Tools Computer Management 2 Click Local Users and Groups then double click Users 3 Right click the user whose password will be changed and click Set Password 4 Click Proceed 66 ...

Page 70: ...5 Enter a new password twice Adding a User 1 From Server Manager click Tools Computer Management 2 Click Local Users and Groups 67 ...

Page 71: ... Click Close Connecting with Standard Accounts Accounts not belonging to the Administrators group cannot connect to Windows Storage Server through the remote desktop Those accounts must be added to the Remote Desktop Users group Follow the procedure below to add accounts to the group 68 ...

Page 72: ...1 From Server Manager click Tools Computer Management 2 Click Local Users and Groups then double click Groups 69 ...

Page 73: ...3 Double click Remote Desktop Users 4 Click Add 5 Click Advanced 6 Click Find Now 70 ...

Page 74: ...7 Select the user to be added as a group member and click OK 8 Click OK then click OK again 71 ...

Page 75: ...Adding a Group 1 From Server Manager click Tools Computer Management 2 Click Local Users and Groups 3 Right click Groups and choose New Group 72 ...

Page 76: ...4 Enter a group name and click Add 5 Click Advanced 6 Click Find Now 73 ...

Page 77: ... Close Enabling Email Notification Your TeraStation can send you email reports daily or when settings are changed or an error occurs Notification emails may be triggered by any of TeraStation reports or Windows event logs Configuring Email Server 1 Click the Start button and click Email Notification 74 ...

Page 78: ... Test Message 5 Enter the password of the user you re logged in as and click OK Items Descriptions Enable email notification If enabled email reports will be sent during specific events Send to Adds a new receiver for the notification email Click New to add a new email address Click Edit to change the receiver settings or Delete to remove an address from the list Note Up to five email addresses ma...

Page 79: ... standard port number 110 is used Username and Password Enter the username and password of your email server SSL TLS If LOGIN SMTP AUTH LOGIN or CRAM MD5 SMTP AUTH CRAM MD5 is selected select whether to use SSL TLS or STARTTLS Email Settings Sender Address Enter the sender s email address for notification emails Title Enter the subject of the notification email Click Content Options to select the ...

Page 80: ...otification emails will be categorized into the following importance levels Levels Details Daily Report Describes the status of the TeraStation in a daily report email Info Sends a notification email if an event occurs Info reports will contain just information such as capacity information backup job starts finishes etc Notice Sends a notification email if a non critical error occurs Notice report...

Page 81: ...r immediately Specifying Windows Event Logs A notification email will be sent when the specified event occurs This section describes notifications using Windows Update events 1 Click the Start button and click Email Notification 2 Click Content Options 3 Click the Event ID Settings tab and select the Use Windows event logs to determine notification type checkbox 4 Click New 5 Select the importance...

Page 82: ...n 1 Click the Start button and click Display Settings 2 Configure the desired settings and click OK Items Descriptions Show Select the items to be displayed on the LCD panel Scroll Display If enabled the LCD scrolls through display items at a regular interval LCD Brightness Change the brightness of the LCD panel and LEDs from level 1 darkest to 5 brightest If you select the Night Mode checkbox the...

Page 83: ...nu to determine the logs to be saved 4 Click Save All Events As 5 Specify the desired location and enter a filename then click Save Do not change the file type 6 When the Display Information screen appears click OK The operation to acquire event logs is complete Open the log file stored in the specified location to check the contents of the event logs 80 ...

Page 84: ...Configuring NIC Teaming 1 From Server Manager click Local Server 2 Click Disabled to the right of NIC Teaming 81 ...

Page 85: ...3 From the TEAMS field click TASKS then select New Team 82 ...

Page 86: ... click OK The created team will be added to the list Wait until the status changes to OK It may take a few minutes Enabling Wake on LAN You can turn on the TeraStation via Wake on LAN You can control the powered down TeraStation remotely without moving to the unit nearby 83 ...

Page 87: ...1 From Server Manager click Tools Computer Management 2 Click Device Manager 84 ...

Page 88: ...t click the network adapter to use for Wake on LAN and click Properties 4 Click the Advanced tab 5 If you use the 1GbE ports LAN 1 or LAN 2 then select Enable PME under Property and change Value to Enabled 85 ...

Page 89: ...AN you ll need Wake on LAN software that sends magic packets The TeraStation does not include Wake on LAN software If the TeraStation is powered off by Wake on LAN using 10GbE ports LAN3 the link speed will be fixed to 100 Mbps To use with 10GbE ports all network devices must be compatible with 100 Mbps speed 86 ...

Page 90: ... replacement drive use a Buffalo OP HDN series drive The new drive should be the same size or larger If a larger drive is used the extra space will not be usable in a volume The TeraStation is fragile Handle it with care Do not drop or bump the TeraStation Use caution when handling the unit in order to avoid personal injury Never disassemble any parts while you are replacing a drive unless instruc...

Page 91: ...ot drive fails repair the mirrored volume of the system area first after replacing the drive Repairing the volume for the data area first may not always succeed If you used Disk Management to mirror the boot drive the TeraStation will not boot if the drive fails In such a case refer to the procedure below 1 If your TeraStation has a front cover open it with the included key 2 Make a note of the dr...

Page 92: ... in with the locking mechanism open Make sure the replacement drive is inserted exactly as the previous drive 7 Swing the lock back down until it clicks into place Make sure that the inserted drive has been pushed in as far as the other drives If the drive has not been inserted properly it will not be detected by the TeraStation 89 ...

Page 93: ...ion s icon and select Open Remote Desktop For macOS select the TeraStation s icon while holding down the control key then select Open Remote Desktop 11Enter the username and password and press the Enter key Windows Storage Server opens in the remote desktop Note The default username and password are Administrator and password 12Click the Start button and click RAID Builder 90 ...

Page 94: ...d Continue is displayed click OK It will take about an hour for the mirrored volume to be repaired You can check the progress of the repair in Disk Management After creating a mirrored volume you will see the message dialog to restart your TeraStation Follow the instructions displayed When the reboot is finished go to the next step 91 ...

Page 95: ...except for a RAID 5 volume or mirrored volume 1 Right click the new dynamic disk and select New Volume 2 Follow the instructions on the screen to create a new volume To repair a RAID 5 volume 1 Right click the volume labeled Failed Redundancy and click Repair Volume 2 When Select one of the disks listed below is displayed select the drive to repair and click OK 92 ...

Page 96: ...r If a Mirrored System Area Failed to Be Repaired If a mirrored volume on the system area doesn t restore the first time try initializing the drive and converting it to a dynamic disk then restart the TeraStation After the TeraStation restarts try the steps above a second time If the mirrored volume still cannot be restored contact Buffalo technical support for assistance Example of Drives 3 and 4...

Page 97: ...m out 8 Pull out the drive cartridge and remove it from the TeraStation 9 Firmly insert the new drive into the empty slot Slide the drive in with the locking mechanism open Make sure the replacement drive is inserted exactly as the previous drive 10Swing the lock back down until it clicks into place Make sure that the inserted drive has been pushed in as far as the other drives If the drive has no...

Page 98: ...12Buffalo Dashboard will show the drive status Getting drive status After the drive status changes to Normal open Server Manager and click Tools Computer Management 13Click Disk Management 95 ...

Page 99: ... Volume 2 Follow the instructions on the screen to create a new volume To repair a RAID 5 volume 1 Right click the volume labeled Failed Redundancy and click Repair Volume 2 When Select one of the disks listed below is displayed select the drive to repair and click Yes Repeat steps 1 and 2 for each volume that requires resynchronization 3 Right click the volume labeled Missing and select Remove Di...

Page 100: ...s displayed click Yes Repeat steps 1 to 3 for each volume that requires resynchronization 4 Select the volume to be repaired and select Add Mirror 5 When Add Mirror is displayed select the drive to be added to the mirrored volume and click Add Mirror 97 ...

Page 101: ... or check its drive in remote desktop To install NAS Navigator2 download the installer from http d buffalo jp WS5020N6 Double click the icon to start NAS Navigator2 Click on a TeraStation s icon to display Total capacity Used capacity Workgroup IP address Subnet mask Default gateway MAC address Firmware version Double click the icon to open a share on the TeraStation 98 ...

Page 102: ...rt by If you have multiple Buffalo NAS devices on the network you may choose to display them in order of hostname product name workgroup IP address subnet mask or default gateway Browse Opens the Buffalo NAS device s shared folders Refresh Searches for the Buffalo NAS devices on the network again I m here Causes your Buffalo NAS device to beep Right click your device s icon to show these options B...

Page 103: ...pen NAS Navigator2 Opens the NAS Navigator2 window Exit Exits NAS Navigator2 The following tasks may be performed from the Buffalo NAS device s properties page Name Description Remote Desktop Click Open Remote Desktop to open Windows Storage Server IP Address Select the Use DHCP checkbox to assign an IP address from the DHCP server automatically If there is no DHCP server on the network you cannot...

Page 104: ...te desktop To install NAS Navigator2 download the installer from http d buffalo jp WS5020N6 Click the icon in the Dock to start NAS Navigator2 Click on a TeraStation s icon to display Total capacity Used capacity Workgroup IP address Subnet mask Default gateway MAC address Firmware version Double click the icon to open a share on the TeraStation Name Description Open Opens the Buffalo NAS device s...

Page 105: ...mote Desktop Opens Windows Storage Server in remote desktop Configure Opens the properties page that lets you configure the Buffalo NAS device s IP address or open Windows Storage Server in remote desktop I m here Causes your Buffalo NAS device to beep Label Color Selects the color of the name displayed below the icon The following tasks may be performed from the Buffalo NAS device s properties pa...

Page 106: ...on your computer The NovaBACKUP installer is available from http d buffalo jp WS5020N6 Select the region and model to go to your specific model s d buffalo website Download the NovaBACKUP installer and install it onto your computer To download the installer you will need the serial number of your TeraStation The serial number is printed on the label on the back or top of the unit For the rackmount...

Page 107: ...ftware completely Turn off any software security suite that might include a firewall Try searching again Cause 3 Wireless and wired adapters are both enabled Disable all adapters except for the Ethernet adapter connected to the TeraStation Cause 4 The Ethernet cable is defective or the connection is unstable Try changing the hub port or Ethernet cable that you used to connect Cause 5 The LAN board...

Page 108: ... Unable to Access the Shared Folder or the System Becomes Unstable This usually happens because too many software applications are running on Windows Storage Server causing a memory shortage Exit or uninstall some of the software running on Windows Storage Server then restart the TeraStation I12 Message Appears Despite No Drive Errors If the I12 message appears on the LCD panel or NAS Navigator2 b...

Page 109: ... volume is operating in degraded mode In such a case right click the volume labeled Failed Redundancy and click Reactivate Volume in Disk Management When you reactivate the volume resynchronization will run automatically File transfers and system performance will be slower while resynchronization is running which will take about 23 hours for a RAID 5 volume and about 2 3 hours for a mirrored volum...

Page 110: ...deleting the area for drive 1 setting up a new 100 GB Basic Disk Simple area and then copying the Windows Storage Server image to this area If there are system areas or mirrored locations on the drives other than drive 1 be sure to delete the system areas or disable the mirrored locations before performing the recovery procedure If recovery is performed without deleting these areas Windows Storage...

Page 111: ...aining space is an unallocated area Drives 2 4 The data on the drives cannot be viewed They appear as Foreign in Disk Management To view the area on the drives right click the area displayed as Foreign and then select Import Foreign Disks Additional Information Ethernet Port Number Is Not Correct on the Windows Storage Server Ethernet port numbers on the Windows Storage Server are assigned as the ...

Page 112: ... the used space for drive C and D on the TeraStation Installed OS Windows Storage Server 2016 Displays the OS installed on the TeraStation Hostname and LAN 1 IP Address WS5410DN6xxx 192 168 11 150 Displays the hostname and the IP address of LAN 1 port Note This example is using a WS5420DN6 unit The x in the hostname is the last three digits of the MAC address Date and Time Date Time YYYY MM DD hh ...

Page 113: ...ilding the volume Note Transfer speeds are slower during the rebuilding process Wait until resynchronization finishes It will take about 23 hours for a RAID 5 volume and about 2 3 hours for a mirrored volume per a 4 TB TeraStation model This message will disappear when resynchronization finishes I33 Replication Failure An error occurred in replication From Buffalo Replication click Sync to execute...

Page 114: ...Windows Storage Server 2016 Workgroup Edition Standard Edition Model Microsoft Windows Storage Server 2016 Standard Edition Note The Microsoft Software License is on the d buffalo website http d buffalo jp WS5020N6 Be sure to read the terms and conditions of this license LAN Interface Standards Compliance 1GbE port IEEE 802 3ab 1000BASE T IEEE 802 3u 100BASE TX IEEE 802 3 10BASE T 10GbE port IEEE ...

Page 115: ...uding protruding parts WS5220DN6 170 x 170 x 230 mm 6 7 x 6 7 x 9 1 in WS5420DN6 170 x 215 x 230 mm 6 7 x 8 5 x 9 1 in WS5420RN6 430 x 44 3 x 430 mm 16 9 x 1 7 x 16 9 in Weight WS5220DN6 5 0 kg 11 0 lb WS5420DN6 7 4 kg 16 3 lb WS5420RN6 8 9 kg 19 6 lb Power Consumption WS5220DN6 WS5420DN6 max 85 W WS5420RN6 max 100 W Operating Environment Temperature 0 40 C 32 104 F Humidity 10 85 non condensing C...

Reviews: