background image

1

Video Camera Operation Manual
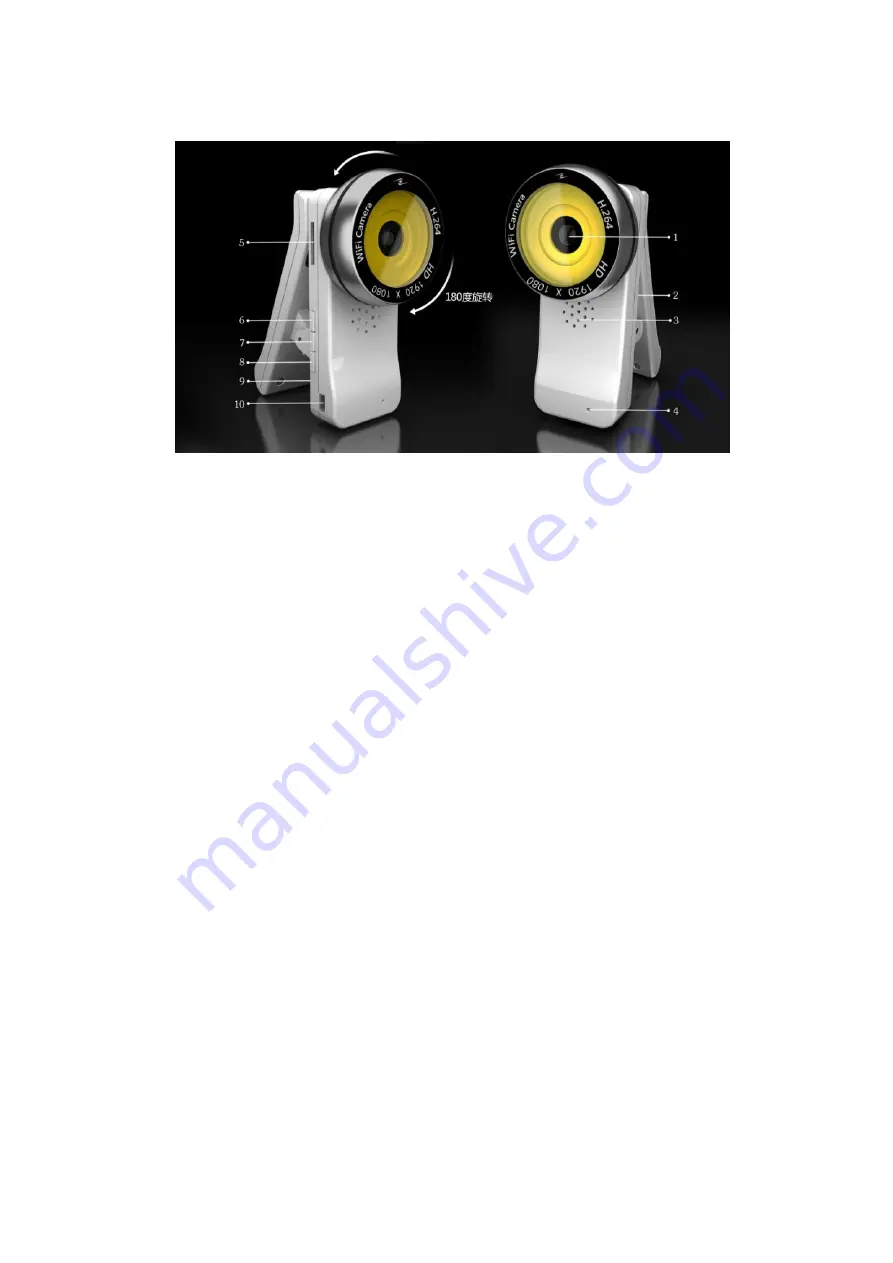
1. Camera

2. Indicator

3. Ventilation hole

4. Microphone 5. IF card

6.

Power switch 7. Recording 8. Reset

9. Ventilation hole

10. USB

Indicators:

Red light on---Power switch on

Red light off---Power switch off

Blue light on---Recording standby

Blue light flash---Recording on

Green light on---Mobile phone connection mode (AP mode)

Green

light

off---

Router connection mode (STA mode)

Green light flash--- (STA mode) Camera unconnected to the router

Camera Operation:

Press NO\OF button, the machine starts up when the red light is on, and the red, blue

and green light are all on after the system runs for 20 seconds (automatic recording will

begin while the blue light flashes at starting up when IF card is loaded). Press the

Recording key for 2 seconds to stop and save the recorded file when recording is going

on and blue light is always on. Press the recording key again for 2 seconds when

required. Red light is off when long pressing the power switch after starting up, and the

machine is off.

Long press Reset button until the green light keeps flashing, then release the button,

when the machine is abnormal due to inappropriate operation or other unknown reasons.

The machine is restored to factory settings and restarts. The camera enters mobilephone

connection mode (AP mode)

Summary of Contents for S-NC-0054

Page 1: ... the red blue and green light are all on after the system runs for 20 seconds automatic recording will begin while the blue light flashes at starting up when IF card is loaded Press the Recording key for 2 seconds to stop and save the recorded file when recording is going on and blue light is always on Press the recording key again for 2 seconds when required Red light is off when long pressing th...

Page 2: ...search QR CAM software in App Store and download iPhone scan packing and QR code on the Manual 3 For jailbreak iPhone visit www qr cam com and click iPhone client for downloading When QR CAM software is installed the following icon will appear on the mobilephone as in Fig 1 Fig 1 Ⅱ Point to Point View of Camera Mobile phone AP Mode Long press Power button the red light is on for starting up and th...

Page 3: ...e black TextField in Fig 4 to enter the page in Fig 5 You can operate accordingly on the camera Ⅲ Camera WLAN Connection View STA Mode As in the above mentioned steps enter the page in Fig 5 when the mobilephone is successfully connected with the camera click Camera Settings to enter the page in Fig 6 and click WLAN to enter Fig 7 and select STA Mode Find the router WIFI hotspot to be added as sho...

Page 4: ...ne and the camera are not in the same network P2P link for a remote access to the camera Ⅳ Computer Client View 1 Install Computer Client Connect the camera with the router i e STA Mode the computer and the camera are in the same network input 192 168 1 168 in the computer IE address field and the webpage that appears is as shown in Fig 9 below Icon will appear on the desktop after ActiveX control...

Page 5: ... lower right corner to pop up a setting window click Add Equipment select P2P Link Mode input UID code UID code is the black text below the blue TextField in Fig 4 which is also P2P account at the Equipment Address UID Input password 123456 click Save and then click Yes New equipment then appears in the unused equipment and remote real time pictures can be viewed by double clicking the new equipme...

Page 6: ... 2 When you want to visit the camera you need to know what the WIFI mode of the camera is AP or STA mode then the corresponding connection mode is used to connect to the camera 3 When connecting the camera with wireless WIFI it may lead to connection break machine restart or unsmooth wireless transmission due to WIFI signal strength the surrounding environment of the camera the wireless router s c...

Reviews: