

Section 2 -
Programming the Keypad with M-Series Main Console
1. Press the learn button on the back
of the M-Series Main Console for
3 seconds until the Zone 1 light
is flashing.
This device complies with Part 15 of the FCC Rules. Operation is subject to the
following two conditions: (1) This device may not cause harmful interference,
and (2) This device must accept any interference received, including
interferences that may cause undesired operation.
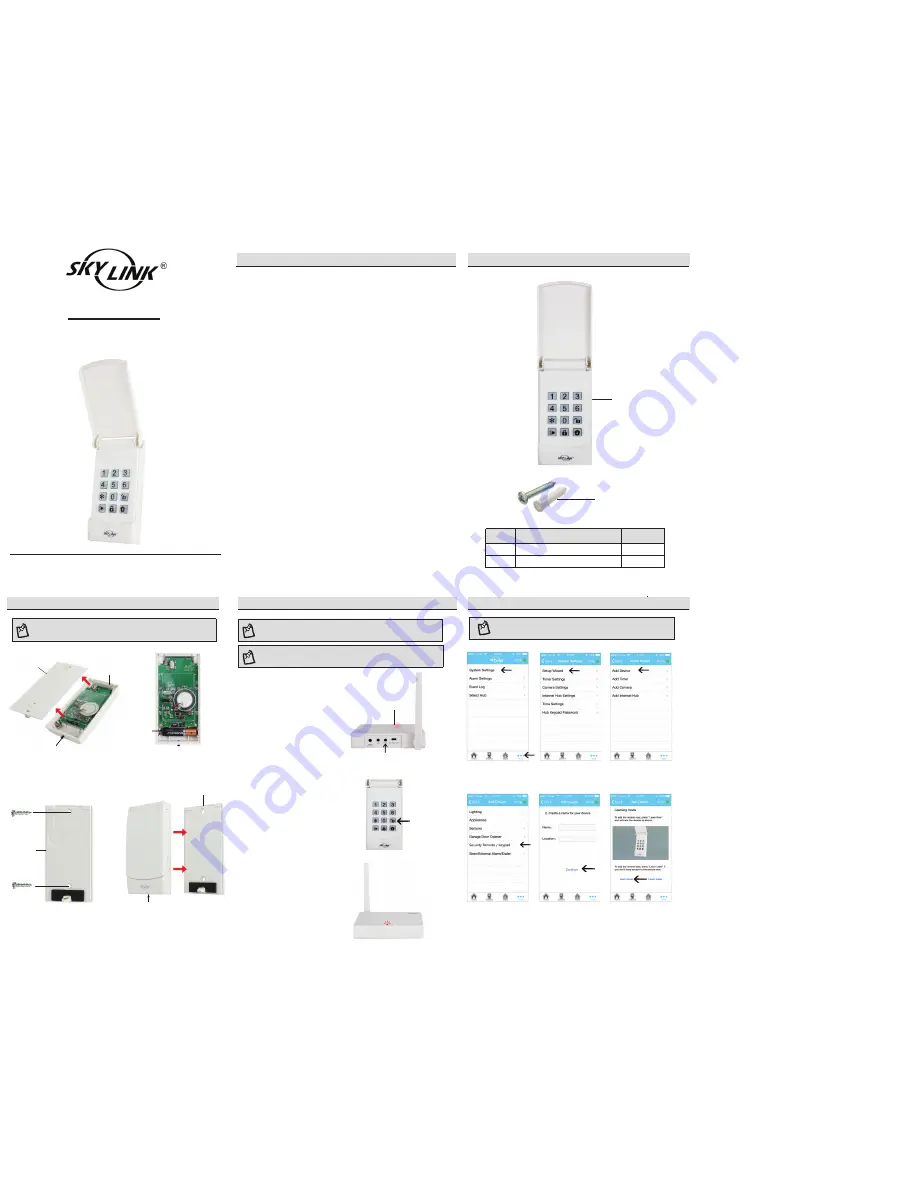
Congratulations on your purchase of the Skylink Security Keypad,
Model: KN-MT. The wireless keypad can arm or disarm your SkylinkNet and
M-Series Alarm system from a secondary location in your home.
INSTALLATION INSTRUCTIONS
Security Keypad
Model: KN-MT
Safety Information
WARNING:
Changes or modifications to this unit not expressly approved by the party
responsible for compliance could void the user’s authority to operate the
equipment.
CE - DECLARATION OF CONFORMITY:
This equipment complies with the requirements relating to electromagnetic
compatibility, EN 301489-1, EN301489-3, EN300220-1, EN300220-2 and
EN60950-1. This equipment conforms to the essential requirement of the
1999/5/EC R&TTE Directive.
Parts
Description
Quantity
A
Security Keypad
1
A
NOTE:
You can program in total up to 4 security keychain remotes or keypads
to your M-Series Alarm System.
NOTE:
The Security Keypads must be programmed in Zone 1.
2. Input Pin followed by the
Disarm button. [Default Pin: 0 0 0 0]
3. Once the keypad is programed to
the M-Series Main Console, the
Zone 1 LED light will be off.
B
2
Screw
B
Section 1 - Installing the Security Keypad
NOTE:
The battery for the Security Keypad is not included. Please refer to
instruction below to insert an AAA Alkaline Battery.
1. Undo the screw (1) on the bottom
side of the Keypad (A) and remove
the back plate.
2. Insert an AAA Battery.
3. Mount the back plate with the
included screws (B).
4. Attach the Keypad on the back
plate and tighten the screw (1)
on the bottom of the Keypad.
1
Back
Plate
AAA Battery
Back
Plate
B
B
Back Plate
1
LED
Disarm
Button
Keypad
Learn Button
Section 3 -
Programming the Keypad with SkylinkNet Internet Hub
1. Go to “More” and tap
on “System Settings”.
2. Tap on “Setup
Wizard”.
3. Tap on “Add Device”.
NOTE:
Programming the keypad with the SkylinkNet Internet Hub
must be done from the SkylinkNet App.
4. Tap on “Security
Remote/Keypad”.
5. Name your Security
Keypad and tap
“Continue”.
6. Tap on the “Learn Now”
button and input the PIN No.
followed by the Disarm
Button [Default Pin is 0000].
Package Contents


