background image


Continuous Band Sealer Instruction Manual 

Distributed By: 


Version 2.6 

Last Updated:  2/13/2019 

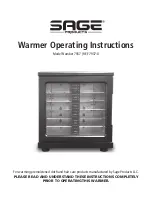
Summary of Contents for CBS-880 I

Page 1: ...C Continuous Band Sealer Instruction Manual Distributed By Version 2 6 Last Updated 2 13 2019...

Page 2: ...methods without the prior written permission of the publisher except in the case of brief quotations embodied in critical reviews and certain other noncommercial uses permitted by copyright law For p...

Page 3: ...njury and or damage to the equipment Please fill in the information below You will find the information on the machine identification plate You will need this information when ordering replacement par...

Page 4: ...f Contents Safety Instructions 1 Introduction 3 Operating your Band Sealer 8 Vertical Configuration Set up 15 Maintenance 20 Parts Diagram 22 Troubleshooting 37 Spare Parts List 39 Quality Control Tes...

Page 5: ...arts are damaged Be sure not to allow the power cord to drape into your work area Check that all parts are operating properly and perform the intended functions Check for all other conditions that may...

Page 6: ...cause electrical shock Do not submerge the band sealer into water or liquid Do not operate band sealer in a corrosive or humid environment Always keep the machine clean lubricated and in good working...

Page 7: ...products ex powders grains coffee and liquids In addition sealing using the vertical configuration also works best with stand up pouches Features of the CBS 880 Band Sealer Your band sealer is equipp...

Page 8: ...ts and conveyor simultaneously Specifications CBS 880I Horizontal CBS 880II Vertical Power 110V 60Hz Motor Power 50W Sealing Speed 0 472 inches minutes Sealing Width 8mm Optional 15mm width available...

Page 9: ...bossing Roller 8 Housing 9 Circuit Breaker 10 Control Panel 11 Feed Opening 12 Fastening Knob 13 Worktable 14 Adjusting Knob for Conveyor Belt 15 Tightening Nut 16 Transverse Tightening Knob for Conve...

Page 10: ...C B S 8 8 0 I N S T R U C T I O N M A N U A L 6 Getting to Know your Band Sealer...

Page 11: ...Diagram Figure 4 Electrical Circuit Diagram QF1 Breaker SB1 Switch Emergency Stop K1 Switch On Off K2 Switch Seal K3 Switch Fan MD DC Motor FAN Axial Flow Fan THC1 Temperature Controller ST1 Thermoco...

Page 12: ...ion Adequate power source Relationship to source of product Relationship to band sealer Relationship to any conveyors necessary to remove finished product Convenience of operator Initial Set up If you...

Page 13: ...aft Make sure grooves are aligned Figure 7 Tighten the screw on the drive shaft to lock the conveyor middle post in place 3 Tighten the round nut Figure 34 Item 18 along the drive shaft as well as the...

Page 14: ...ards or backwards Refer to Figure 8 for knob adjustments For vertical configuration only adjust the height of the band sealer appropriate for your bag to be sealed Figure 8 1 Adjusting Knob 2 Foot Res...

Page 15: ...e desired to seal your material Temperature settings will vary based on bag material and thickness If you are unsure what temperature setting to use we recommend starting at a low temperature and grad...

Page 16: ...hile the material is moving through the band sealer do not push or pull the material as this will cause irregular sealing 8 If the sealing belt is running off the guide wheels make adjustments to the...

Page 17: ...wheel plate and turn counter clockwise to loosen the print wheel plate Figure 12 Remove the embossing wheel plate as well as the o ring Figure 13 Figure 12 Figure 13 2 Carefully install your typesets...

Page 18: ...speed the less exposure the material and therefore a higher temperature will be required to seal the material 2 Try a variety of different sealing temperatures and conveyor speeds to get the optimal s...

Page 19: ...2 from your distributor Figure 16 CBS 880II Vertical CBS 880 Band Sealer for sealing liquids and stand up pouches 1 Detach the conveyor table by removing the two knobs under the conveyor table Slide t...

Page 20: ...l configuration Figure 20 Assemble vertical stand as shown above 4 Remove the cover from the Umbrella Gear Figure 45 Item 4 Set aside for later Figure 21 Remove the cover from the umbrella gear by rem...

Page 21: ...for later Figure 23 Remove the three screws and nuts on the umbrella gear Figure 24 Umbrella Gear without the screws 6 Insert the long drive shaft of the Umbrella Gear into the axis hole Take note of...

Page 22: ...lock the conveyor in place Figure 29 Insert the short drive shaft on the conveyor unto the groove of the umbrella gear Figure 30 Tighten screw and knob on both sides under the conveyor to lock conveyo...

Page 23: ...st each other Move the conveyor belt in order to align the groves Figure 32 Set the three screws back on the umbrella gear 11 Replace the cover on the Umbrella Gear 12 Final tuning a To adjust height...

Page 24: ...d replace the belts as necessary Both the sealing and drive belts are consumable items Replace sealing belts when there are burn marks or if the belts become hard and brittle Replace drive belts when...

Page 25: ...and benzene chemicals 2 The turbocase should be oiled monthly with 50g 20 oil by a Remove the back cover b Locate the turbocase and unscrew the cap Replenish any depleted gear oil with 50g 20 oil 3 T...

Page 26: ...o order spare parts please use diagram and part s below Figure 34 Spare Parts Diagram Overview Figure 36 Heating Cooling Blocks Figure 38 Gears Figure 40 Conveyor Table Figure 42 Motor Turbocase Figur...

Page 27: ...C B S 8 8 0 I N S T R U C T I O N M A N U A L 23...

Page 28: ...C B S 8 8 0 I N S T R U C T I O N M A N U A L 24 Figure 34 Spare Parts Diagram Overview...

Page 29: ...ulley Includes 12 13 13 CBS 880 6A 2 606 2Z bearing Includes 12 13 14 CBS 880 4 1 embossing roller seat 15 CBS 880 3 1 embossing roller w cavities for types Includes 15 16 15 CBS 880 3A 1 embossing ro...

Page 30: ...C B S 8 8 0 I N S T R U C T I O N M A N U A L 26 Figure 36 Heating Cooling Blocks...

Page 31: ...12X95 heating pipe for sealing 9 CBS 880 9A 1 bottom heating block 770 10 CBS 880 9 10 4 copper block cushion 11 CBS 880 9 11 1 bottom holding plate 12 CBS 880 21 23 1 slide seat for pressing wheel 13...

Page 32: ...C B S 8 8 0 I N S T R U C T I O N M A N U A L 28 Figure 38 Gears...

Page 33: ...A 6004 2Z bearing 1 Includes 3 6 8 11 5 BS 35A BS 35A 1 steel gear 1 Includes 3 6 8 11 6 BS 35A gear shaft 1 Includes 3 6 8 11 7 BS 33B 10 pin wiring terminal orange 1 8 BS 35A middle gear 1 Includes...

Page 34: ...C B S 8 8 0 I N S T R U C T I O N M A N U A L 30 Figure 40 Conveyor Table...

Page 35: ...half round square neck bolt 2 Includes 9 11 12 10 CBS 880 15 worktable 1 specify flat or curved edges 11 CBS 880 18 plastic spacer 2 Includes 9 11 12 12 CBS 880 18 BS 17 knob 2 Includes 9 11 12 13 CB...

Page 36: ...re 42 Motor Turbocase Item Part Description Quantity Comments 1 CBS 880 29 110V DC motor 1 BS 29A motor brush 2 Not shown In motor 2 CBS 880 30 worm gear case assembly 1 3 BS 35B driving gearwheel 1 4...

Page 37: ...C B S 8 8 0 I N S T R U C T I O N M A N U A L 33...

Page 38: ...C B S 8 8 0 I N S T R U C T I O N M A N U A L 34 Figure 43 Sealer Body...

Page 39: ...by taking temperature controller out TMC XMTE 1000 2 O temperature controller gen 2 0 determine version by taking temperature controller out 7 CBS 880 83 plastic panel 1 A old gen B new gen 8 BS 14 1...

Page 40: ...ver 1 Umbrella Gear Base Parts 1 12 5 CBS 880 72c 6000 2Z bearing 1 Umbrella Gear Base Parts 1 12 6 CBS 880 72c short conical gear 1 Umbrella Gear Base Parts 1 12 7 CBS 880 72c 608 bearing 1 Umbrella...

Page 41: ...melts on the sealing belt your bags will stick to the melted plastic Embossing is not clear 1 Embossing roller is worn out 2 Pressure spring on embossing roller needs to be tightened 1 Replace emboss...

Page 42: ...3 Replace motor brushes BS 29A If the temperature controller works and the power lamp illuminates but the motor does not move start off by checking the motor and turbocase connection Remove the back...

Page 43: ...lowing parts Please note that spare parts included with your band sealer are subject to change without notice Power Cord Part PWC CBS PTFE Sealing Belts Part CBS 880 10 Drive Belts Part CBS 880 26 Spe...

Page 44: ...in proper working order ex wheels belts knobs etc CBS 880 only Attach the conveyor to the body via the drive shaft Part 40 Detach after testing Turn on machine start seal fan printer Check all knobs...

Page 45: ...41...

Reviews: