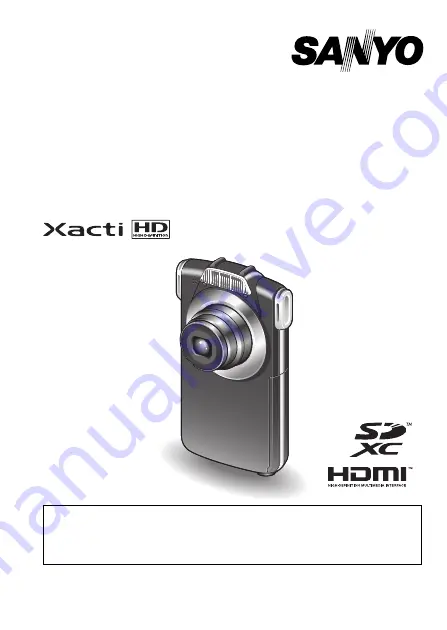
background image

VPC-PD1EX
VPC-PD2
VPC-PD1GX
VPC-PD1PX
VPC-PD1TA 

INSTRUCTION MANUAL

Dual Camera

Please read these instructions carefully before using the camera.
Make sure to read and understand the separate booklet “SAFETY MANUAL”. 
Keep this manual in a safe place for later reference.

Important note

This manual explains how to safely operate the VPC-PD1EX, VPC-PD2, 
VPC-PD1GX, VPC-PD1PX and VPC-PD1TA.
Any information regarding only one of these products will be labeled as such.

Summary of Contents for VPC-PD2BK

Page 1: ...using the camera Make sure to read and understand the separate booklet SAFETY MANUAL Keep this manual in a safe place for later reference Important note This manual explains how to safely operate the VPC PD1EX VPC PD2 VPC PD1GX VPC PD1PX and VPC PD1TA Any information regarding only one of these products will be labeled as such ...

Page 2: ... If this equipment does cause harmful interference to radio or television reception which can be determined by turning the equipment off and on the user is encouraged to try to correct the interference by one or more of the following measures h Reorient or relocate the receiving antenna h Increase the separation between the equipment and receiver h Connect the equipment into an outlet on a circuit...

Page 3: ...ymbol is printed beneath the symbol mark this chemical symbol means that the battery or accumulator contains a heavy metal at a certain concentration This will be indicated as follows Hg mercury Cd cadmium Pb lead In the European Union there are separate collection systems for used electrical and electronic equipment batteries and accumulators Please dispose of them correctly at your local communi...

Page 4: ...IS MANUAL Symbols used in this manual HINT Points giving some extended instructions or special points to pay attention to CAUTION Points that require special attention page xx Refer to the page indicated for detailed information ...

Page 5: ...e battery pack and card Install the card and the supplied battery pack i The card is not an included accessory Please purchase a commercially sold card i The camera has an internal memory which means that you can record and save the recorded data even if no card is installed To close ...

Page 6: ... computer 3 Turn on the computer h Charging begins h During charging the multi indicator is lit red h When charging is completed the indicator turns off h The charging time is approx 180 minutes 2 Pull out 2 Pull out 1 Push in 1 Press Remove the battery pack Remove the card To USB terminal Supplied dedicated USB interface cable To USB connector on the computer Computer power switch ON Camera on of...

Page 7: ...mputers it may be possible to charge the battery pack even when the computer is turned off Insert and pull out the cable and USB plug carefully i When connecting the cables make sure that the plugs are correctly oriented and that they match the shapes of the terminal sockets on the devices Push the plugs in straight when connecting them If undue force is used to connect a cable it may permanently ...

Page 8: ...or how to set the date and time see page 14 2 Record To record a video clip h Press the button to begin recording a video clip h Press the button again to end the recording To take a photo h Press the button h A still image is captured REC 00 09 5 2M ON OFF button button Video recording button Available recording time remaining Recording time button Photo shooting button ...

Page 9: ...ge frame to the image you wish to play back h The image information for the framed image is shown in the bottom part of the monitor 3 Press the SET button h The file you selected is played back To return to the recording mode h Press the REC PLAY button 2010 12 24 14 25 100 0011 Remaining battery power indication Orange frame Arrow keys SET button REC PLAY button ...

Page 10: ... and press the button 2 Select DELETE SINGLE and press the SET button h If you press G or H the screen to delete a different file will appear 3 When you are finished deleting files press the button When you are finished using the camera Press the ON OFF button for at least 1 second to turn the camera off ...

Page 11: ... cable and USB plug carefully i When connecting the cables make sure that the plugs are correctly oriented and that they match the shapes of the terminal sockets on the devices Push the plugs in straight when connecting them If undue force is used to connect a cable it may permanently damage the terminal or the camera i If excessive force is used to pull the USB plug it may damage the cable and or...

Page 12: ...the automatic playback window click Open folder and display files h To copy files from the internal memory Click on the XACTI_INT Open folder and display files h To copy files from the card Click on the XACTI Open folder and display files 5 Copy data from your camera to a computer h Copy files to a computer CAUTION For VPC PD1EX i It is not possible to copy files from the computer side a hard disk...

Page 13: ...nnect your camera to a computer 2 Turn on the computer and the camera 3 On the USB Connection Screen select CARD READER and press the SET button i The window for automatic playback of XACTI_INT internal memory and XACTI card opens and the Access Menu appears i If the Access Menu does not appear double click Autorun Exe in XACTI_INT 4 In the Access Menu click on Install Xacti Simple Uploader i The ...

Page 14: ...s of their respective owners for Windows for Mac OS Video playback 1 Xacti Simple Uploader 2 Xacti Simple Uploader 2 Video playback Operating System 3 Windows 7 Windows Vista Windows XP with standard USB port Windows 7 Windows Vista Windows XP with standard USB port Mac OS X 10 3 9 Mac OS X 10 4 9 or later with standard USB port CPU Core 2 Duo E4400 2 0GHz or faster Core Duo T2600 2 16GHz or faste...

Page 15: ...follow this procedure may cause faulty operation of your computer or corrupt the files in your camera 1 Left click on the icon for safely removing hardware in the task tray h A list appears showing the devices connected to the computer s USB connector 2 Left click on the camera drive h The camera can now be disconnected ...

Page 16: ...NING THE CAMERA ON AND OFF 11 Turning on the camera 11 Turning off the camera 11 Turning on the camera when the power save sleep mode is active 12 DATE AND TIME SETTING 14 ACCESSING THE SETUP MENU SCREEN 16 SHOOTING VIDEO CLIP RECORDING 18 SHOOTING SINGLE SHOTS 20 SHOOT A STILL IMAGE WHILE RECORDING A VIDEO CLIP 23 MACRO PHOTOGRAPHY ZOOM 25 SHOOTING WITH THE SELF TIMER 26 PLAYING BACK VIDEO CLIPS ...

Page 17: ... 44 Battery life 44 Possible No of Images Possible Shooting Time Possible Recording Time 45 Concerning the multi indicator 46 Supplied Li ion battery pack 46 Others 47 Before capturing those important shots be sure to first take a test shot to confirm that your camera is set up and ready to go 48 About the MPEG 4 Standard license 48 ...

Page 18: ...ORIES i Li ion battery pack 1 i Dedicated USB interface cable page v x 1 i SAFETY MANUAL safety precautions booklet Please read this booklet carefully before using the camera i QUICK GUIDE i Obtaining the PDF instruction manual and cautions ...

Page 19: ...English 4 How to use the accessories k Handstrap Please purchase a commercially available handstrap i To avoid dropping the camera it is recommended that you attach a handstrap ...

Page 20: ...e of card that can be inserted into and used with this camera is i SD Memory Card i SDHC Memory Card i SDXC Memory Card What card means in this manual i In this manual SD Memory Cards SDHC Memory Cards and SDXC Memory Cards that can be used in this camera are referred to as card ...

Page 21: ...English 6 SETUP SETUP SETUP PARTS NAMES Front Bottom Lens Microphone Speaker Flash Slot cover Microphone LED Strap holder Tripod stand hole Connector lever ...

Page 22: ...7 English Rear Multi indicator Monitor Arrow keys button Photo shooting button button Video recording button SET button REC PLAY button ON OFF button button ...

Page 23: ...is difficult to insert because it has become swollen may then be impossible to extract from the battery compartment In this case please discontinue its use and replace it with a new battery Do not use the battery with the outer covering or label removed i Doing so may result in malfunction HINT About the internal backup battery i This camera s internal battery serves to maintain the date and time ...

Page 24: ...era excluding battery temperature rises during use h During camera use if the temperature of the battery or inside the camera excluding the battery rises a icon lights on the monitor It is still possible to record and play back even when the icon is lit however it is advised that you discontinue use as soon as possible and turn the camera off h If the temperature rises further the icon will start ...

Page 25: ...ructions on the screen to format the card Shooting without a card installed i When a card is installed images are recorded to and played back from the card When no card is installed images are recorded to and played back from the camera s internal memory When the camera is turned on with no card installed the internal memory icon is shown on the monitor to let you know that the images you capture ...

Page 26: ...t 1 second Turning off the camera 1 Press the ON OFF button for at least 1 second h The camera turns off HINT To adjust the operation sounds i If you turn on the camera by pressing the ON OFF button while holding down the I arrow key the screen to change the operation sounds will appear ON OFF button ...

Page 27: ...k power the power save sleep function will automatically turn off the camera after about 2 minutes of no use during shooting or about 2 minutes of no use during playback i When the power save mode is active you can restore the power by any of the following methods h Press the ON OFF button h Press the SET button ...

Page 28: ...ppears after which the K icon is shown on the Recording Screen To have the date and time recorded with the images please complete this setting before capturing images i Due to the characteristics of the camera the outer surface may become warm during use but this does not indicate a malfunction i If the camera starts to feel uncomfortably hot during use you might temporarily discontinue use until ...

Page 29: ... J arrow keys to select CLOCK SET and press the SET button h The Clock Set Screen appears 4 Set the date and time h To select the desired setting Press the G and H arrow keys h To change the assigned value Press the I and J arrow keys 5 Press the SET button h Assign the desired value to each setting 6 Press the button h The date and time settings are completed and you are returned to the Setup Men...

Page 30: ... to check that the date and time settings are still correct after replacing the battery pack and before shooting or recording of any type follow step 1 To correct the date and time settings 1 Turn on the camera 2 Press and hold the button for at least 1 second 3 Select CLOCK SET and press the SET button h The screen to set the date and time appears h The current date and time settings are shown 4 ...

Page 31: ...ENU SCREEN 1 Turn on the camera page 11 2 Press and hold the button for at least 1 second h The Setup Menu appears h To cancel the Setup Menu press the button SETUP LANGUAGE CLOCK SET OPTICAL ZOOM VIDEO STABILIZER TV OUTPUT FORMAT OK button ...

Page 32: ...he Setting Screen for the selected item appears h To return to the Setup Menu press the button SETUP CLOCK SET DATE 2 0 1 0 0 7 0 1 0 0 0 0 D M Y TIME DISP OK OK LANGUAGE CLOCK SET OPTICAL ZOOM VIDEO STABILIZER TV OUTPUT FORMAT Select an item to change Setting Screen Press SET button Press I J ...

Page 33: ...utton pressed while recording h When the remaining recording time available for the currently recording clip becomes little a countdown of the remaining recording time appears on the display 3 End the recording h Press the button again to stop recording REC 00 09 5 2M ON OFF button button Video recording button Available recording time remaining Recording time ...

Page 34: ...The screen to change the video settings appears h To return to the Recording Screen without changing the settings press the button 2 Use the G and H arrow keys to select a setting and press the SET button h The video settings are changed and you are returned to the recording screen VIDEO 1920x1080 30fps SHQ ...

Page 35: ...s the button halfway h The autofocus operates and the image is focused focus lock 2 Continue to gently press the button all the way h The shutter releases and the image is captured h You can view the captured image on the monitor by keeping the button depressed when you capture the image button Photo shooting button ON OFF button ...

Page 36: ...he flash operation 1 While the Recording Screen is shown press the button h The screen to select the flash operation appears h To return to the Recording Screen without changing the setting press the button 2 Use the G and H arrow keys to select the desired setting and press the SET button h The flash operation setting is modified and you are returned to the Recording Screen HINT Did the Setup Men...

Page 37: ...g angle i The large target mark appears when the camera focuses on a wide area in the center of the screen If the camera shake icon appears i During still image shooting if the shutter speed is slow and the possibility that the image may be blurred due to camera shake becomes high the camera shake icon may appear on the monitor In this case use a tripod to stabilize the camera when shooting Does i...

Page 38: ...he remaining video recording time becomes approximately 30 seconds it will no longer be possible to capture a still image while recording a video clip The exact remaining recording time at which this occurs will differ depending on the subject and on the recording size as well as on the video clip recording mode If you intend to capture a still image while recording a video clip it is suggested th...

Page 39: ... of still images i The size of a still image captured during video clip recording depends on the video clip recording size Video clip recording size setting Still image recording size Y 1920 1080 pixel 1280 720 pixel 1280 720 pixel 640 480 pixel ...

Page 40: ...a lens at the subject 2 Press I or J I Zoom in on the subject J Zoom out h When the zoom switch is pushed the zoom bar appears on the monitor 3 Take the picture For video clip recording see page 18 For shooting single shots see page 20 Press I J Monitor ...

Page 41: ...g Screen HINT To pause or cancel the self timer function i If the button or button is pressed again before the shutter is released the self timer countdown temporarily stops Press the button or button one more time to restart the self timer When x is selected i When the button or button is pressed the multi indicator will blink for about 10 seconds and then the image is captured Also 4 seconds bef...

Page 42: ...ramed image is shown in the bottom part of the monitor 3 Press the SET button h The file you selected is played back To return to the recording mode h Press the REC PLAY button HINT Slideshow playback i In step 3 if you press the SET button for about 1 second or more a slideshow playback will start i The slideshow playback will stop when any button is pressed 2010 12 24 14 25 100 0011 Remaining ba...

Page 43: ...ng playback press G Slow playback Forward playback After pausing playback press and hold H Reverse playback After pausing playback press and hold G To accelerate playback Forward playback During forward playback press H h The playback speed changes each time H is pressed as follows Normal playback 2 5 10 15 Press G to resume normal playback speed Reverse playback During forward playback press G h ...

Page 44: ... size for a video clip is very large i Therefore be aware that if the video clip is uploaded to a computer to be played back the computer may not be able to play back the video fast enough making it appear jerky The video will always be displayed properly on the camera monitor or a television i Depending on the card recording may end even before the possible recording time indicated ...

Page 45: ...ible i During recording the sound of the optical zoom movement or autofocus movement was recorded This is not a malfunction If no audio is heard i The audio is not played back when the video clip is played back in the frame by frame slow motion fast playback or reverse playback mode ...

Page 46: ...m If undue force is used to connect a cable it may permanently damage the connector pins in the terminal socket i Do not use excessive force when connecting and disconnecting cables About image output The image output destination differs depending on the camera status m Images are output n Images are not output When an HDMI cable is used to connect the camera to a TV 1080p video mode images are ou...

Page 47: ...ING TO A TV Connecting to the HDMI terminal Use a separately sold or commercially available mini HDMI cable to connect to a TV Set the input to HDMI To HDMI terminal To HDMI terminal on the TV Mini HDMI cable VCP HDMI02 ...

Page 48: ...hen playing back with the camera is used to play back audio recordings as well CAUTION Insert and pull out the cable carefully i When connecting the cables make sure that the cable plugs are correctly oriented and that they match the shapes of the terminal sockets on the devices Push the plugs in straight when connecting them If undue force is used to connect a cable it may permanently damage the ...

Page 49: ...ure is very low Keep the battery pack in an environment of 10 to 40 C 50 to 104 F The battery pack life has expired If a battery becomes depleted quickly even after it was sufficiently charged it should be assumed that the battery has reached the end of its service life Please replace it with a new battery Why doesn t recharging end The battery pack life has expired Replace with a new battery pack...

Page 50: ...or larger and for printing a close up of part of a photo trimming 1 t For printing standard photo photo service sizes Monitor When used in cold weather why does the image seem to leave traces as it moves Condition due to the monitor characteristics Not a malfunction Spots that appear in the monitor only appear in the monitor and will not be recorded with the images Why does the displayed image con...

Page 51: ...that were recorded on a card using this camera Why is the playback image distorted If the subject moves or the camera is moved during recording a distorted image may sometimes occur Not a malfunction This is a characteristic of the CMOS sensor Why isn t the magnified image clear Due to the characteristics of the camera magnified images appear less clear Not a malfunction Can I play back image and ...

Page 52: ...ry Delete unnecessary files or use a card that has more memory available Why does the Card is protected message appear The lock switch on the card is in the locked protect position Move the lock switch to the unlocked position Why can t the camera be operated A temporary internal circuitry problem may be the cause Remove the battery pack from the camera wait a few minutes then reinstall the batter...

Page 53: ... with a dealer near you for advice Why does the System error message appear A problem has occurred within the camera or card Check the following items 1 Remove the card and then install it again 2 Remove the battery pack and then install it again 3 Install a different card If System error still appears after performing the above steps then take the camera to the dealer for service Question Answer ...

Page 54: ...east 1 second while the camera is on Use the arrow keys to select the desired parameter and press the SET button to display the setting screen for the specified parameter The Setup Menu is canceled when the button is pressed SETUP OK LANGUAGE CLOCK SET OPTICAL ZOOM VIDEO STABILIZER TV OUTPUT FORMAT 4 5 6 3 2 1 7 ...

Page 55: ...rding 2 OPTICAL ZOOM h Select whether or not to enable the optical zoom during video clip recording 3 CLOCK SET setting h Set the camera s clock 4 LANGUAGE setting h Select the language in which the monitor messages are displayed 5 TV OUTPUT setting 6 FORMAT 7 Remaining battery power indication ...

Page 56: ...vices for the images stored on removable memory cards However it is not guaranteed that all devices will support the DCF standard Video clips ISO standard MPEG 4 AVC H 264 MP4 Audio 48 kHz sampling 16bit 2ch AAC compression Data storage media Internal memory Approx 80 MB SD Memory Card SDHC Memory Card up to 32 GB SDXC Memory Card up to 64 GB Image sensor camera effective number of pixels 1 2 33 i...

Page 57: ...s 6 elements 4 aspheric elements 6 aspheric surfaces 35 mm film camera conversion Still image shooting 36 mm to 108 mm Optical zoom 3 Video clip recording 37 mm to 111 mm Optical Zoom 3 Exposure control type Programmable AE Light measuring mode Multi section measuring Range 10 cm 3 94 in to infinity Digital zoom For shooting 1 to approx 4 Shutter speed Still image shooting mode 1 2 to 1 1 500 sec ...

Page 58: ...2 second delay 10 second delay Ambient environment Temperature 0 to 40 C 32 to 104 F operation 20 to 60 C 4 to 140 F storage Humidity 30 to 90 operating no condensation 10 to 90 storage no condensation Power supply Battery pack supplied Li ion battery pack DB L80 1 Power consumption 3 4 W When using the Li ion battery during recording Dimensions excluding protrusions 63 1 W 22 0 D 110 8 H mm 2 48 ...

Page 59: ...C 50 F the battery pack operation time is significantly reduced USB terminal Dedicated regrouped jack USB 2 0 High Speed mini HDMI terminal Video output Total number of scan lines effective number of scan lines 750p 720p 1125i 1080i 525p 480p Audio output L PCM 48 kHz sampling Shooting Still image shooting mode Approx 170 images CIPA standard when a SanDisk 2 GB SD Memory Card is used Video clip r...

Page 60: ...ch video clip will differ depending for example on the card capacity environmental conditions temperature and shooting conditions etc Shooting recording mode Resolution setting Internal Memory SD Memory Card 8 GB 16 GB Still image mode w 21 images 2 000 images 3 910 images v 25 images 2 390 images 4 670 images u 50 images 4 690 images 9 160 images 1 124 images 11 300 images 22 700 images t 124 ima...

Page 61: ...uter Charging Flashing Slow Battery charge error or rise in internal temperature Slow Fast During sleep mode Fast Connected to a computer Connected to a TV Very fast Accessing card Model number DB L80 Voltage 3 7 V Capacity 700 mAh Ambient environment Temperature 0 to 40 C 32 to 104 F during use 10 to 30 C 14 to 86 F storage Humidity 10 to 90 no condensation Dimensions 39 2 W 5 9 D 31 4 H mm 1 54 ...

Page 62: ...rating system and Microsoft Windows 7 operating system are collectively referred to as Windows Software Red Eye by FotoNationTM 2003 2005 is a trademark of FotoNation Inc Red Eye software 2003 2005 FotoNation In Camera Red Eye covered by U S Patent No 6 407 777 Other patents Pending SDXC logo is a trademark of SD 3C LLC HDMI the HDMI logo and High Definition Multimedia Interface are trademarks or ...

Page 63: ...s done by those other than a technician authorized by the manufacturer i Sanyo Electric shall not be held responsible for any damage caused by optional devices or consumable items used with the camera other than those supplied with the camera or those specified by Sanyo Electric i Sanyo Electric shall not be held responsible for any losses or loss of revenue resulting from the loss of data caused ...

Page 64: ...SANYO Electric Co Ltd ...

Reviews: