Sanyo VPC-E1090, Instruction Manual
The Sanyo VPC-E1090 is a compact digital camera that captures stunning images with its 10-megapixel sensor and 3x optical zoom. Preserve your memories by exploring the camera's various shooting modes and customizable settings. For a seamless user experience, download the free Instruction Manual from our website and unleash the full potential of your camera.
Share
Download


Reviews:
No comments
Related manuals for VPC-E1090

MS11
Brand: Samsung Pages: 156

ZVC7640
Brand: Zonet Pages: 58
EXPCMR-ALG-OZ-IC-1080P-1224 HD-TVI
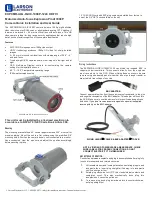
Brand: Larson Electronics Pages: 4

TV-IP672PI
Brand: TRENDnet Pages: 9

CC-5455 IR
Brand: Convision Pages: 24

IPC-100AC-AUS
Brand: MAGINON Pages: 64

E-410 - EVOLT Digital Camera SLR
Brand: Olympus Pages: 132

DZ-100
Brand: Olympus Pages: 79

CC4000
Brand: ELRO Pages: 2

90481-980
Brand: ZowieTek Pages: 14

UCIT BASIC 2
Brand: Safety Track Pages: 13

BC950
Brand: Sercomm Pages: 30

DPB701
Brand: Curtis Pages: 1

SPORTSCAM
Brand: Mediacom Pages: 24

CAMEDIA C-5060 Wide Zoom
Brand: Olympus Pages: 289

D-750
Brand: Olympus Pages: 76

Enrollment Kiosk
Brand: EVERI Pages: 2

ELECTRO AX
Brand: Yashica Pages: 64


