Digital Video Camcorder
user manual
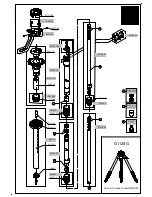
VP-D381( i )
VP-D382( i )
VP-D382H
VP-D384
VP-D385( i )
imagine
the possibilities
Thank you for purchasing this Samsung product.
To receive more complete service, please register
your product at
www.samsung.com/global/register
Page 1: ...er manual VP D381 i VP D382 i VP D382H VP D384 VP D385 i imagine the possibilities Thank you for purchasing this Samsung product To receive more complete service please register your product at www sa...
Page 2: ...es you clean sharp images as well as the ability to review your recordings immediately Digital Image Stabilizer DIS The DIS compensates for any hand shaking reducing unstable images particularly at hi...
Page 3: ...camcorder These warning signs are here to prevent injury to you and others Please follow them explicitly After reading this section keep it in a safe place for future reference precautions Warning Thi...
Page 4: ...h precision technology However there may be tiny dots red blue or green in colour that appear on the LCD screen These dots are normal and do not affect the recorded picture in any way Do not pick up t...
Page 5: ...o qualified service personnel When replacement parts are required be sure the service technician has used replacement parts specified by the manufacturer and having the same characteristics as the ori...
Page 6: ...14 Using the battery pack 17 Connecting a power source 18 Basic miniDV camcorder operation 19 Screen indicators in camera player modes 20 Screen indicators in m Cam m Player modes vp d385 i only 21 U...
Page 7: ...for a desired scene setting the zero memory vp D382 i D382H d385 i only 39 Self record using the remote control setting the self timer vp D382 i D382H d385 i only 40 Reviewing and searching a recordi...
Page 8: ...yback Audio Select 67 Audio effect 68 Setting the av in out AV In Out VP D381i D382i D385i only 69 Tape playing back on a tv screen 71 Copying a camcorder tape onto a video tape 72 Using the voice fun...
Page 9: ...ures using the pictbridgetm 92 Transferring ieee1394 I Link dv standard data connections 94 Using usb interface 96 Selecting the usb device usb connect 97 Installing the software dv media pro programm...
Page 10: ...ocal Samsung dealer Option This is an optional accessory To buy this one contact your nearest Samsung dealer A memory card is not included See page 74 for memory cards compatible with your miniDV camc...
Page 11: ...2 Remote sensor VP D382 i D382H D385 i only 6 Display button 3 Light VP D382 i D382H D384 D385 i only 7 TFT LCD screen 4 OPEN switch 8 Internal microphone Be careful not to cover the internal micropho...
Page 12: ...stick function works reversely 1 MENU button 2 Joystick Select W T page 23 3 Recording start stop button 4 Jack cover AV DV jack 5 Built in speaker 6 Select CARD TAPE switch VP D385 i only 7 Battery p...
Page 13: ...1 Zoom W T Volume VOL lever 5 Jack cover DC IN USB VP D385 i only jack 2 PHOTO button page 60 78 6 Cassette compartment cover 3 Recording start stop button 7 Hand strap 4 POWER switch MODE AV DV POWE...
Page 14: ...a Player mode 4 DC IN Jack 5 DV IEEE1394 jack 6 Charging CHG indicator 7 USB jack VP D385 i only 8 Memory card slot VP D385 i only 9 Tripod receptacle 10_ English 9 8 Jacks VP D385 i AV DV DC IN USB V...
Page 15: ...age 60 78 10 Direction button page 64 2 REC button 11 Display button 3 SELF TIMER button page 39 12 W T Zoom button 4 ZERO MEMORY button page 38 13 X2 button page 64 5 PHOTO SEARCH button page 61 14 D...
Page 16: ...the hand strap and adjust its length for your convenience 3 Close the hand strap Lens Cover Attaching the Lens Cover 4 Hook up the lens cover with the lens cover strap as illustrated 5 Hook up the len...
Page 17: ...t the button type battery holder Precaution regarding the button type battery There is a danger of explosion if button type battery is incorrectly replaced Replace only with the same or equivalent typ...
Page 18: ...pack from the miniDV camcorder Charging the Battery Pack 1 Slide the POWER switch downwards to turn off the power 2 Insert the battery pack to the camcorder 3 Open the jack cover and connect the AC po...
Page 19: ...tions are measured using a fully charged battery pack at 25 C 77 F As the environmental temperature and conditions vary the remaining battery time may differ from the approximate continuous recording...
Page 20: ...ery pack a Fully charged b 20 40 used c 40 80 used d 80 95 used e Completely used Blinking The Camcorder will turn off soon change the battery as soon as possible Battery Pack Management The battery p...
Page 21: ...n fully discharged Fully discharging a battery pack damages the internal cells To preserve battery power keep your camcorder turned off when you are not operating it If your camcorder is in Camera mod...
Page 22: ...photo images on a tape page 19 M Cam mode To record movie or photo images on memory card page 20 M Player mode To play movie or photo images on memory card page 20 The operating modes are determined b...
Page 23: ...e Indicator 9 Remaining Tape measured in minutes 10 Audio Mode page 44 11 Light page 59 VP D382 i D382H D384 D385 i only 12 BLC Back Light Compensation page 56 13 WindCut Plus page 45 14 Fade page 41...
Page 24: ...n the miniDV camcorder is powered on after turning it off 1 Time counter movie recording time 2 File number of the moving image 3 Volume Control page 86 4 Erase Protection Indicator page 80 5 Silde pa...
Page 25: ...splay mode All information will appear Minimum display mode Only operating status indicators will appear Checking the remaining battery Press and hold the Display button while charging with the power...
Page 26: ...each of the menu items listed after this page For example setting the Exposure in Camera mode 1 Press the Joystick Quick menu is displayed 2 Press the Joystick to control the setting Moving the Joyst...
Page 27: ...Player modes VP D385 i only Joystick M Cam Mode M Player Mode Movie images M Player Mode Photo images STOP PLAY PAUSE FF REW Exposure Delete Focus Thumbnail STOP STOP STOP STOP Thumbnail Previous Skip...
Page 28: ...ing the year 8 Press the Joystick after setting the minutes A message Complete is displayed 9 To exit press the MENU button You can set the year up to 2037 Turning the date and time display on off To...
Page 29: ...emote then press the Joystick 6 Move the Joystick up or down to select On or Off then press the Joystick 7 To exit press the MENU button If you set the Remote to Off in the menu and try to use it the...
Page 30: ...5 Move the Joystick up or down to select Beep Sound then press the Joystick 6 Move the Joystick up or down to select On or Off then press the Joystick 7 To exit press the MENU button SETTING THE BEEP...
Page 31: ...ick up or down to select System then press the Joystick or move the Joystick to the right 4 Move the Joystick up or down to select Shutter Sound then press the Joystick 5 Move the Joystick up or down...
Page 32: ...listed English Fran ais Espa ol Deutsch Italiano Portugu s Polski Nederlands Magyar Svenska Iran Suomi T rk e Norwegian Danish Czech Slovakia 6 Move the Joystick up or down to select the desired OSD...
Page 33: ...t On then press the Joystick 7 Press the MENU button The demonstration will begin 8 To quit the demonstration press the MENU button The demonstration function is automatically activated when the camco...
Page 34: ...ngs Contents On screen display Off Disables the function None Cross Records the subject placed in the centre as the most general recording composition Grid Records the subject on the horizontal or ver...
Page 35: ...oystick up or down to select Display then press the Joystick or move the Joystick to the right 5 Move the Joystick up or down to select the item you want to adjust LCD Bright or LCD Colour then press...
Page 36: ...e AC power adaptor or while the battery pack is attached The rechargeable battery will be fully discharged in about 3 months if you do not use your camcorder at all Use your camcorder after charging t...
Page 37: ...ra or Player 3 Press the MENU button The menu list will appear 4 Move the Joystick up or down to select Display then press the Joystick or move the Joystick to the right 5 Move the Joystick up or down...
Page 38: ...3 Press the area marked PUSH on the cassette compartment cover until it clicks into place The cassette is loaded automatically 4 Close the cassette compartment cover INSERTING EJECTING A CASSETTE bas...
Page 39: ...e sure the image you want to record appears on the LCD screen Make sure the battery level indicates that there is enough remaining power for your expected recording time You can select a record mode o...
Page 40: ...ording start stop button to start recording Recording will begin using the basic automatic settings To cancel the EASY Q mode Press the EASY Q button again The EASY Q and DIS indicators disappear from...
Page 41: ...move your finger off the Zoom lever the operation sound of the Zoom lever may be also recorded Focussing may become unstable during zooming In this case set the zoom before recording and lock the focu...
Page 42: ...you have finished playback fast forward or rewind the tape in stop mode The tape stops automatically when it reaches the zero position When you have finished recording press the MODE button to set Pla...
Page 43: ...timer starts counting down from 10 At this moment recording indicator blinks with a beep sound At the last second of the countdown recording starts automatically If you want to cancel the self timer f...
Page 44: ...o the left While you press and hold the Joystick the selected images will be played in reverse order Press and release the Joystick to play the images in reverse order for 3 seconds before resetting t...
Page 45: ...t fade function to select Fade On 4 Press the Recording start stop button and at the same time release the Fade function Recording starts and the picture and sound gradually appear Fade In To Stop Rec...
Page 46: ...e to the camcorder others further away b A person enveloped in fog or surrounded by snow c Very shiny or glossy surfaces like a car d People or objects moving constantly or quickly like an athlete or...
Page 47: ...k to switch the mode to manual You can also toggle between Auto Exposure and Manual Exposure by moving up the Joystick 5 Move the Joystick left or right to select the desired exposure value then press...
Page 48: ...ick up or down to select Rec Mode or Audio Mode then press the Joystick 6 Move the Joystick up or down to select the desired record mode or audio mode then press the Joystick Rec mode can be set to SP...
Page 49: ...Joystick to the right 5 Move the Joystick up or down to select WindCut Plus then press the Joystick 6 To activate the windcut plus function move the Joystick up or down to select the windcut plus type...
Page 50: ...ystick up or down to select Real Stereo then press the Joystick 6 To activate the Real Stereo function move the Joystick up or down to select On then press the Joystick If you do not want to use the R...
Page 51: ...e right 5 Move the Joystick up or down to select Program AE then press the Joystick The available options are listed 6 Move the Joystick up or down to select the desired program AE option then press t...
Page 52: ...ppears against a softened background The portrait mode is most effective when used outdoors The shutter speed is automatically adjusted from 1 50 to 1 1000 per second Spotlight Prevents overexposure o...
Page 53: ...oystick or move the Joystick to the right 5 Move the Joystick up or down to select White Balance then press the Joystick The available options are listed 6 Move the Joystick up or down to select the d...
Page 54: ...he message Set white balance are displayed 2 Frame a white object such as a piece of paper so that it fills the screen Use an object that is not transparent If the object that fills the screen is not...
Page 55: ...o select Camera then press the Joystick or move the Joystick to the right 5 Move the Joystick up or down to select Visual Effect then press the Joystick The available options are listed 6 Move the Joy...
Page 56: ...effect embossing on surrounding area of an image 9 Pastel1 This mode applies a pale pastel drawing effect to an image Pastel2 This mode applies a pale pastel drawing effect to surrounding area of an...
Page 57: ...te the 16 9 wide function move the Joystick up or down to select On then press the Joystick If you do not want to use the 16 9 wide function set the 16 9 Wide menu to Off 7 To exit press the MENU butt...
Page 58: ...the Macro menu to Off 7 To exit press the MENU button Tele Macro indicator is displayed When recording in Tele Macro mode the focus speed may be slow When you operate the zoom function in the Tele Mac...
Page 59: ...u do not want to use the DIS function set the DIS menu to Off 7 To exit press the MENU button DIS indicator is displayed EASY Q mode automatically sets the DIS to On You cannot set the following funct...
Page 60: ...enu list will appear 4 Move the Joystick up or down to select Camera then press the Joystick or move the Joystick to the right 5 Move the Joystick up or down to select BLC then press the Joystick 6 Mo...
Page 61: ...to 34x 7 To exit press the MENU button Move the Joystick up or down or move the Zoom lever to use the digital zoom The digital zoom indicator appears Maximum digital zooming may result in lower pictu...
Page 62: ...f the selected mode is displayed When the Off mode is selected no indicator is displayed When using the C Nite the image takes on a slow motion like effect When using the C Nite the focus adjusts slow...
Page 63: ...up or down to select On then press the Joystick To cancel the Light function set the Light menu to Off 7 To exit press the MENU button Light indicator will be displayed The light can become extremely...
Page 64: ...corder returns to the standby mode During the seven seconds you cannot record another photo image During the Tape Photo Recording do not shake your camcorder Mosaic pattern noise may appear on the ima...
Page 65: ...photo image When there are no photo images recorded on the tape it will be fully rewound or forwarded 7 To stop the photo search move down the Joystick or press the MENU button The remote control will...
Page 66: ...ing the LCD Bright LCD Colour during Playback You can adjust the LCD bright LCD colour during playback The adjustment method is the same procedure as used in Camera mode page 31 Adjusting the Volume W...
Page 67: ...Joystick during playback To resume playback press the Joystick Press the PLAY or PAUSE button on the remote control Picture Search Forward Reverse Move the Joystick left or right during playback or p...
Page 68: ...on the remote control during playback To resume normal playback press the PLAY button Reverse X2 Playback Press the button during forward X2 playback To resume normal playback press the PLAY button R...
Page 69: ...ess the Joystick to playback and press it again to pause the scene If you want to resume to playback just press the Joystick again on playback 5 Press the A DUB button on the remote control Audio dubb...
Page 70: ...the audio playback channel then press the Joystick Sound 1 Plays the original sound Sound 2 Plays the dubbed sound MIX 1 2 Plays back sound 1 and 2 equally mixed 7 To exit press the MENU button 8 Pres...
Page 71: ...fect channel then press the Joystick Off Disables the function Voice Highlights the human voice Music Highlights the sound by enhancing the bass and treble Wide Magnifies the stereo effect by enhancin...
Page 72: ...k 6 Move the Joystick up or down to select Out or In then press the Joystick Out Select this when copying or playing back the contents of this camcorder onto the external device In Select this when re...
Page 73: ...ow jack Video The white jack Audio L mono The red jack Audio R If you connect to a mono TV connect the yellow jack Video to the video input of the TV and the white jack Audio L to the audio input of t...
Page 74: ...the tape Playback the tape 1 Connect a power source 2 Insert the tape you wish to play back 3 Set the Select switch to TAPE VP D385 i only 4 Press the MODE button to set Player 5 Move the Joystick lef...
Page 75: ...put jack on your VCR The yellow jack Video The white jack Audio L mono The red jack Audio R 6 Press the Record button on your VCR to start recording 7 Play the tape on your camcorder Please refer to p...
Page 76: ...the function press the Recording start stop button again Voice is available only when the Audio Video cable is connected If a different cable DV or USB cable VP D385 i only is connected Voice functio...
Page 77: ...Insert the video tape to be played in your VCR Pause at the starting point of playing 5 Start copying by pressing the Recording start stop button on your camcorder 6 Press the PLAY button on your VCR...
Page 78: ...o edit or delete data by mistake Deleting images stored in memory card Marking photo images with print Information Formatting memory cards Inserting a Memory Card 1 Open the memory card cover 2 Insert...
Page 79: ...ce when you insert eject the memory card Do not turn the power off while recording loading erasing a photo image or formatting the memory card Turn the power off before you insert or eject the memory...
Page 80: ...8 Tape Capture 640x480 Movie image Images are compressed in MPEG4 Moving Picture Experts Group format The file extension is AVI The picture size is 720X576 page 84 Up to 99 files are created in one fo...
Page 81: ...n to set Camera 3 Press the MENU button The menu list will appear 4 Move the Joystick up or down to select Memory then press the Joystick 5 Move the Joystick up or down to select File No then press th...
Page 82: ...s been recorded Photo images are saved more widely than have been taken in LCD screen Photo images are saved in the memory card in an 800x600 format The number of photo images that can be stored depen...
Page 83: ...rom the current picture All images will be played back consecutively for 2 3 seconds each To stop the slide show press the Joystick again To view the Multi Display If you move down the Joystick you wi...
Page 84: ...arch for the photo image that you want to protect 4 Press the MENU button The menu list will appear 5 Move the Joystick up or down to select Memory then press the Joystick 6 Move the Joystick up or do...
Page 85: ...lete 4 Press the MENU button The menu list will appear 5 Move the Joystick up or down to select Memory then press the Joystick 6 Move the Joystick up or down to select Delete then press the Joystick A...
Page 86: ...en there is no stored picture on the memory card the message No image will be displayed If an erroneous image file is found on the memory card the message Memory Card Error will be displayed It may be...
Page 87: ...format is completed 7 To exit press the MENU button If you execute the format function all photo images moving images will be erased completely and erased photo images moving images cannot be recovere...
Page 88: ...to be recorded is 720X576 Saving moving images onto a Memory Card 1 Set the Select switch to Card 2 Press the MODE button to set Camera 3 Press the Recording start stop button the moving images are r...
Page 89: ...Moving images that you recorded are saved in avi avi 1 0 file format on the memory card The moving images on a memory card are a smaller size and lower definition than images on tape The sound is reco...
Page 90: ...ving image then press the Joystick Use the Joystick to enjoy various playback operations Press the Joystick to pause or play back Move the Joystick right or left to search playback during playback or...
Page 91: ...ack 4 Press the PHOTO button The photo image is recorded on the memory card During the time it takes to save an image the playback screen is paused and the OSD is displayed 5 When you finish the recor...
Page 92: ...ess the Joystick All photo images recorded on the cassette tape will be copied onto a memory card 6 The camcorder automatically performs the photo image search to find photo images and copy starts 7 M...
Page 93: ...ct Print Mark then press the Joystick 7 Move the Joystick up or down to select the desired option All Off This File or All Files then press the Joystick 8 If you select This File move the Joystick up...
Page 94: ...rd 3 Press the MODE button to set Player 4 Press the MENU button The menu list will appear 5 Move the Joystick up or down to select System then press the Joystick 6 Move the Joystick up or down to sel...
Page 95: ...ting will be cancelled The Date Time Imprint option may not be supported by all printers Check with your printer manufacturer The Date Time menu cannot be setup if the printer does not support this op...
Page 96: ...images is dependent on the capacity of the PC System Requirements CPU faster Intel Pentium III 450MHz compatible Operating system Windows 98SE ME 2000 XP VISTA Mac OS 9 1 10 4 Main memory more than 64...
Page 97: ...the power OFF and ON again When you transmit data from the camcorder to PC PC function button is not available in M Player mode VP D385 i only Do not use another DV device when using IEEE1394 Do not...
Page 98: ...with Service Pack 4 or later installed Windows XP High speed USB on a system with Service Pack 1 or later installed Windows VISTA High speed USB on a system with Service Pack 1 or later installed Syst...
Page 99: ...oned above Do not connect the camcorder to a PC using both DV and USB cables It may not operate properly In M Cam or M Player mode be sure that the memory card is inserted into camcorder before connec...
Page 100: ...ess the Joystick 5 Move the Joystick up or down to select USB Connect then press the Joystick 6 Move the Joystick up or down to select Computer or Printer then press the Joystick You can select Comput...
Page 101: ...installed already there is no need to restart the PC Application Installation Video Codec Click on Video Codec on the setup screen Video Codec is required to play movie files recorded by this miniDV c...
Page 102: ...may be damaged If you connect the USB cable to a PC via a USB HUB or simultaneously connect the USB cable along with other USB devices the camcorder may not work properly If this occurs remove all US...
Page 103: ...voice communication may not be supported depending on the video conferencing software In this case connect an external microphone to the soundcard of the PC to enable voice communication Using the cam...
Page 104: ...connect the power source or remove the battery pack Open the LCD panel of the camcorder and slide down the Battery release BATT switch on the left side of the body to remove the battery with a click m...
Page 105: ...s the MODE button to set Player 3 Insert a cleaning tape 4 Press the Joystick 5 Move down the Joystick after 10 seconds Check the quality of the picture using a video cassette If the picture quality h...
Page 106: ...recordings on a TV or to copy it to an external device it must be an PAL system based TV or an external device and have the appropriate Audio Video jacks Otherwise you may need to use a separate video...
Page 107: ...page 104 Self Diagnosis Display in M Cam M Player Modes VP D385 i only Display Blinking Informs that Action No Memory Card slow There is no memory card in the camcorder Insert a memory card Memory ful...
Page 108: ...recording in bright surroundings page 56 Auto focus does not work Check the Manual Focus menu Auto focus does not work in the Manual Focus mode page 42 FF or REW Play function Joystick does not work...
Page 109: ...Light 59 Tape Photo Search Searching pictures recorded on a tape 61 Photo Copy Copying photo images from a cassette to memory card 88 Audio Select Selecting the Audio playback channel 66 Audio Effect...
Page 110: ...UT THIS USER MANUAL This user manual covers models VP D381 VP D381 i VP D382 VP D382 i VP D382H VP D384 VP D385 and VP D385 i Although the external appearances of VP D381 i D382 i D382H D384 and VP D3...
Page 111: ...2K LCD Screen Method TFT LCD Connectors Video output 1Vp p 75 terminated Audio output 7 5dBs 600 terminated DV input output 4pin special in out connector USB output VP D385 i only Mini B type connecto...
Page 112: ...consult your dealer for assistance However if there is no alternative to cutting off the plug remove the fuse and then safely dispose the plug DO NOT connect the plug to a mains socket as there is a r...
Page 113: ...ucts caused by such repair work will not be covered by this warranty 4 This product is not considered to be defective in materials nor workmanship by reason that it requires adaptation in order to con...
Page 114: ...GREECE SAMSUNG SAMSUNG 12 SAMSUNG ser ice ser ice ser ice FOURLlS TRADE 112 145 68 210 629 3100 1 ser ice 2 SAMSUNG 3 ser ice SAMSUNG SAMSUNG 4 laser CD D D...
Page 115: ...5 service SAMSUNG FOURLIS TRADE...
Page 116: ...com ITALIA 800 SAMSUNG 726 7864 www samsung com LUXEMBURG 0035 0 2 261 03 710 www samsung com be NETHERLANDS 0900 SAMSUNG 726 7864 0 10 Min www samsung com nl NORWAY 815 56 480 www samsung com no POL...
Page 117: ...rtain Hazardous Substances in Electrical And Electronic Equipment and we do not use the 6 hazardous materials Cadmium Cd Lead Pb Mercury Hg Hexavalent Chromium Cr 6 Poly Brominated Biphenyls PBBs Poly...