


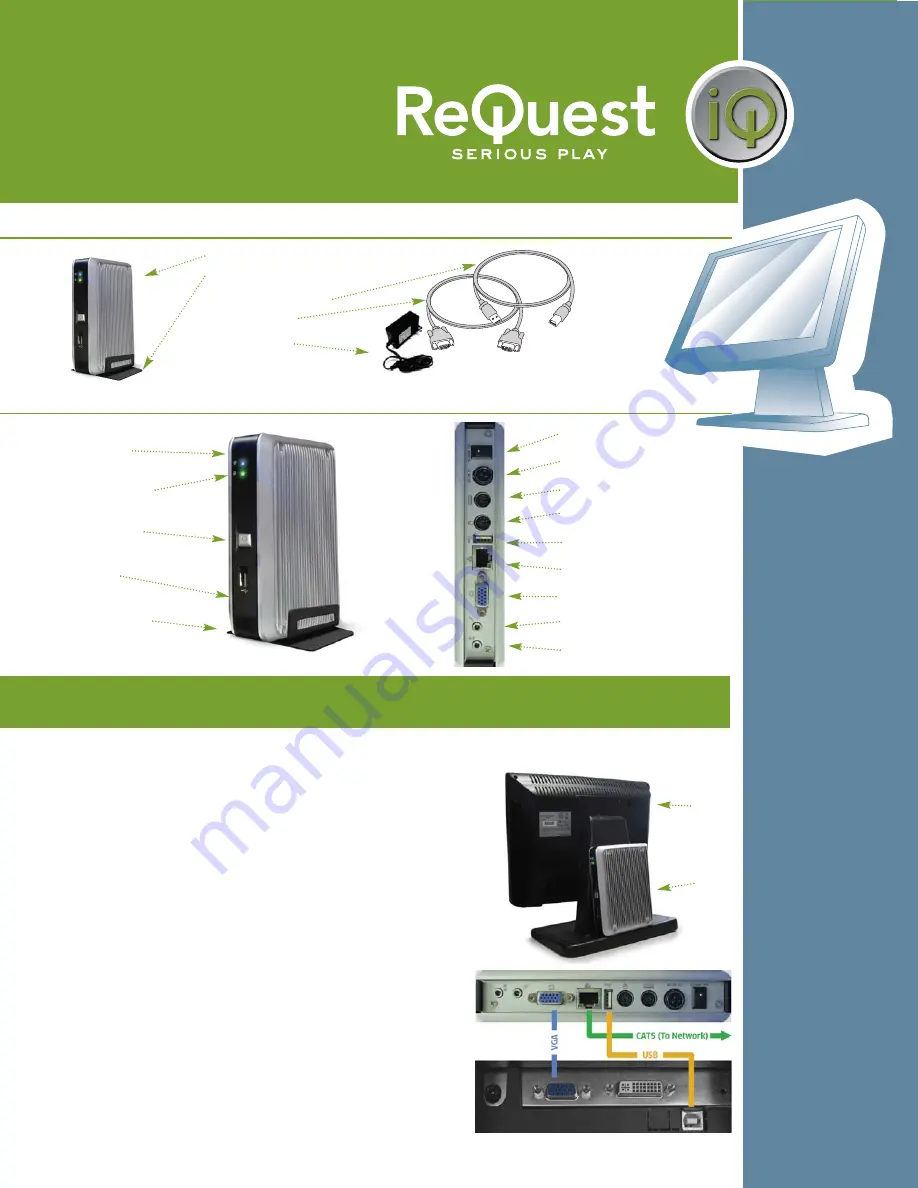
Network Touchscreen Client (NTC)
Vertical stand
12" USB cable (A-B)
12" VGA cable
Power supply
Setup Guide for the
TS.15N
© 2007 ReQuest Inc.
100 Saratoga Village Blvd
Suite 44
Ballston Spa, NY 12020
www.request.com/support
1-800-236-2812
Network Touch Screen
Power LED
Hard Drive LED
Power Switch
USB Port
Vertical Stand
Power switch
DC Power jack
PS/2 Keyboard (not used)
PS/2 Mouse (not used)
USB Port
RJ45 LAN Port
VGA Port
Mic In (not used)
Audio Out (not used)
NTC Overview
Remove the adhesive strips from the Velcro backing on the NTC. D
DO
O
N
NO
OT
T R
RE
EM
MO
OV
VE
E T
TH
HE
E S
ST
TR
RIIP
P F
FR
RO
OM
M T
TH
HE
E U
UN
NIIT
T!!
Position the device in the orientation depicted and gently press the
unit onto the plastic stand of the TS.15 touchscreen.
Connect the cables supplied with the NTC (shortened, 12” VGA and USB
cables) to the ports on the NTC and the TS.15 touchscreen. Be sure the
cables fit snugly and completely.
Note: You may use either USB port on the NTC device.
Attach an RJ-45 terminated network cable to the jack on the NTC
computer.
Attach the power supply cable to the TS.15N and plug the other
end into a wall outlet.
Attach the power cable to the TS.15 touchscreen and plug the
other end into a wall outlet.
Turn on the TS.15 touchscreen. Turn on the power switch on the
rear of the NTC. Press the power button on the front of the NTC
computer.
The NTC has been designed to attach to the mounting post of the TS.15 touchscreen. This location provides
the best proximity for the computer to the screen and also keeps the system out of view.
1.
2.
3.
4.
5.
6.
7.
Setting Up (Client Attached To TS.15)
NTC Back
TS.15 Bottom
NTC
TS.15
What’s in the box?


