


Dominion PX Quick Setup Guide
1
QSG-DPX-0F-E
y
255-80-6081-00
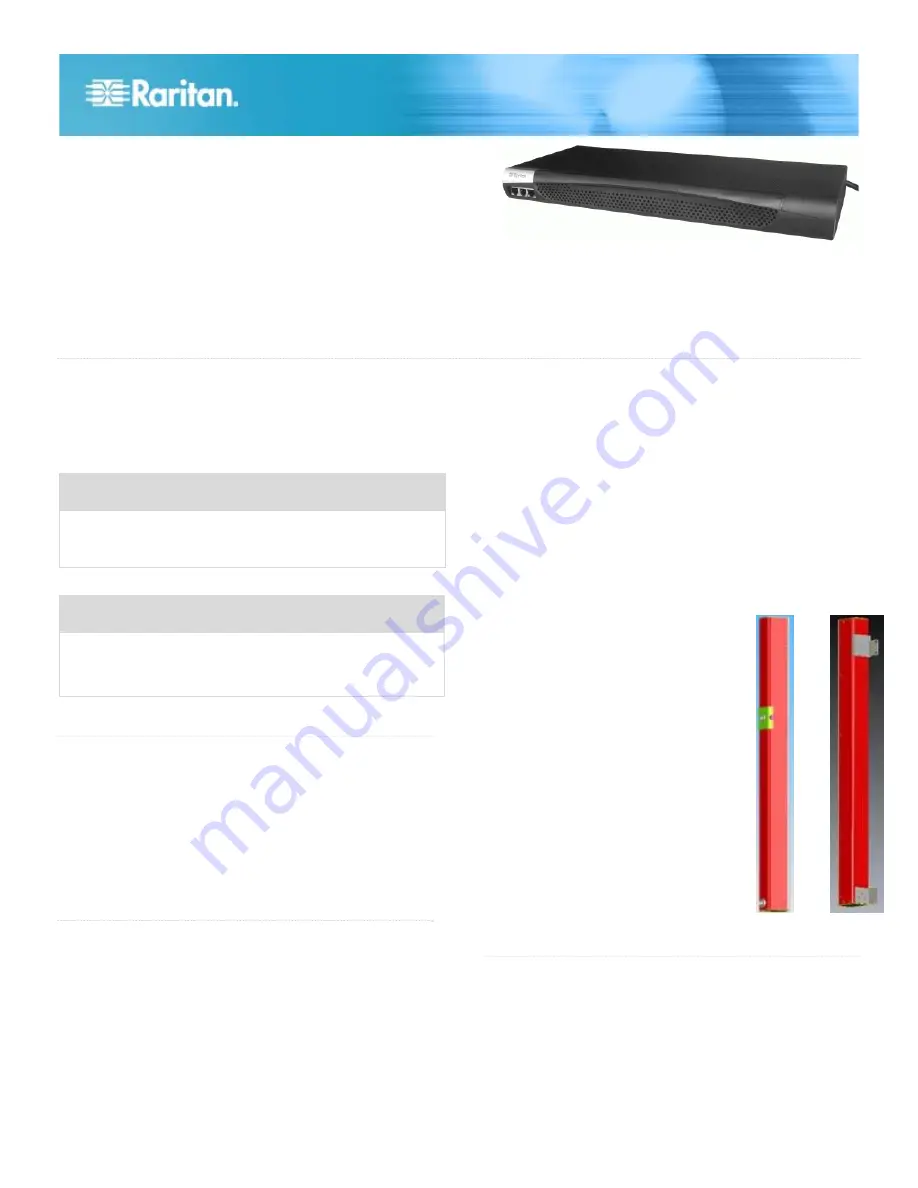
Dominion PX
Quick Installation and Setup Guide
Thank you for purchasing the Dominion PX intelligent power distribution unit (PDU).
Unpack the Dominion PX
The Dominion PX comes in Zero U, 1U and 2U sizes. The
table below describes the equipment shipped with each size.
Unpack the components, and if any piece is missing or
damaged, report this to Raritan Technical Support at
[email protected].
Zero U Size
DPX unit including power cord 4.5m (15 feet).
Tool-less mounting bracket and bracket with screws.
Null modem cable with RJ-45 and DB9F connectors.
1U and 2U Size
DPX unit including power cord 4.5m (15 feet)
1U or 2U bracket pack and screws
Null modem cable with RJ-45 and DB9F connectors.
QS Rule
Before You Begin
1. Prepare the installation site. Make sure the installation
area is clean and not exposed to extreme temperatures or
humidity. Allow sufficient space around the Dominion PX
for cabling and outlet connections (safety instructions are
provided in the Dominion PX User Guide).
2. Fill out the Equipment Setup Worksheet, found in the
Appendix section of the User Guide. Record the model,
serial number, and use of each device connected to the
Dominion PX's power outlets.
QS Rule
Mount the Dominion PX
Depending on the model, your Dominion PX will require one
of the following mounting options:
For 1U and 2U Models
Using the appropriate brackets and tools, fasten the Dominion
PX to the rack or cabinet.
For Zero U Models Using Claw-Foot Mounts
1. Attach a claw-foot bracket to the back of the Dominion PX.
2. Fasten the Dominion PX to the rack or cabinet by:
a. Using rack screws to secure the unit through the claw-
foot bracket.
b. If using the tool-less mounting bracket align the silver
buttons with the mounting holes in the cabinet, fixing
one in place and adjusting the other. Then let the
Dominion PX drop into place.
For Zero U Models Using L-Bracket
1. Align the base-plates on the back of the
Dominion PX unit and tighten the thumb
screws to secure them in place.
2. Unscrew the large buttons in the center
of the base plates.
3. Align the L-Brackets with the base
plates so that the five screw-holes line
up. The rack-mount side of the plates
should face either the left or right side
of the Dominion PX.
4. Fasten the L-brackets in place with the
large button. Use additional screws as
desired.
5. Using rack screws, fasten the Dominion
PX to the rack through the L-Brackets.
QS Rule
Connect the Dominion PX to a Power Source
1. Each Dominion PX model should be plugged into an
appropriately rated outlet for its type.
2. The Zero U models do not have front panel indicator lights
since they will be mounted in the back of an equipment
rack. When a Dominion PX is powered on, the outlet
LEDs cycle through various colors. Once the internal


